Using Libertadia
Integrations and automations
Integrations connect outside apps, such as Gmail or Google Calendar, so agents and automations can read or change data there. Automations (workflows) run a series of steps on a schedule or after an event. Both are available on PRO, Team and Enterprise.
Create an integration
- Open Integrations and click New integration.
- Enter a Name and Description, then click Continue.
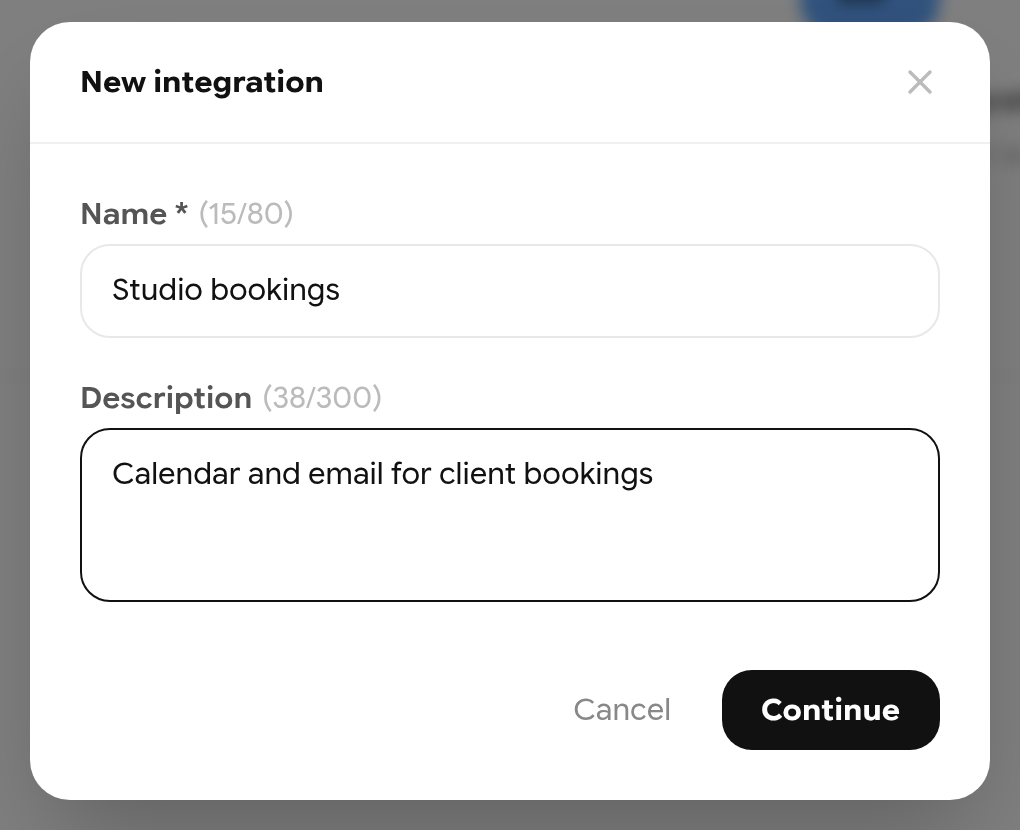
Creating an integration.
- On the integration page, click Connect next to an app. Sign in to that service and approve access.
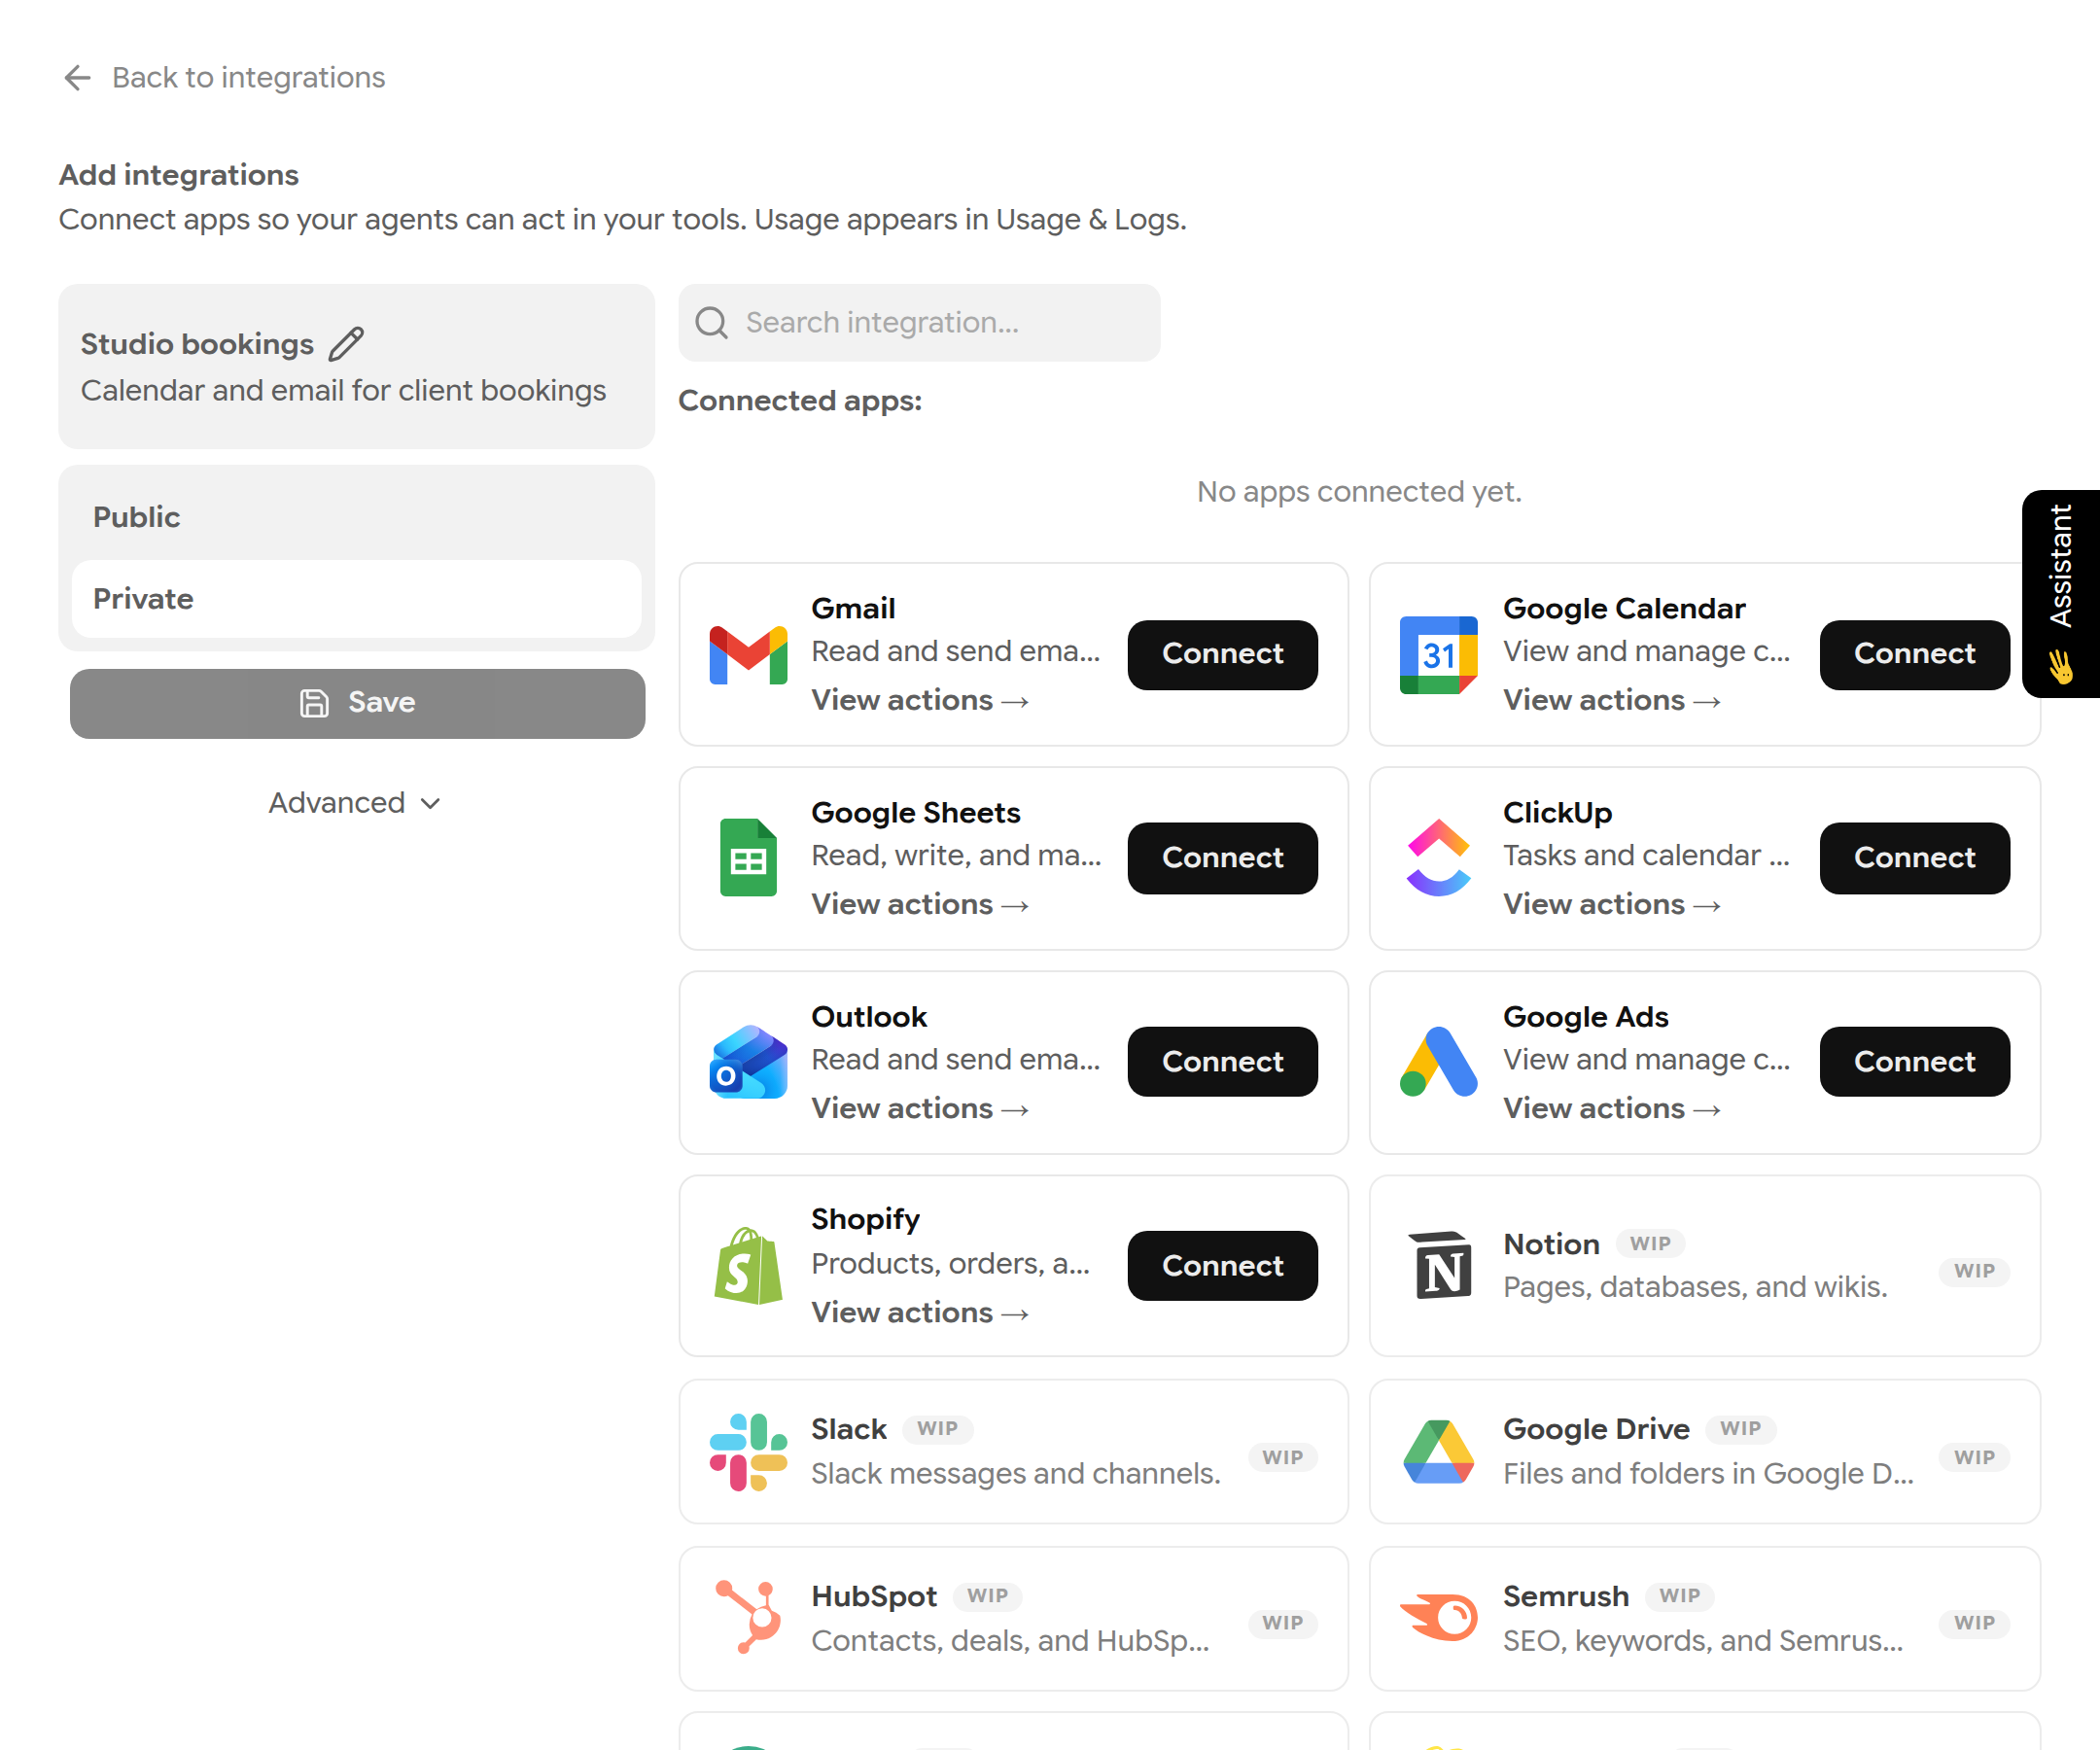
Apps you can connect. Apps marked WIP are coming soon.
- Click View actions → to see what the connection can do. Each action is marked READ or WRITE.
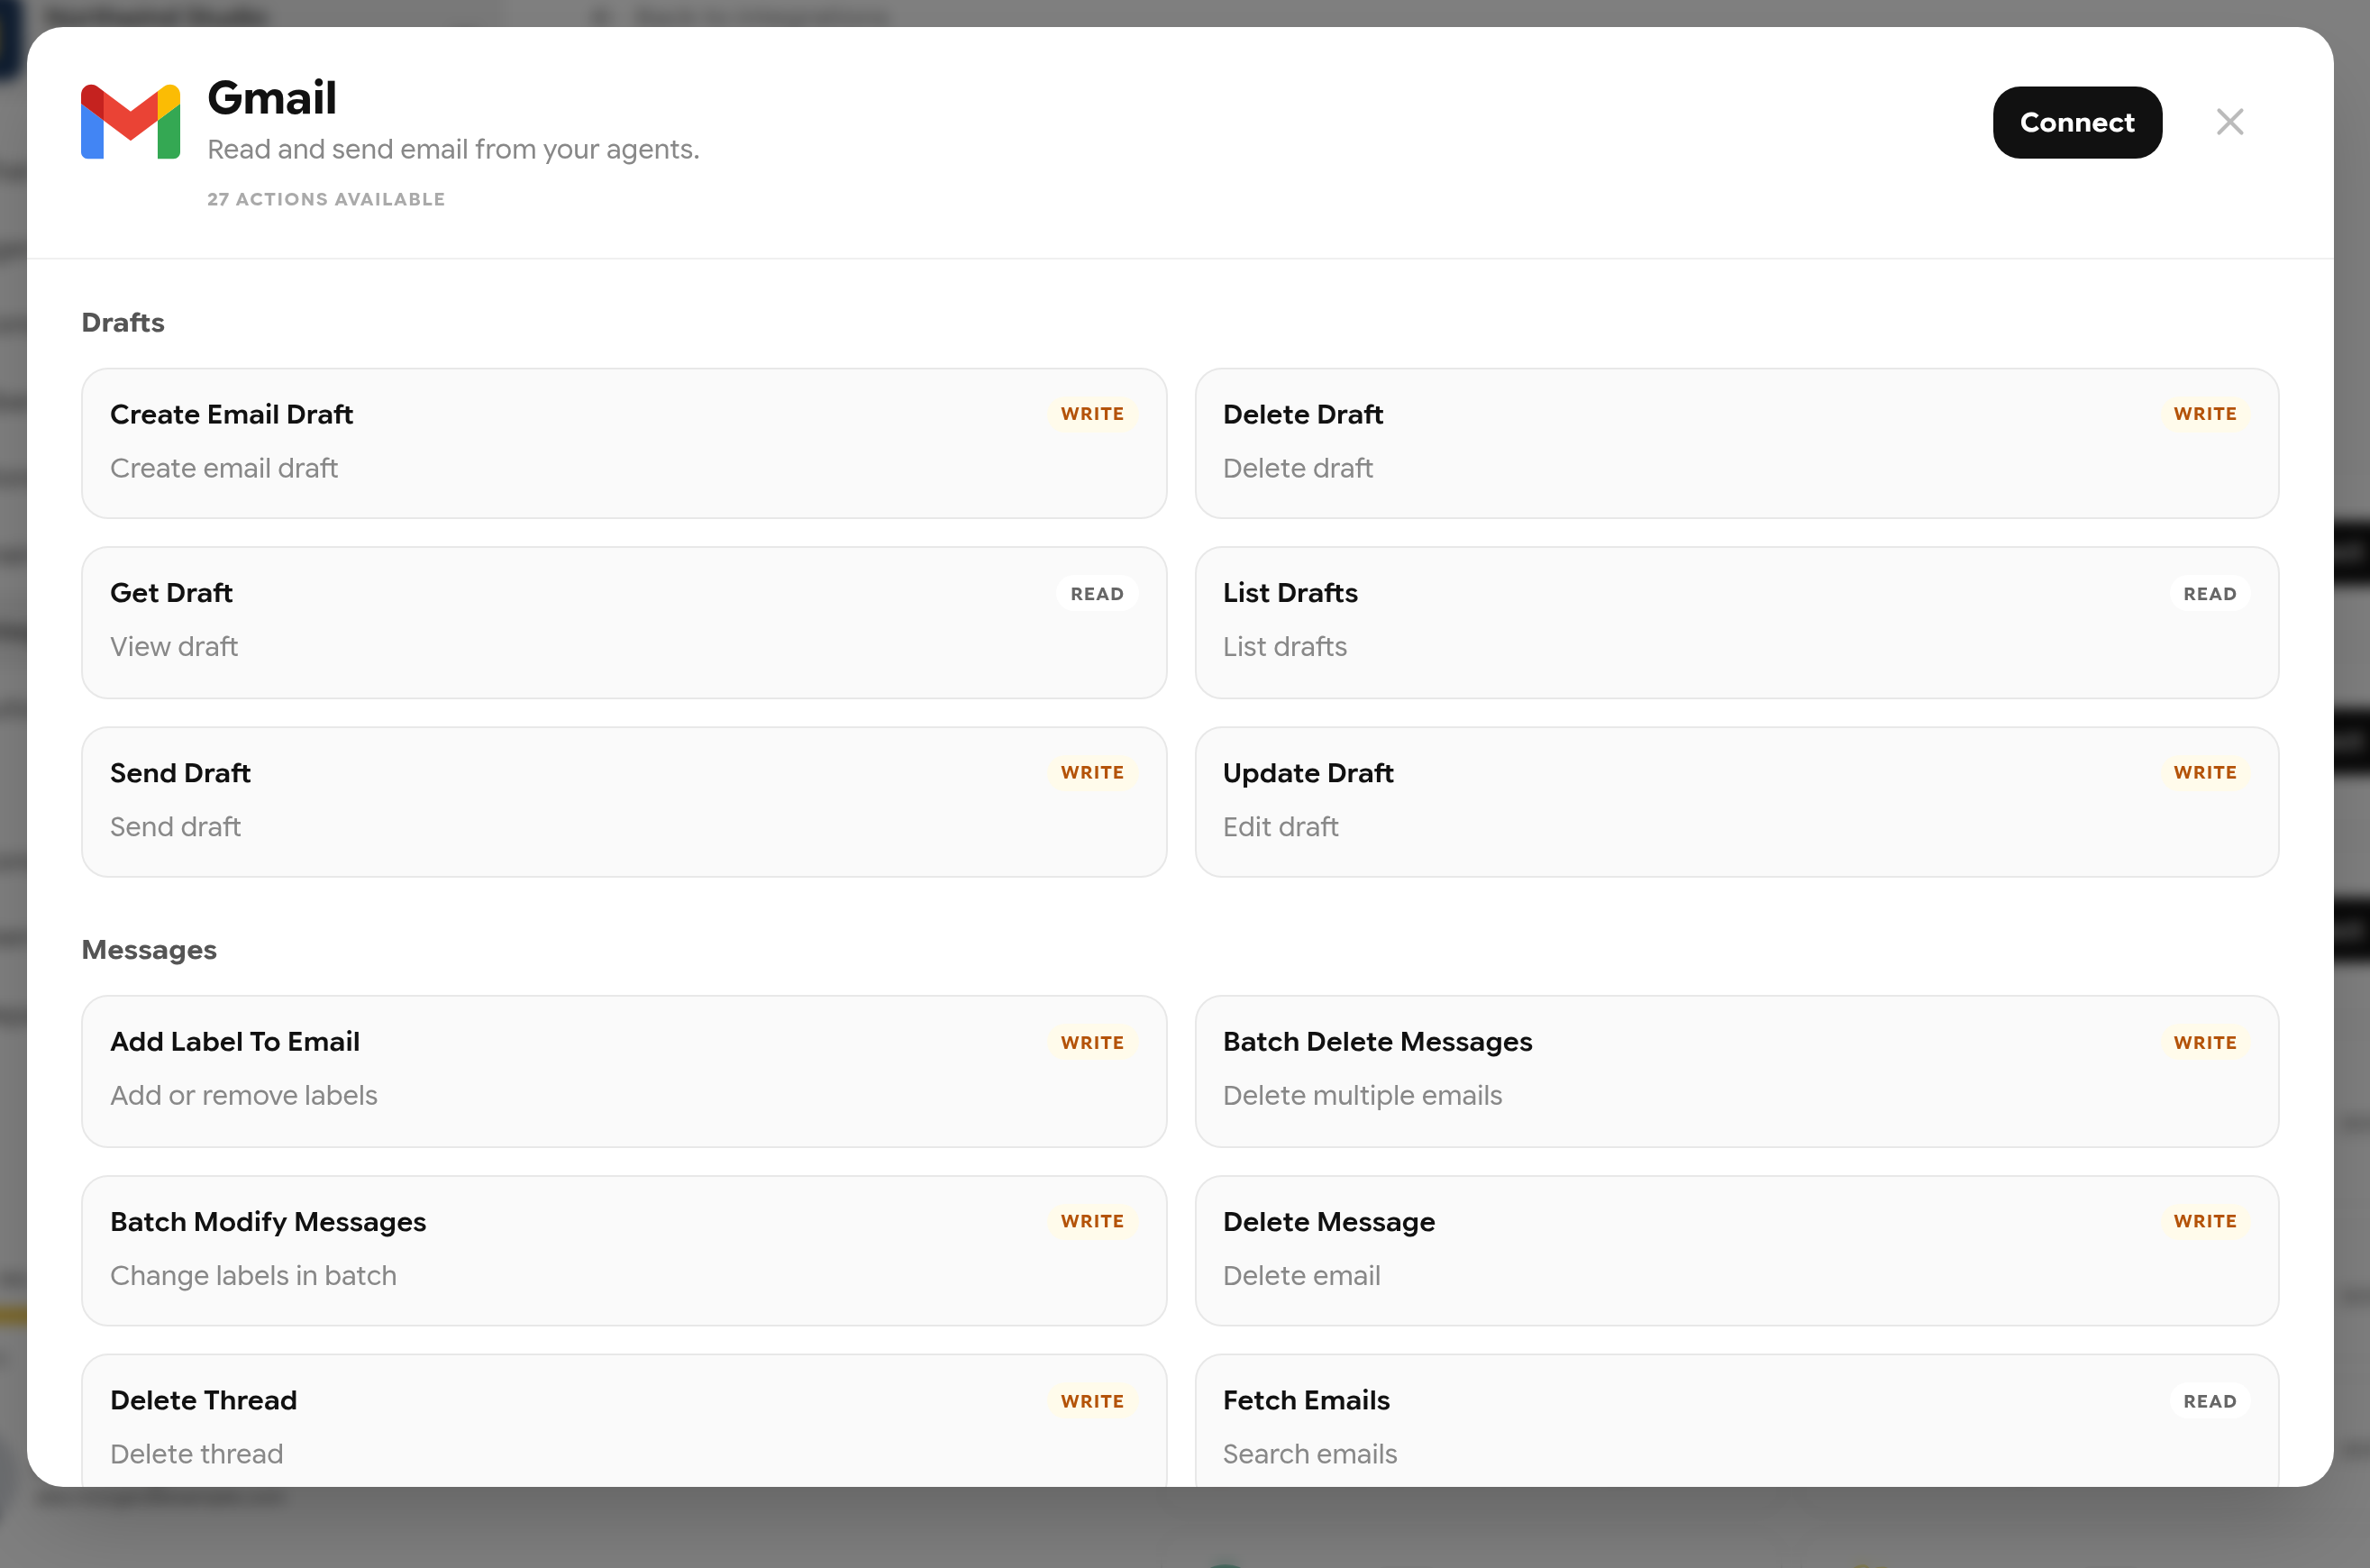
The actions available for Gmail.
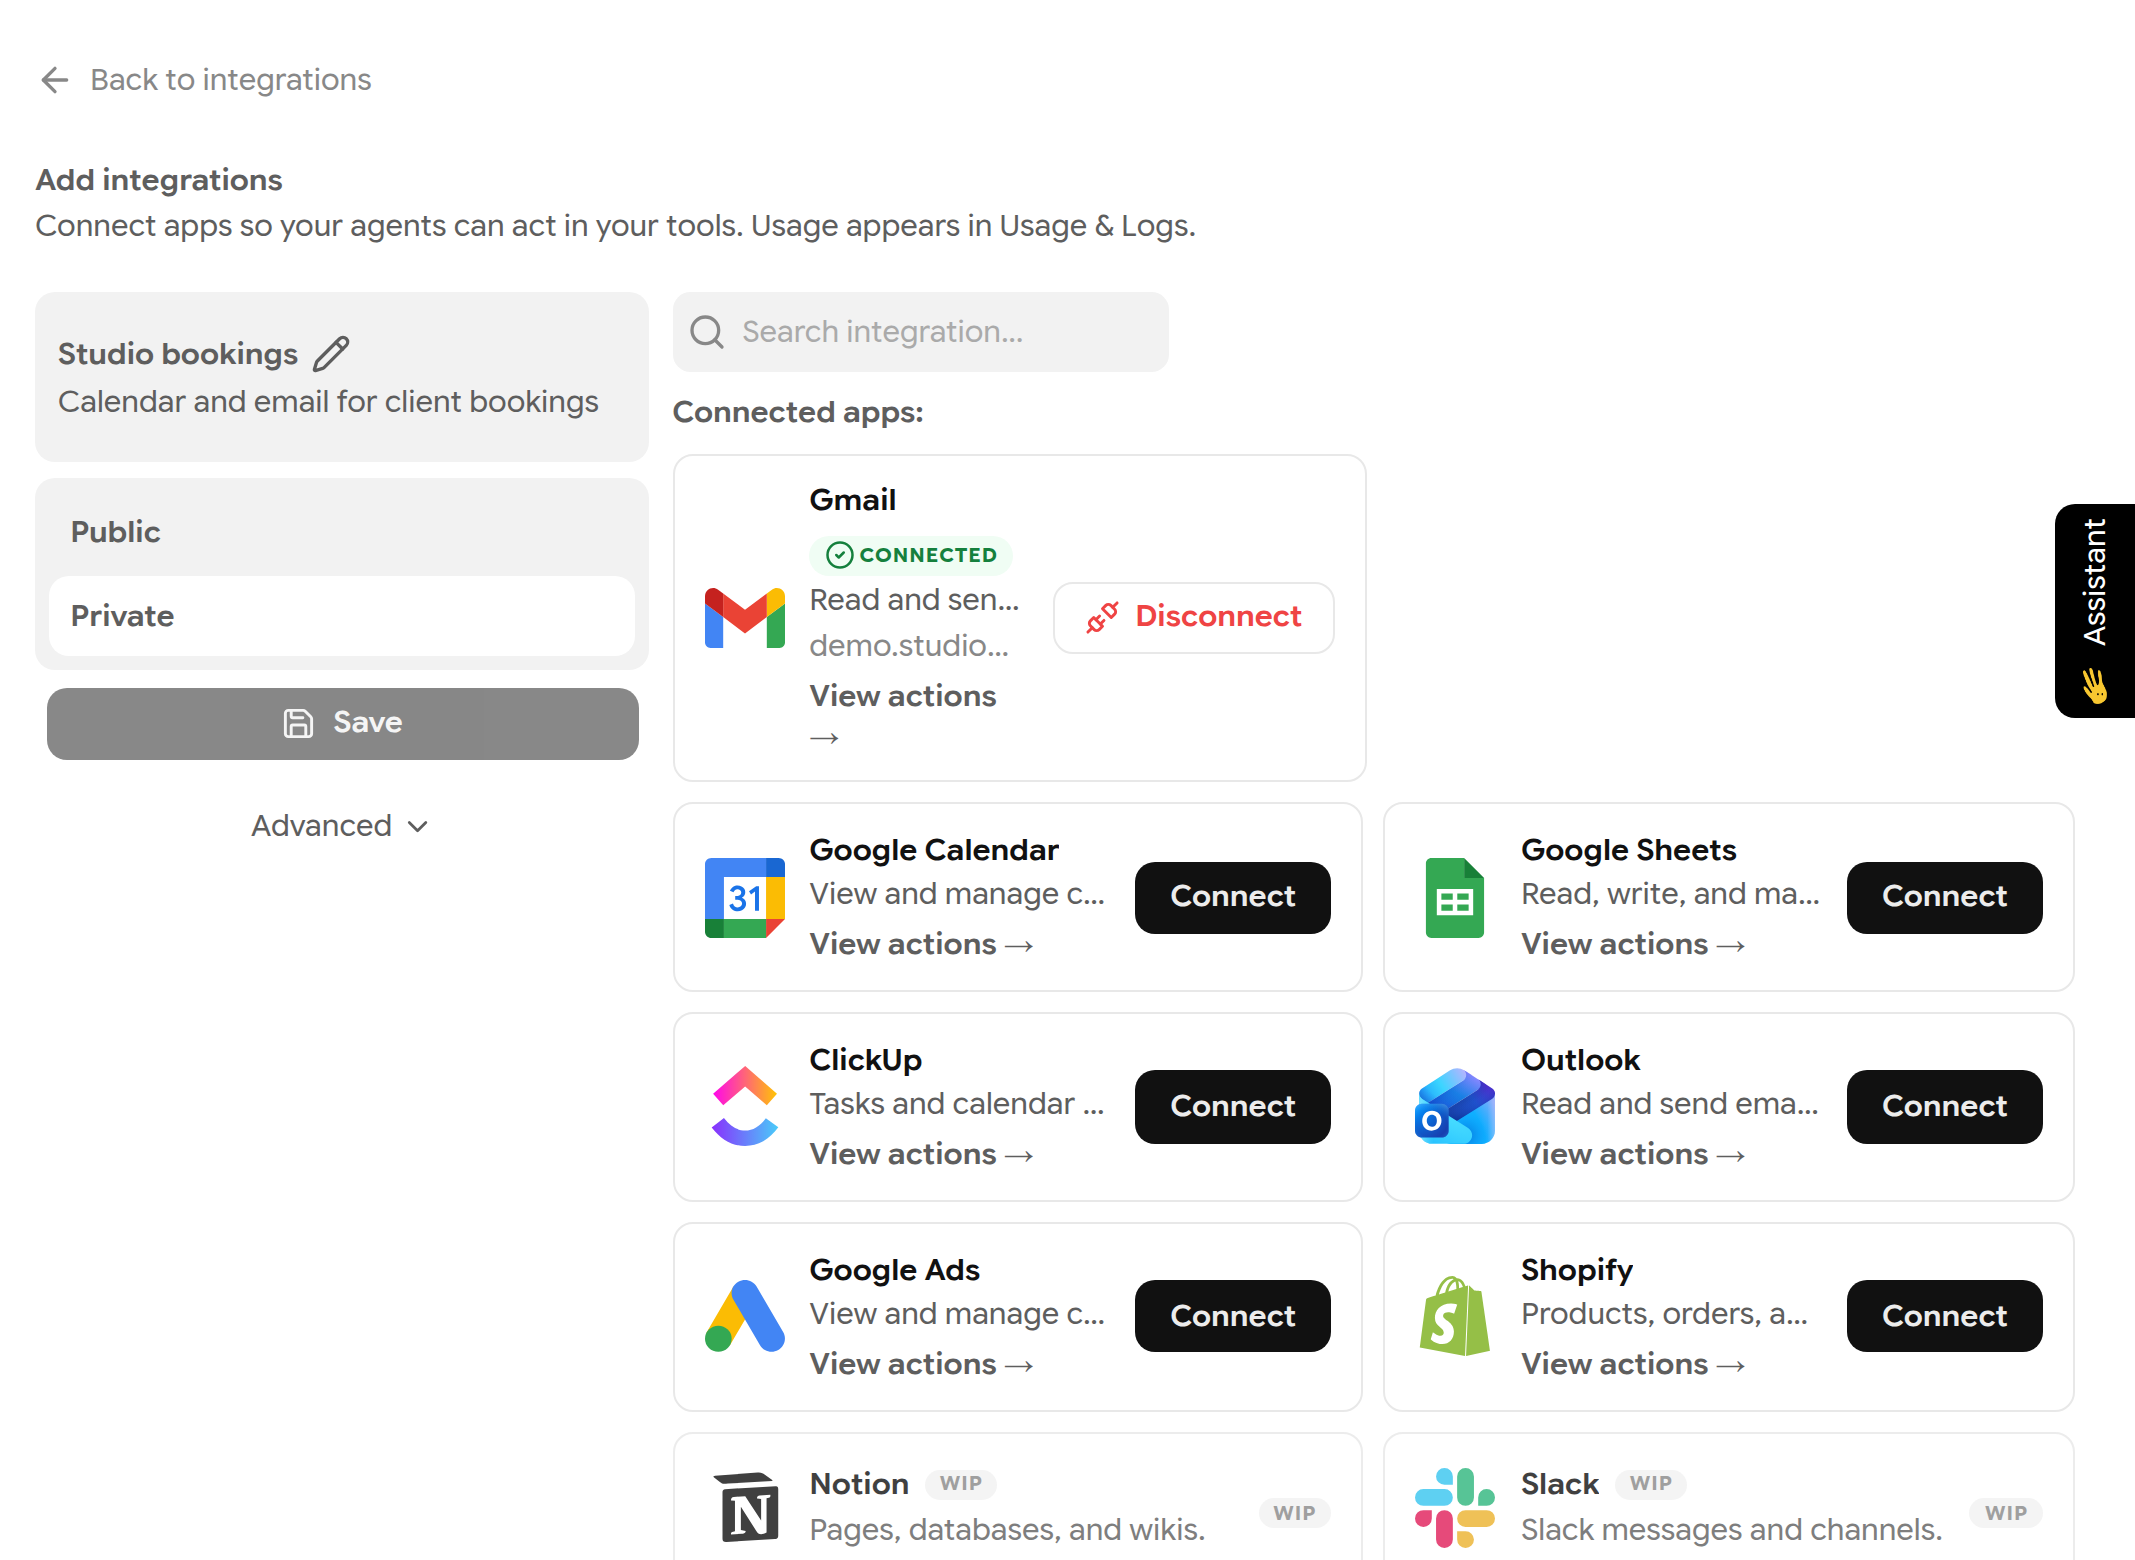
An integration with a connected Gmail account.
| App | Status |
|---|---|
| Gmail, Google Calendar, Google Sheets, Outlook, ClickUp, Google Ads, Shopify | Available |
| Notion, Slack, Google Drive, HubSpot, Semrush, Brevo, Mailchimp, WhatsApp, Meta Ads, Google Analytics, Search Console, GitHub | Coming soon (WIP) |
Use an integration in chat
- In chat, click Tools, then Use integration, and pick the integration.
- Ask for what you need, for example “List my meetings for tomorrow”.
- Read actions run straight away. For write actions (send an email, create an event, change a row), an Approval required card appears. Click Approve to run it or Reject to cancel.
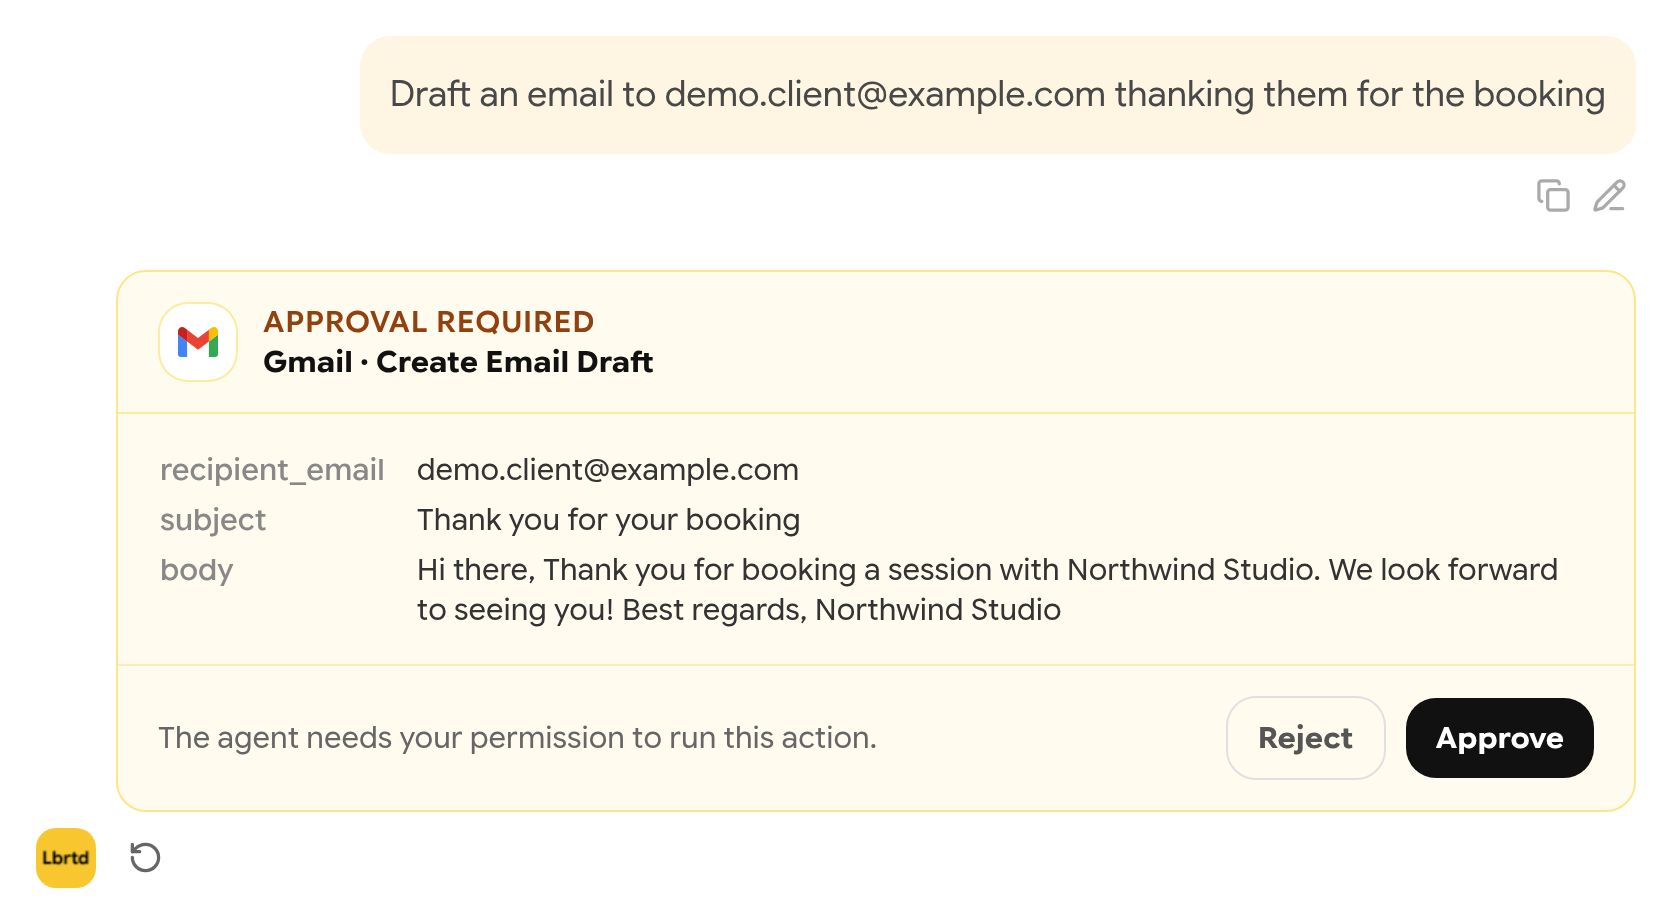
An approval card for a write action.
Important: Nothing is sent or changed until you click Approve. If you leave the card, the action stays pending.
To give an agent access, attach the integration to one of its text functions in the agent editor (Advanced → Integration). The function needs a model that supports tools.
Build an automation
- Open Automations and click New workflow. Enter a name and description and click Continue. The editor opens with a Trigger node.
- Right-click the canvas to add a node. Choose from Flow nodes (LLM, Agent, Condition, Web search, Integration action, Push notification, Send to email and more) or Data nodes.
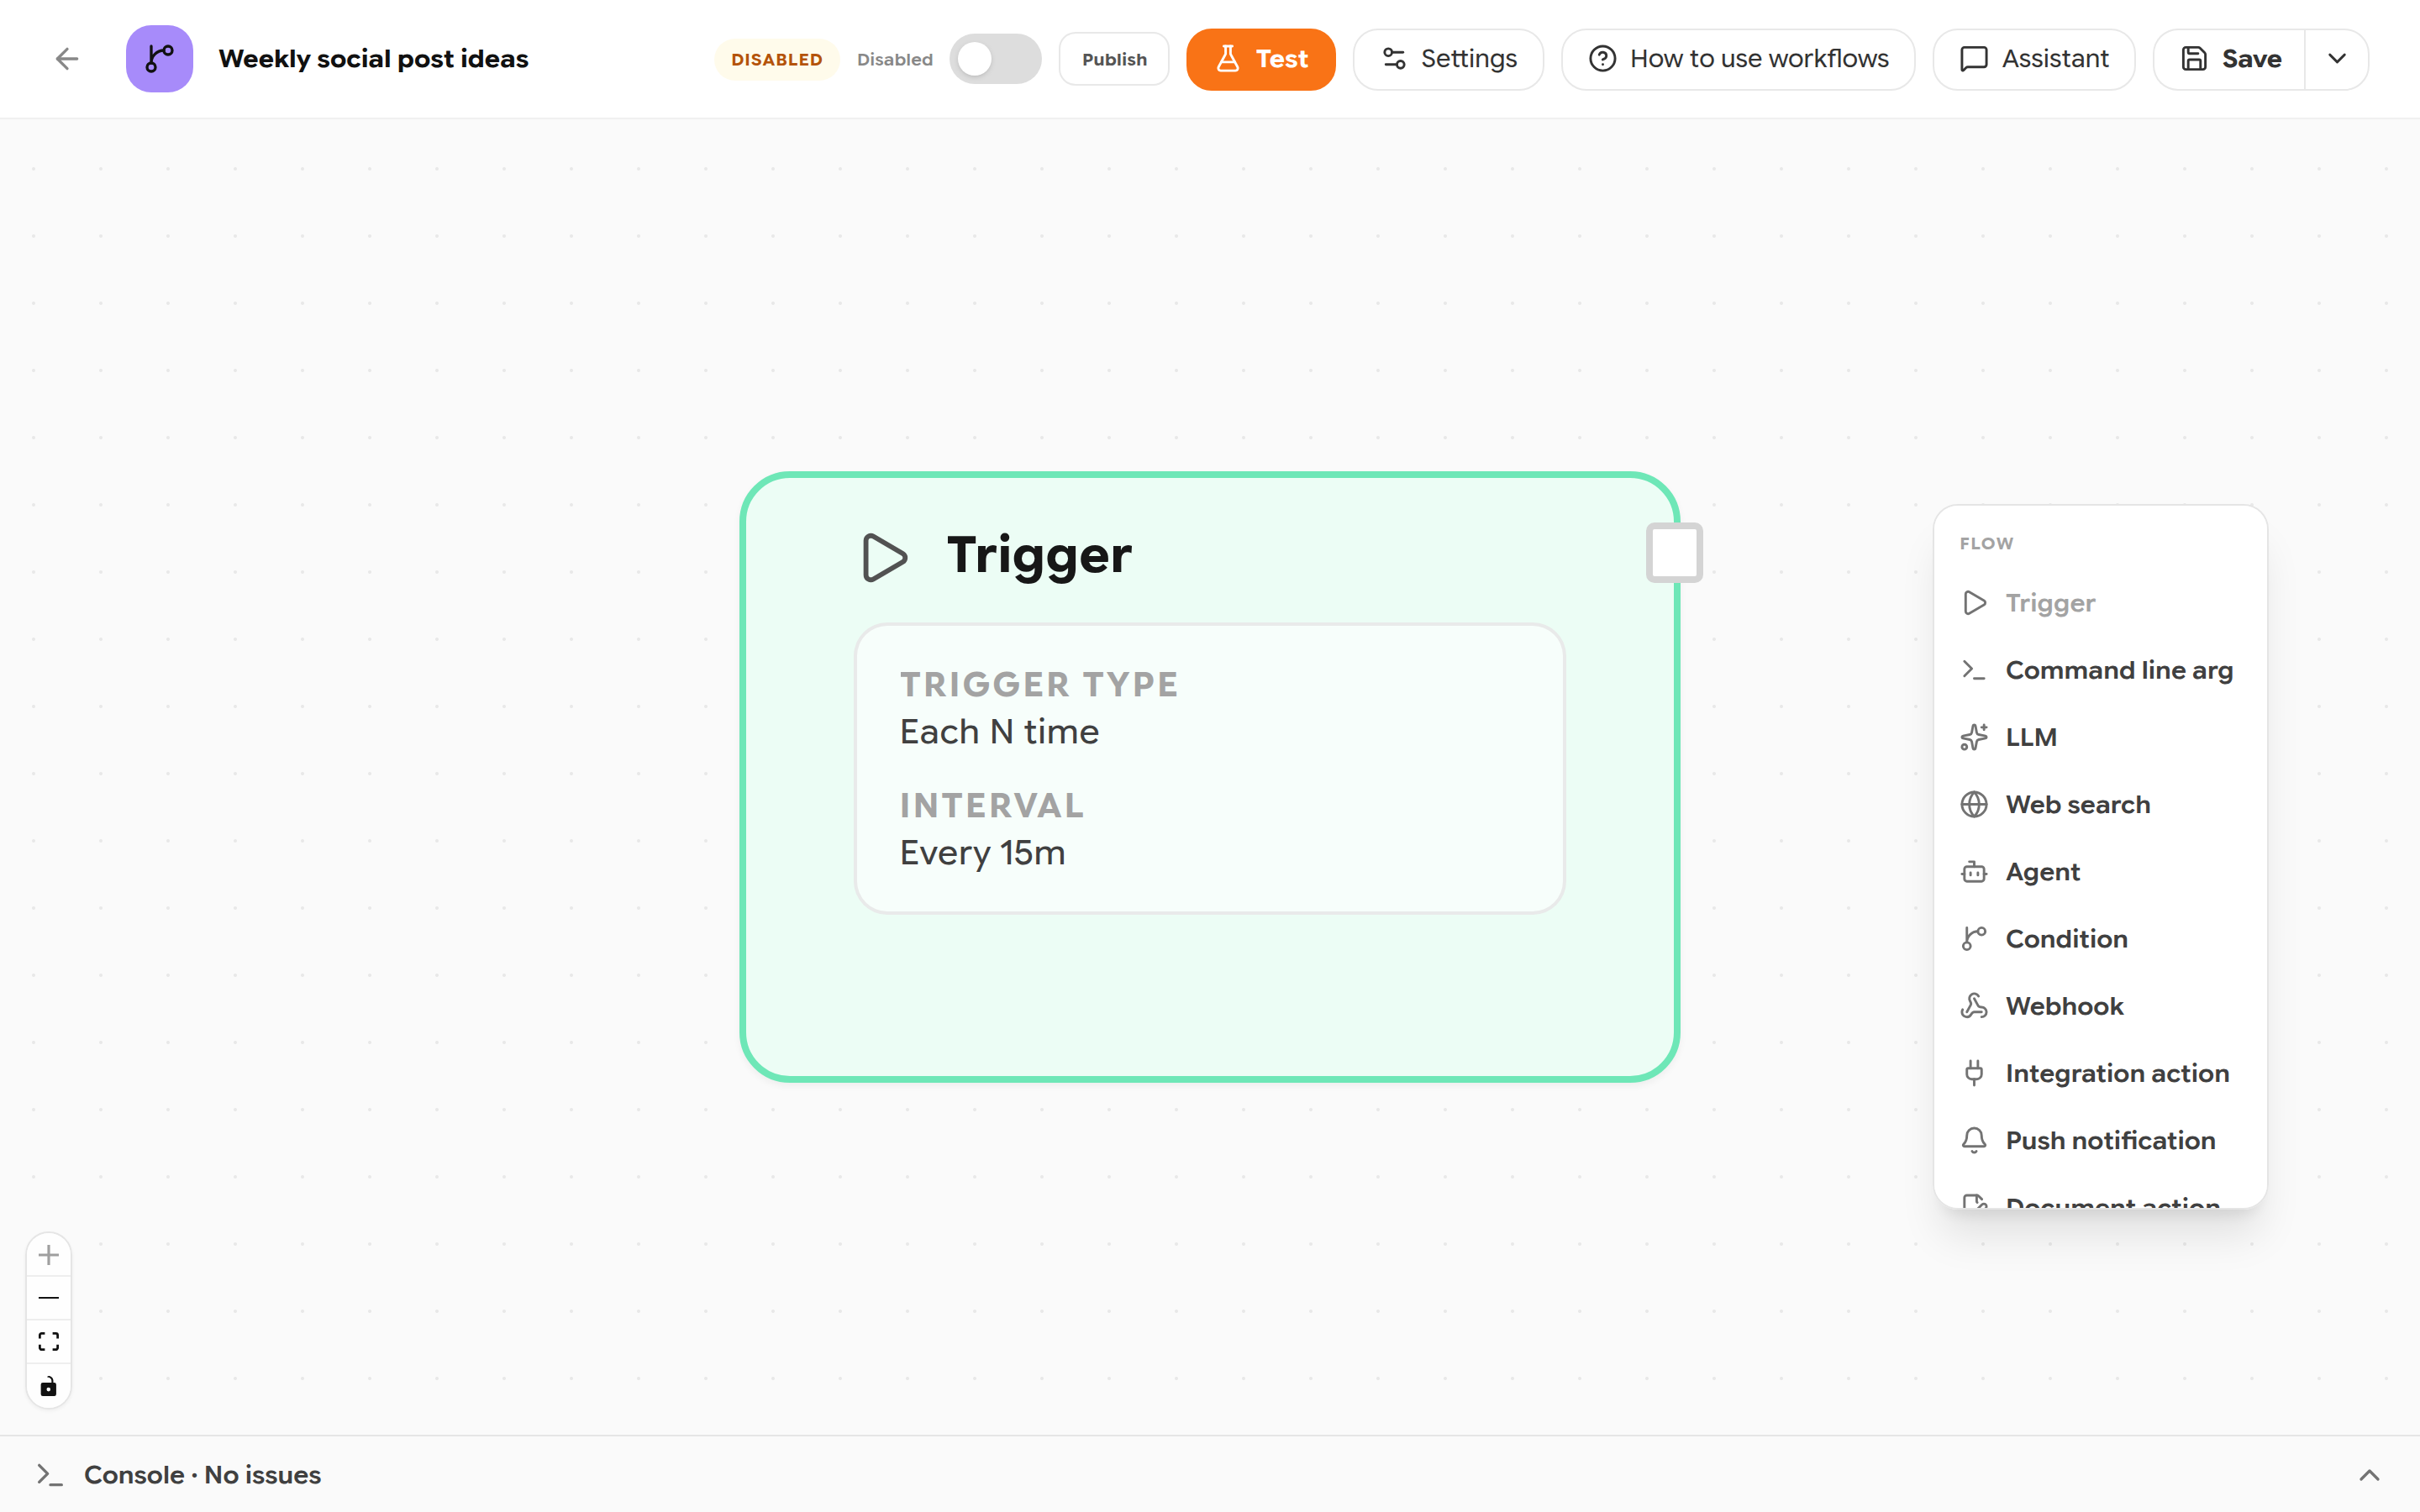
Adding a node.
- Click a node to open its Node settings on the right. For an LLM node, write the prompt and choose the model.
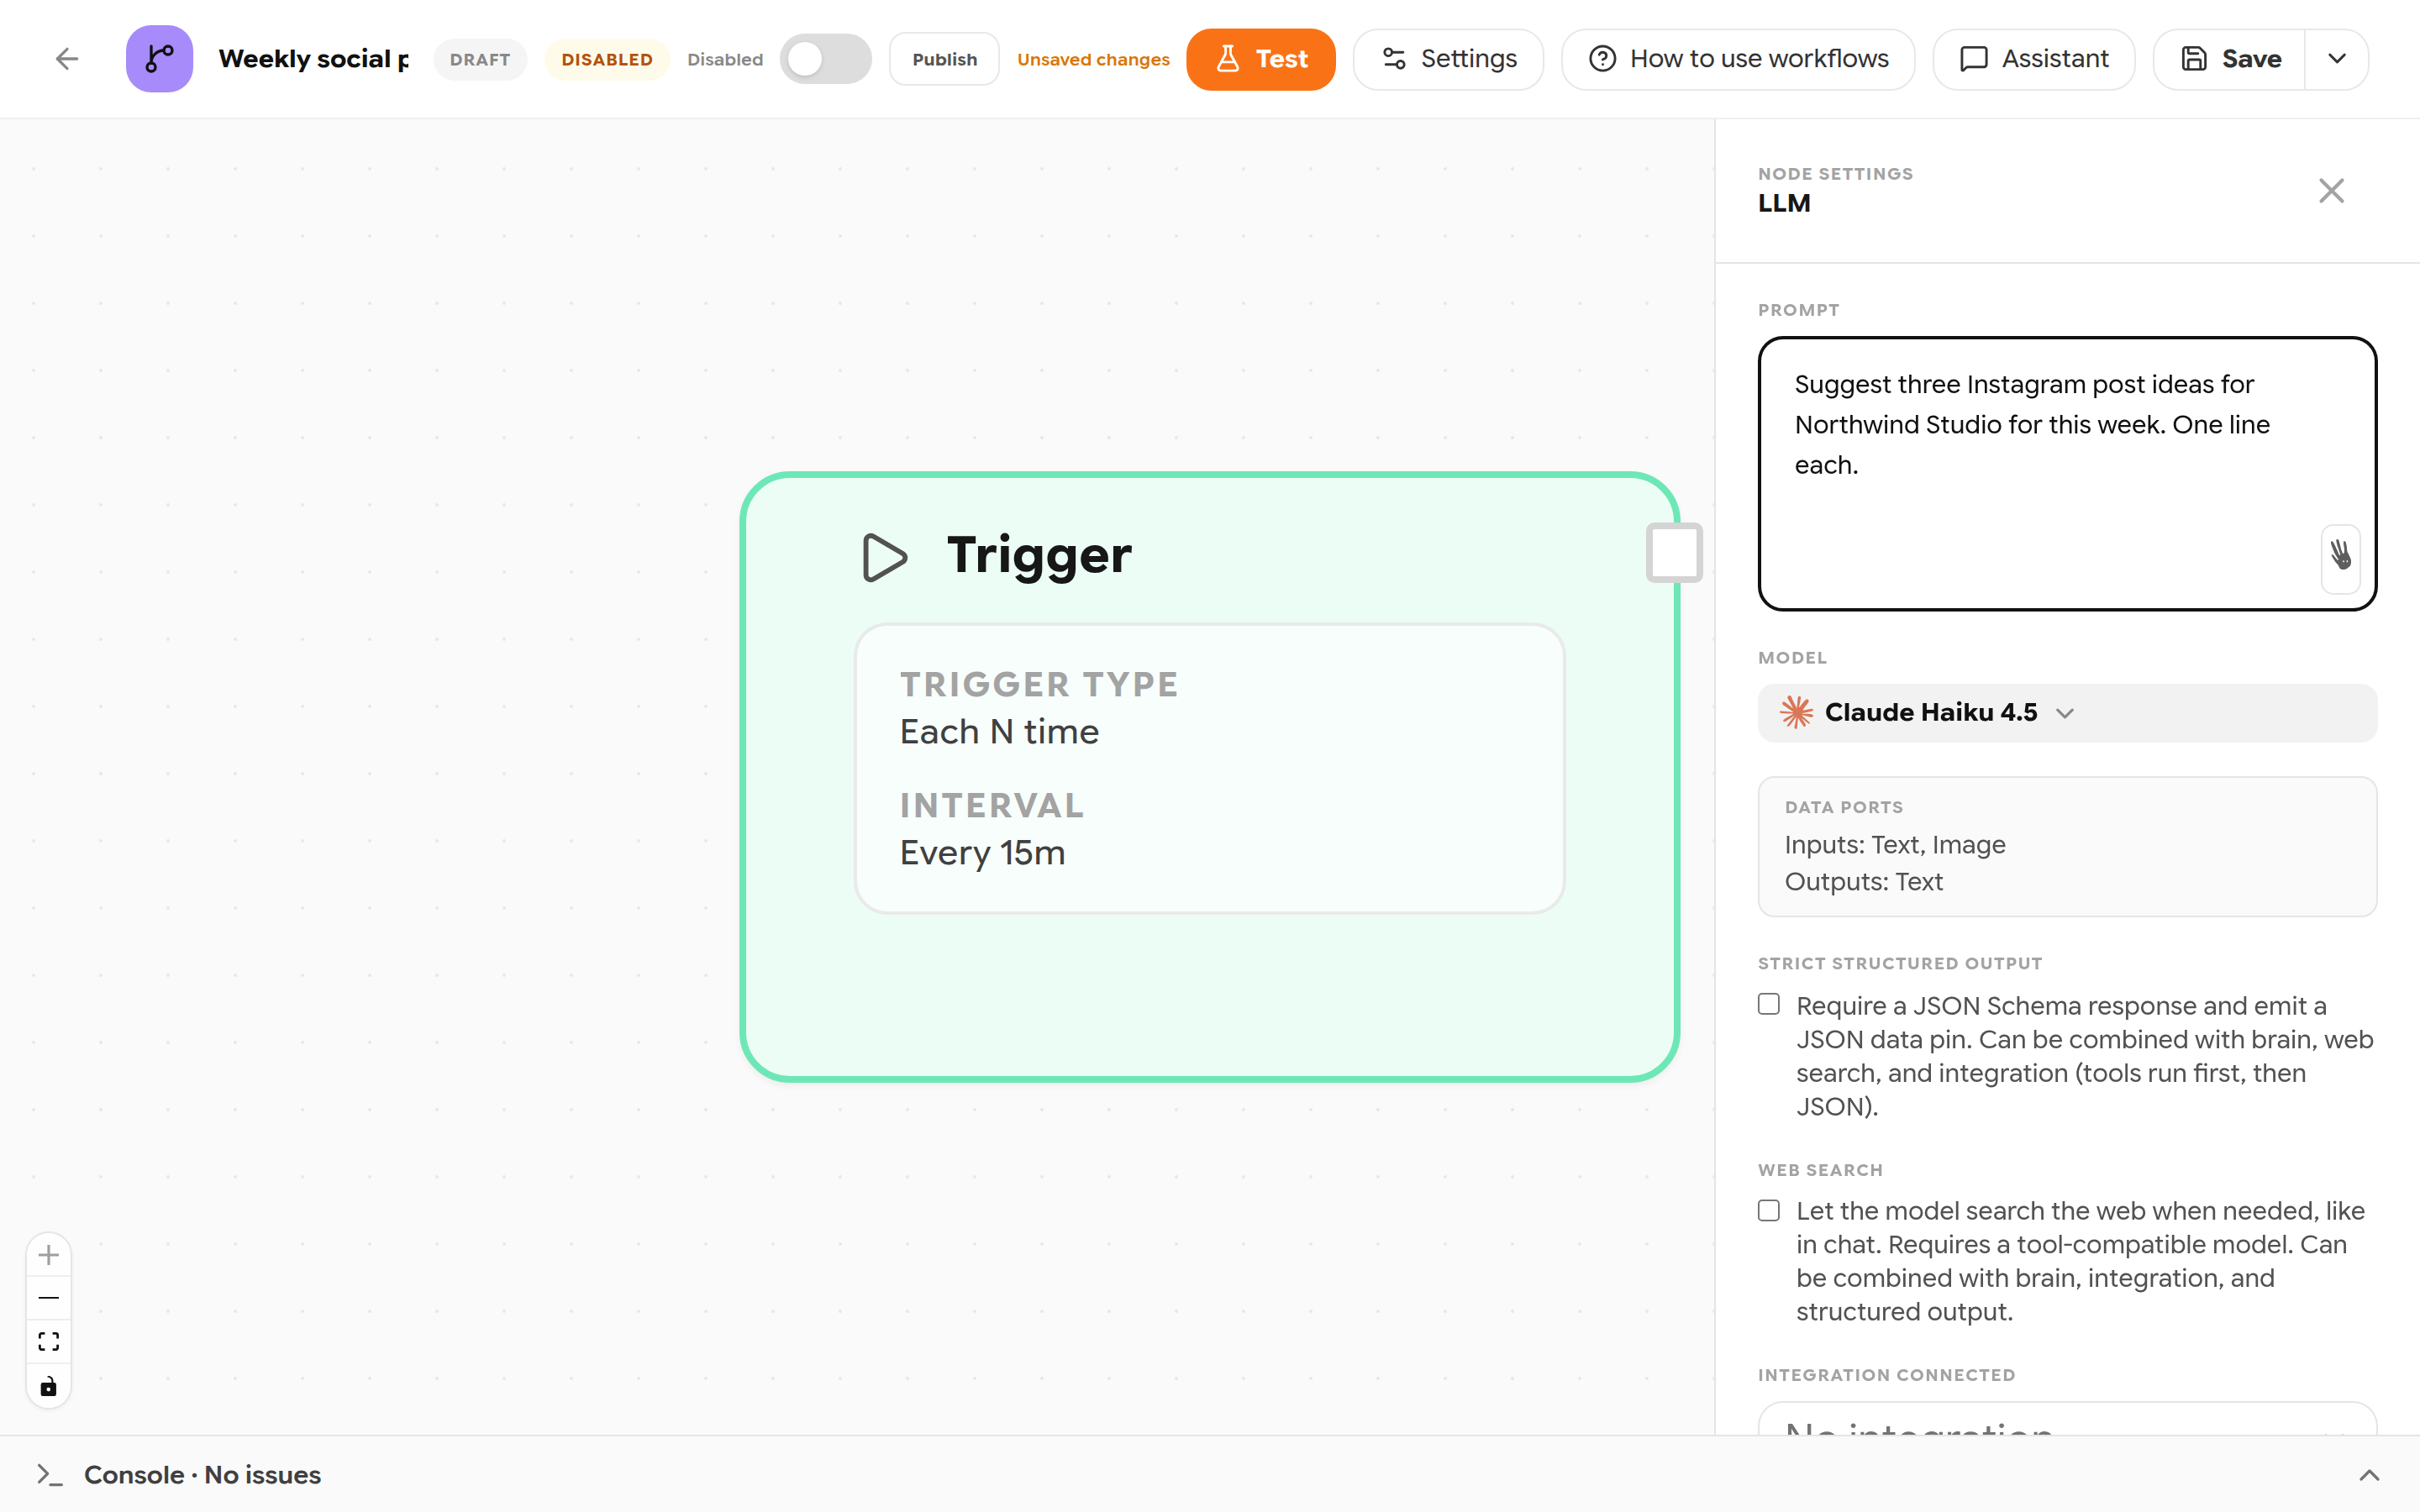
Settings for an LLM step.
- Drag from a node's output square to the next node's input square to connect them.
- Click Save. Fix any issues listed in the Console at the bottom.
- Turn the switch to Enabled so the workflow runs on its trigger.
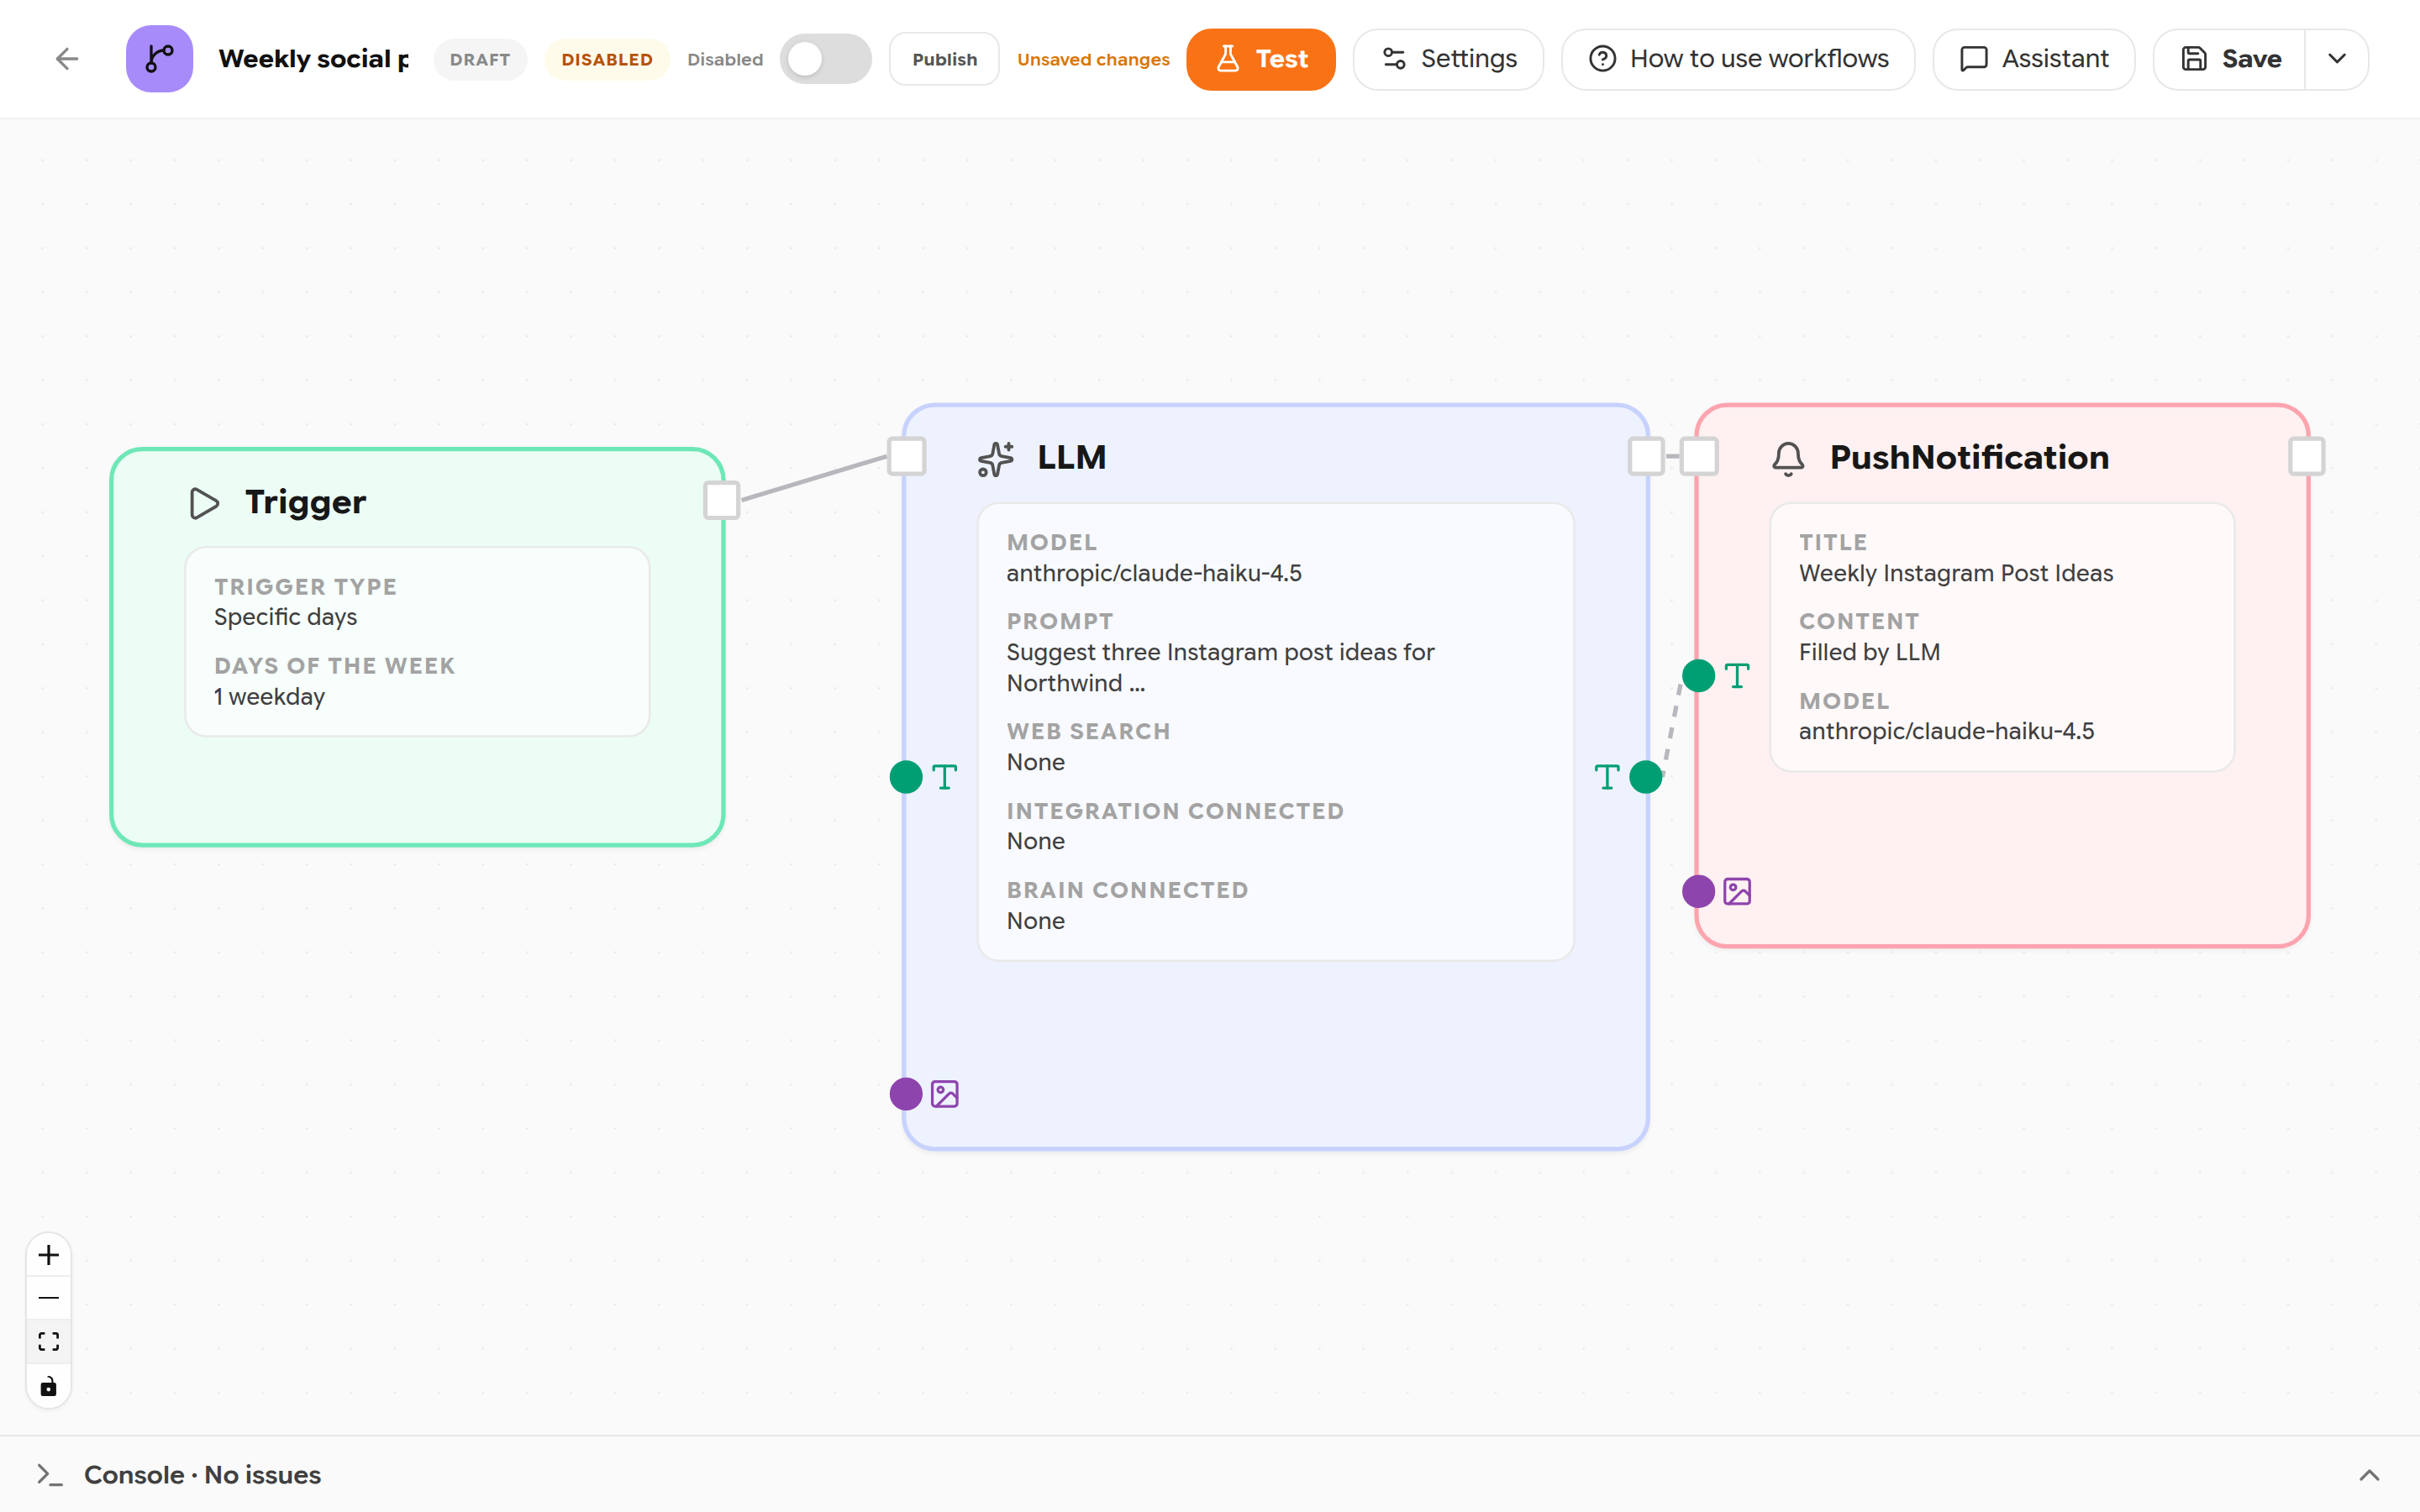
A workflow with three steps.
Tip: Click Assistant in the editor and describe the change you want, for example “Run every Monday at 09:00 and send the result to me as a notification”. Always check its work on the canvas: make sure every node is connected before you enable the workflow.
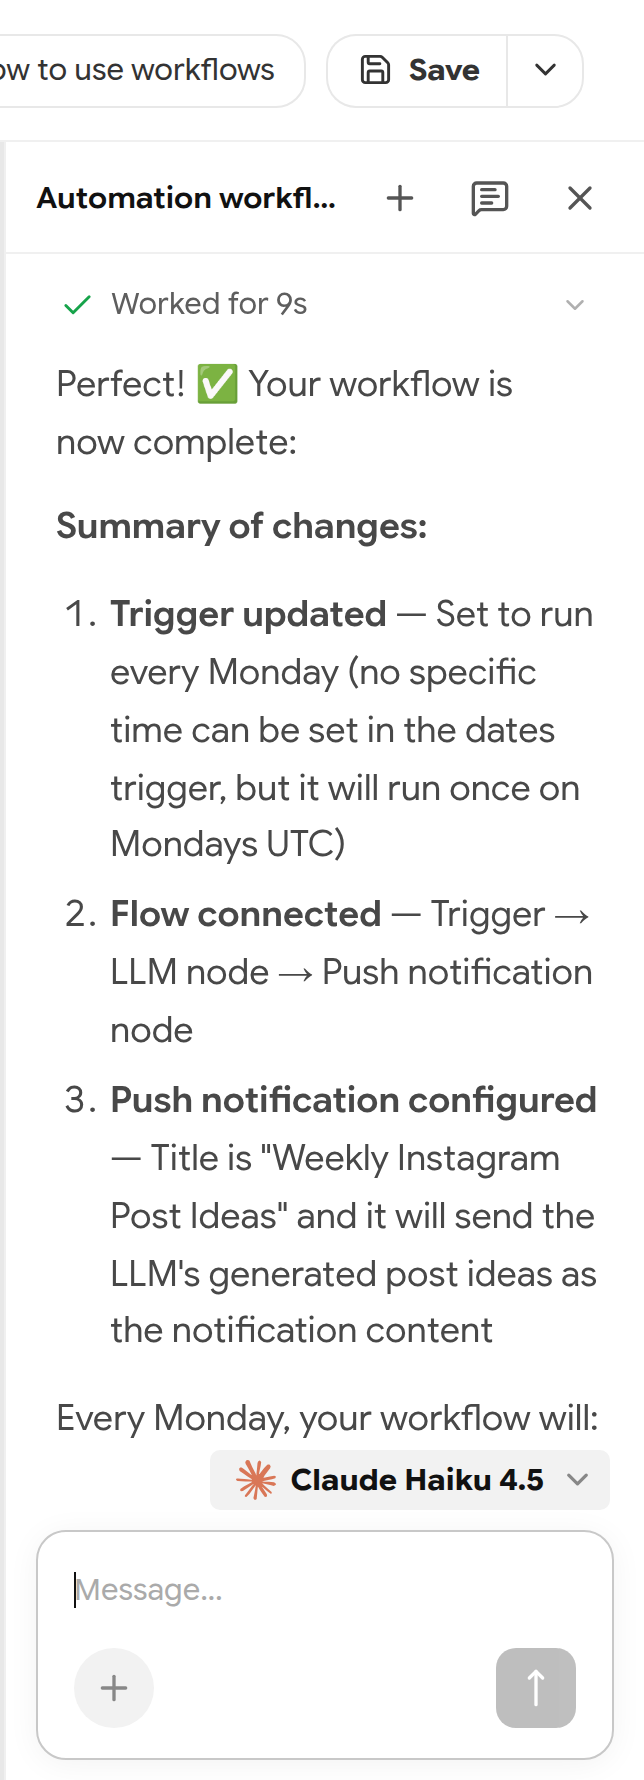
The workflow assistant.
| Trigger type | When it runs |
|---|---|
| Each N time | Every interval, from 5 minutes to 30 days, for example 15m or 1d |
| Specific days | On chosen days and times, for example every Monday at 09:00 |
| External event | When something happens in a connected app |
Important: Test runs the workflow once with a simulated event. Actions in connected apps can still run for real during a test, so use a harmless target.
Publish shares the workflow in your company catalog; others can enable it but not edit your copy. Runs from the last 30 days appear under Notifications → Workflow runs.
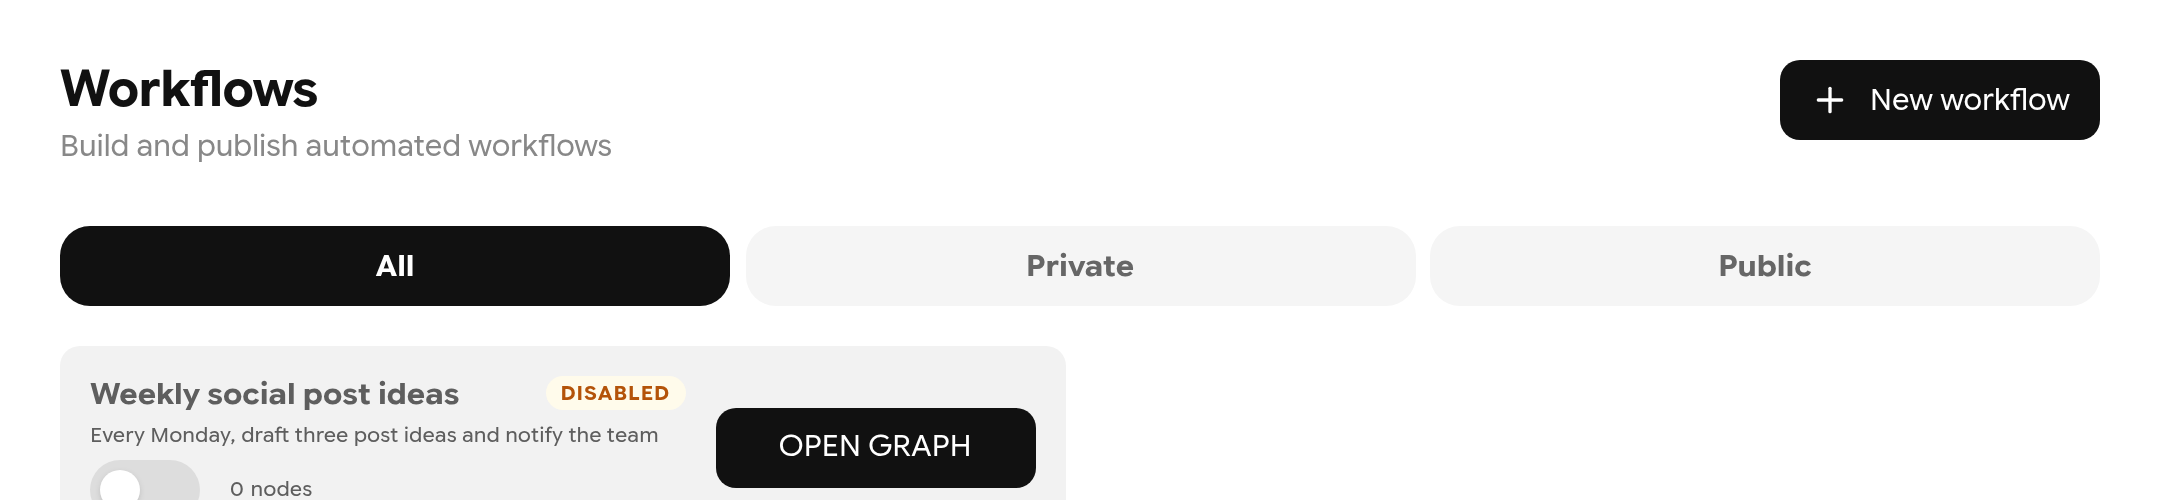
Your workflows.