Using Libertadia
Chatting with AI
Chat is where you talk to an AI model or one of your agents. Type a message, choose a model or leave it on AUTO, and turn on tools such as web search or research when you need them.
Send your first message
- Click New chat on the left rail.
- Type your request in the Message… box.
- Press Enter, or click the send arrow. Press Shift + Enter for a new line.
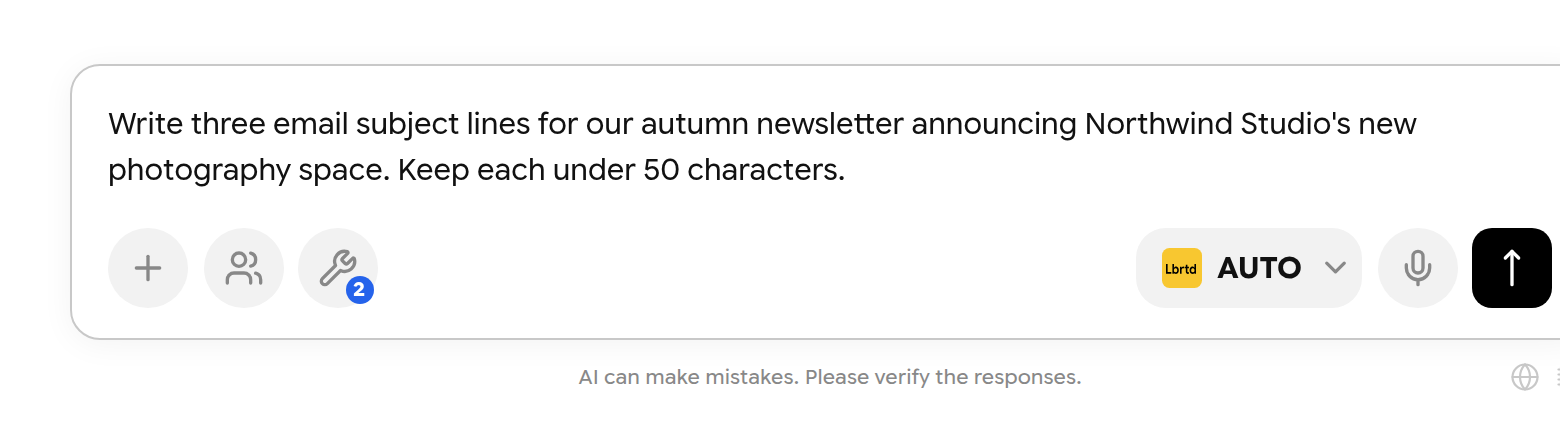
Typing a request in the composer.
The reply appears under your message. Worked for 1s shows how long the model worked; click it to see the steps it took. The model that answered is shown on the right. Libertadia names the conversation for you.
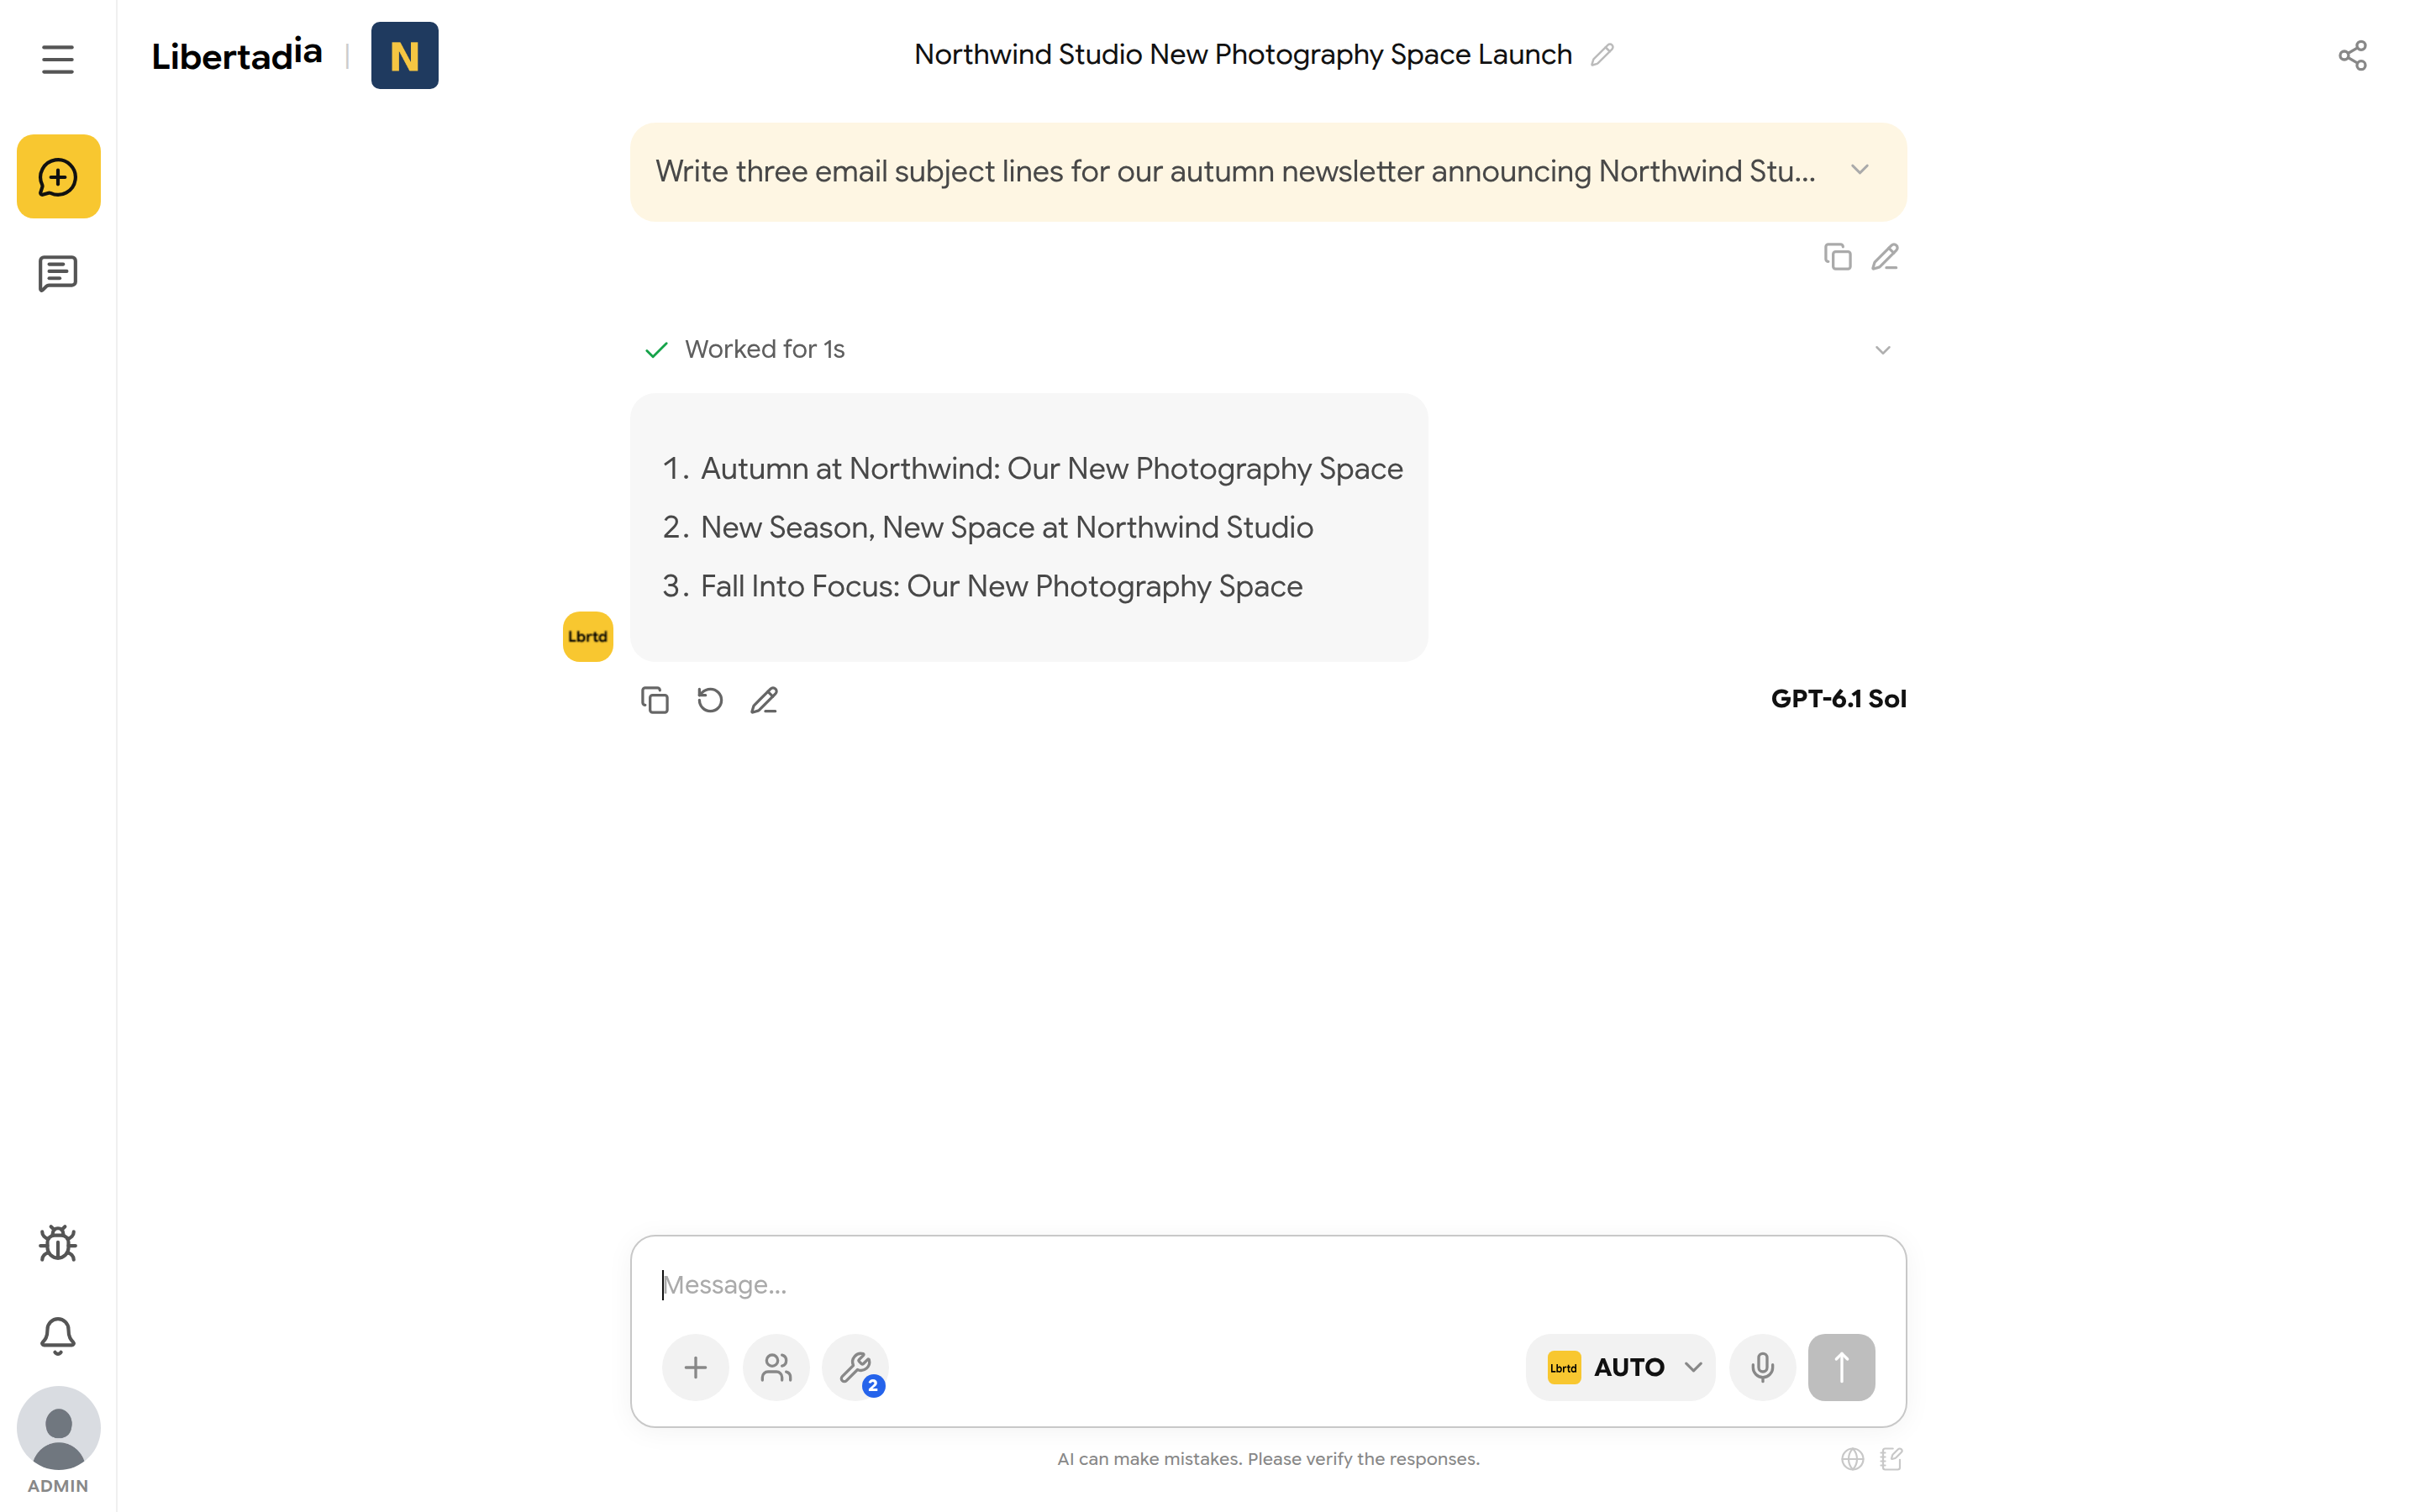
A completed reply, with the model name and the message actions.
Tip: Be specific. Say who the text is for, how long it should be and what tone you want. For example: “Three subject lines, under 50 characters, for our autumn newsletter.”
Choose a model
Click the model button in the composer to open the picker. Search by name, filter by type (text, image, audio, video), or browse by provider.
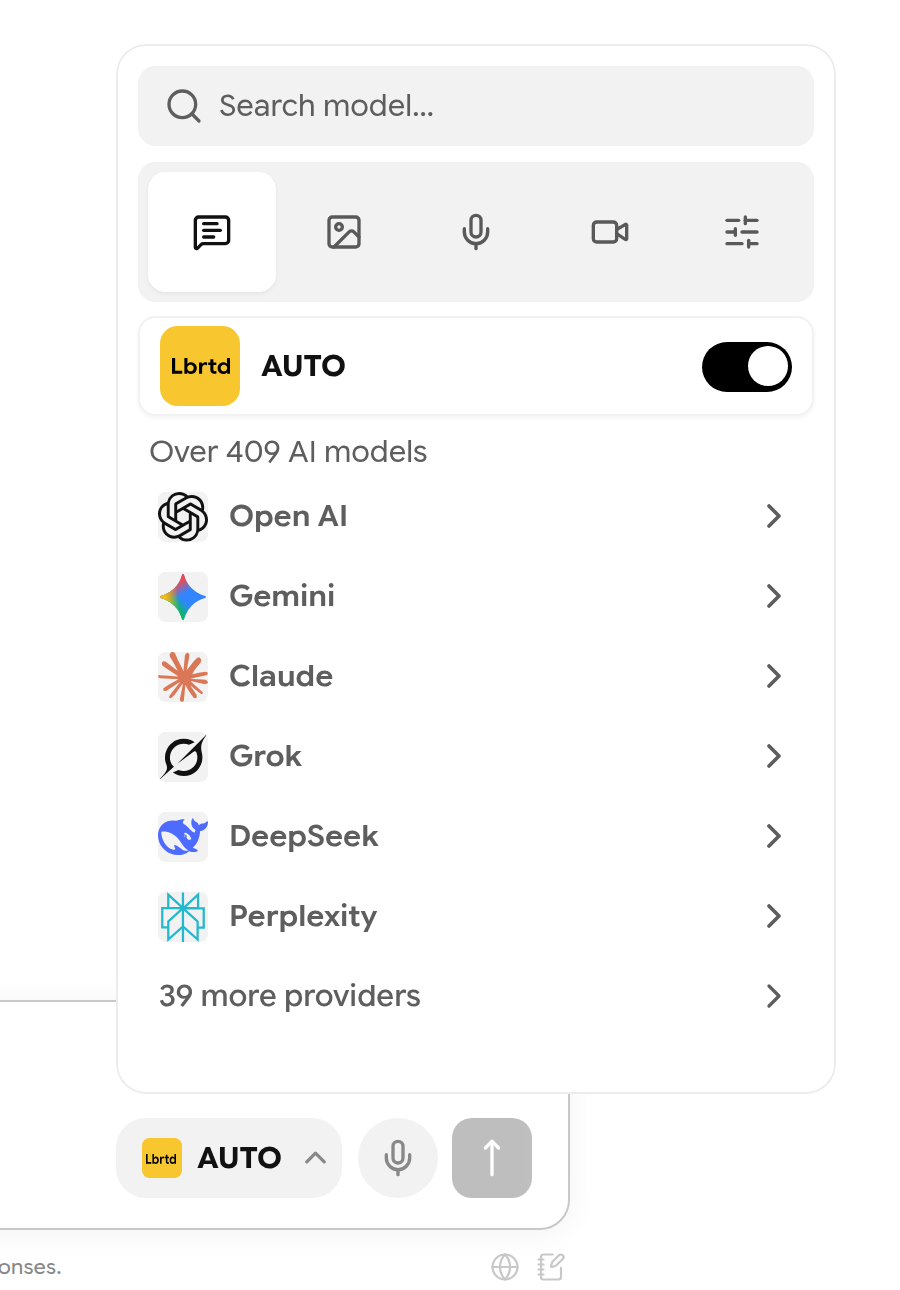
The model picker.
- AUTO — Libertadia picks a suitable model for each message. This is the easiest choice for most tasks.
- A specific model — turn AUTO off and pick a model. Click the star next to a model to add it to your favourites.
- Hover over a model (or press and hold on a phone) to see its prices and supported options.
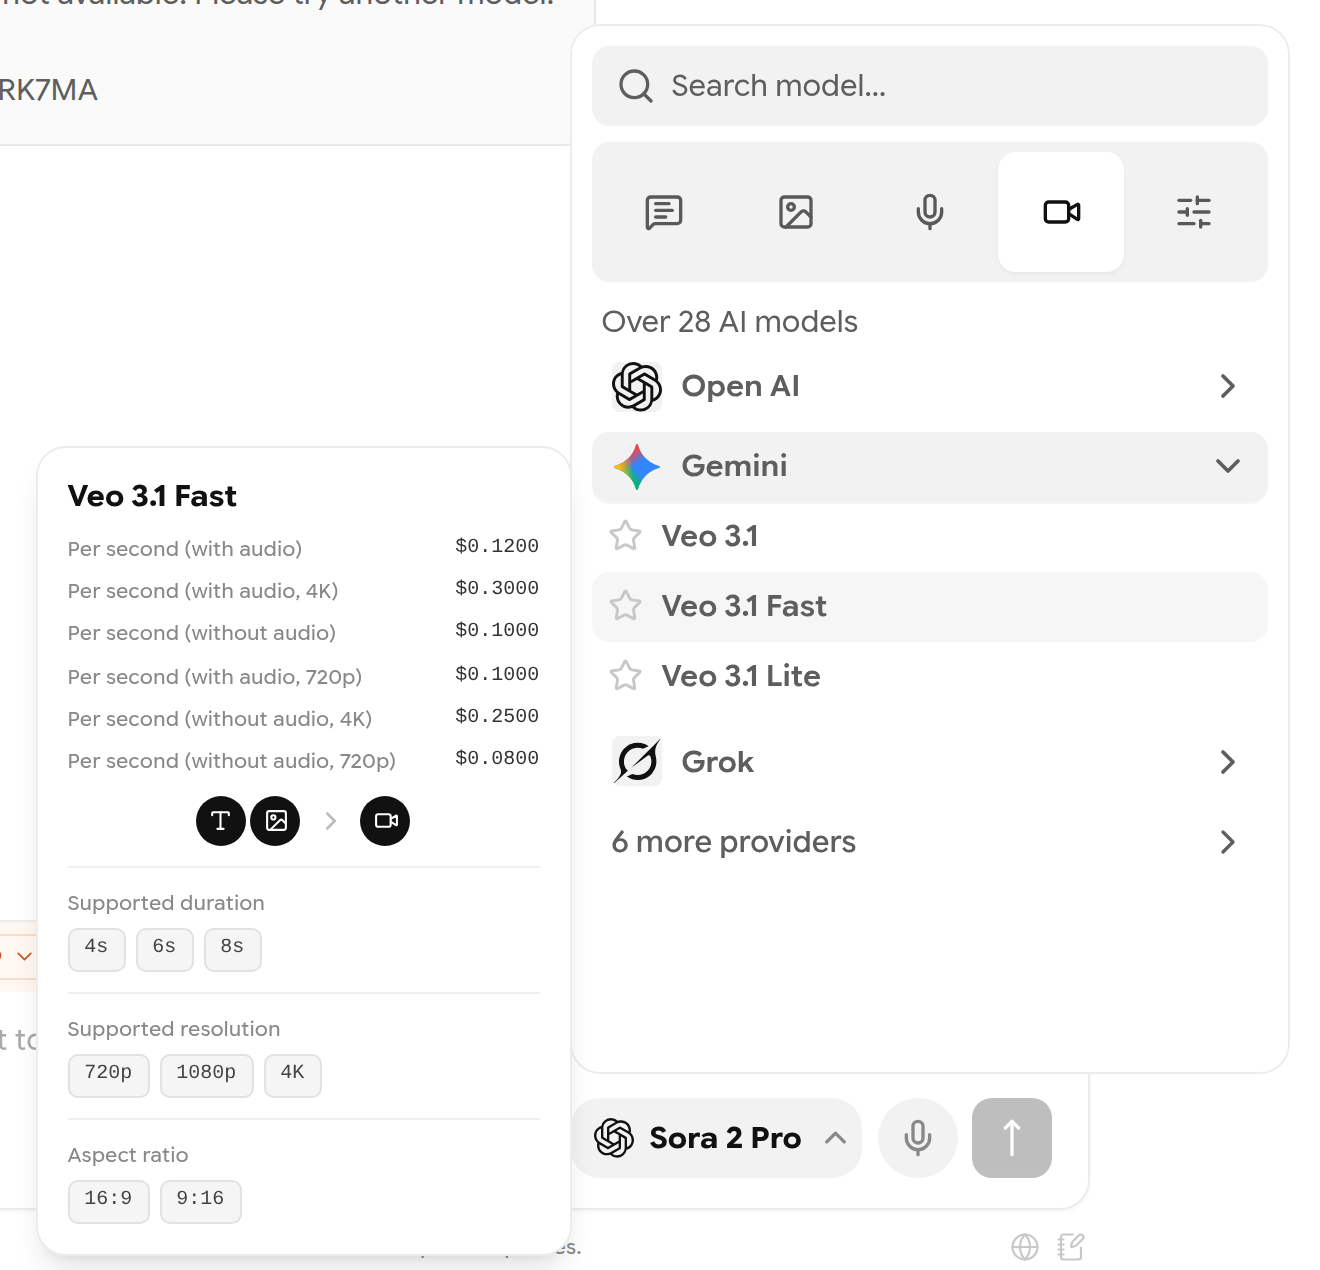
Hovering over a model shows its price and capabilities.
Note: If a model you expect is missing, clear the type filter first. In a company, an administrator may also have limited which models you can use.
Choose which models AUTO uses
Open the chat panel and go to Settings → Auto LLMs. For each kind of task you can pick the model AUTO should use.
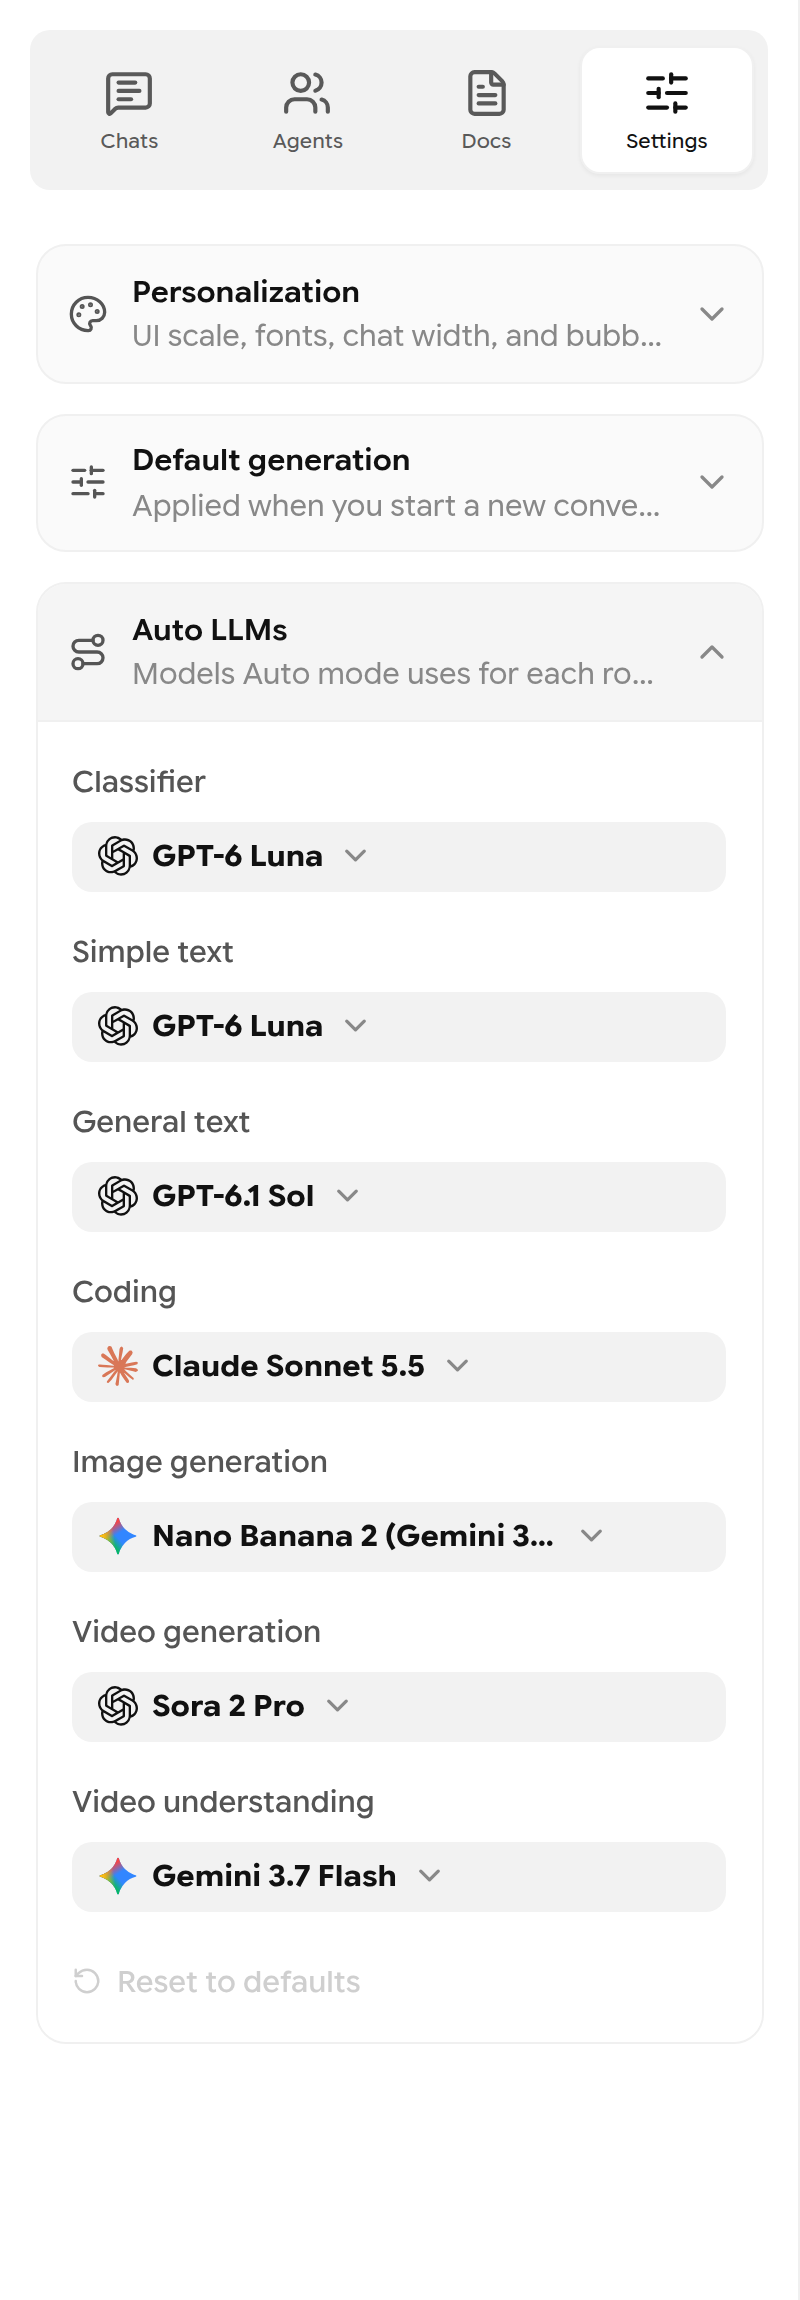
Auto LLMs: one model per kind of task.
| Route | Used for |
|---|---|
| Classifier | Deciding what kind of task your message is |
| Simple text | Short, easy questions |
| General text | Most writing and analysis, plus documents and integrations |
| Coding | Programming questions |
| Image generation | Pictures requested in AUTO |
| Video generation | Videos requested in AUTO |
| Video understanding | Questions about a video you attach |
A Custom mark shows the routes you changed. Reset to defaults restores the original models.
Important: If your company does not allow a model chosen here, a red ! appears and AUTO refuses that kind of task until you pick an allowed model. Click Open Auto LLMs on the message to fix it.
Use tools
Click the Tools button (wrench) to switch tools on or off. The number on the button shows how many are on.
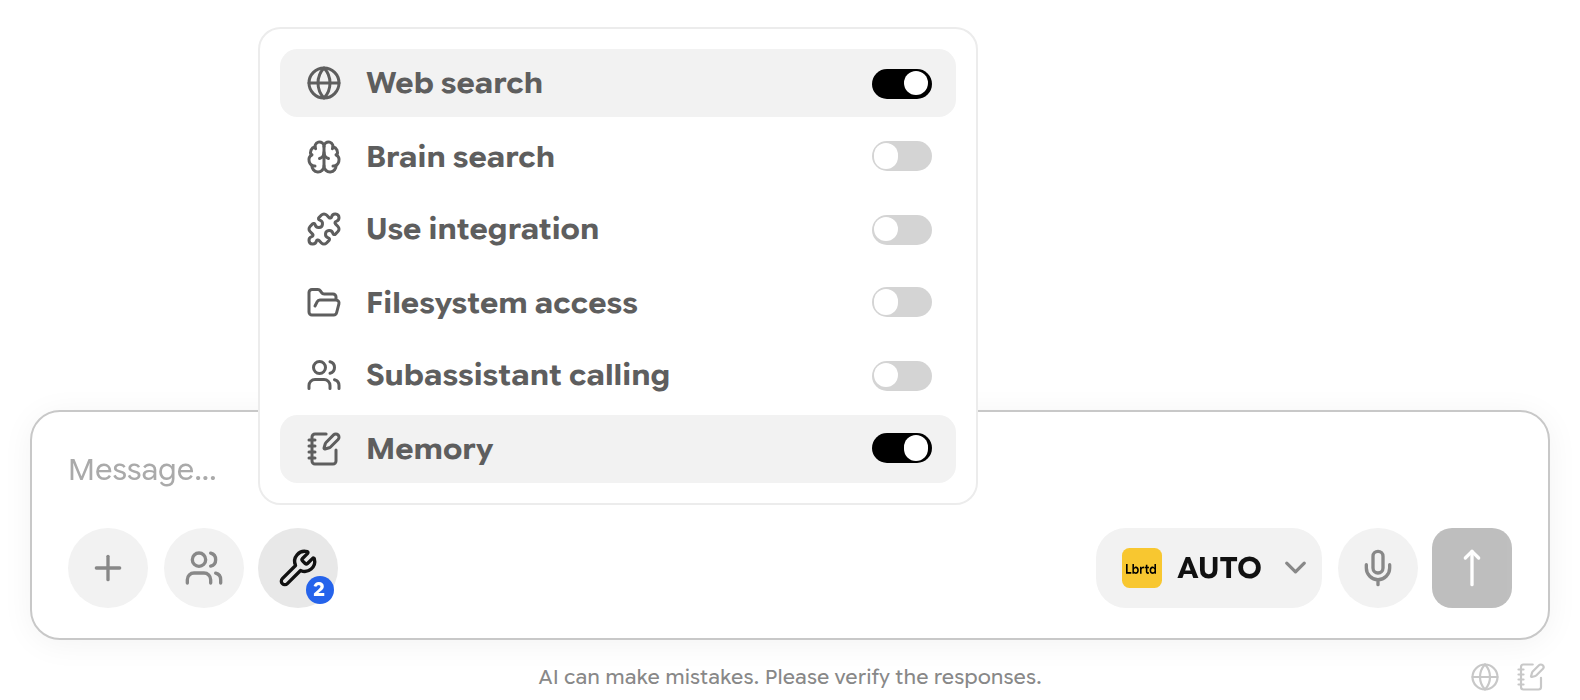
The Tools menu.
| Tool | What it does |
|---|---|
| Web search | Looks up current information and answers with source links |
| Brain search | Searches one of your knowledge bases (see section 7) |
| Use integration | Lets the AI read or act in a connected app. Actions that change data ask for your approval |
| Filesystem access | Lets the AI list, read and write files in this workspace's My Drive |
| Subassistant calling | Lets the AI hand a small task to a helper assistant |
| Memory | Adds your saved memory notes to free-chat messages |
Important: With Filesystem access on, the AI can change or delete files in My Drive. Turn it on only when you want that.
With Web search on, the reply cites its sources. Expand Worked for… to see the searches.
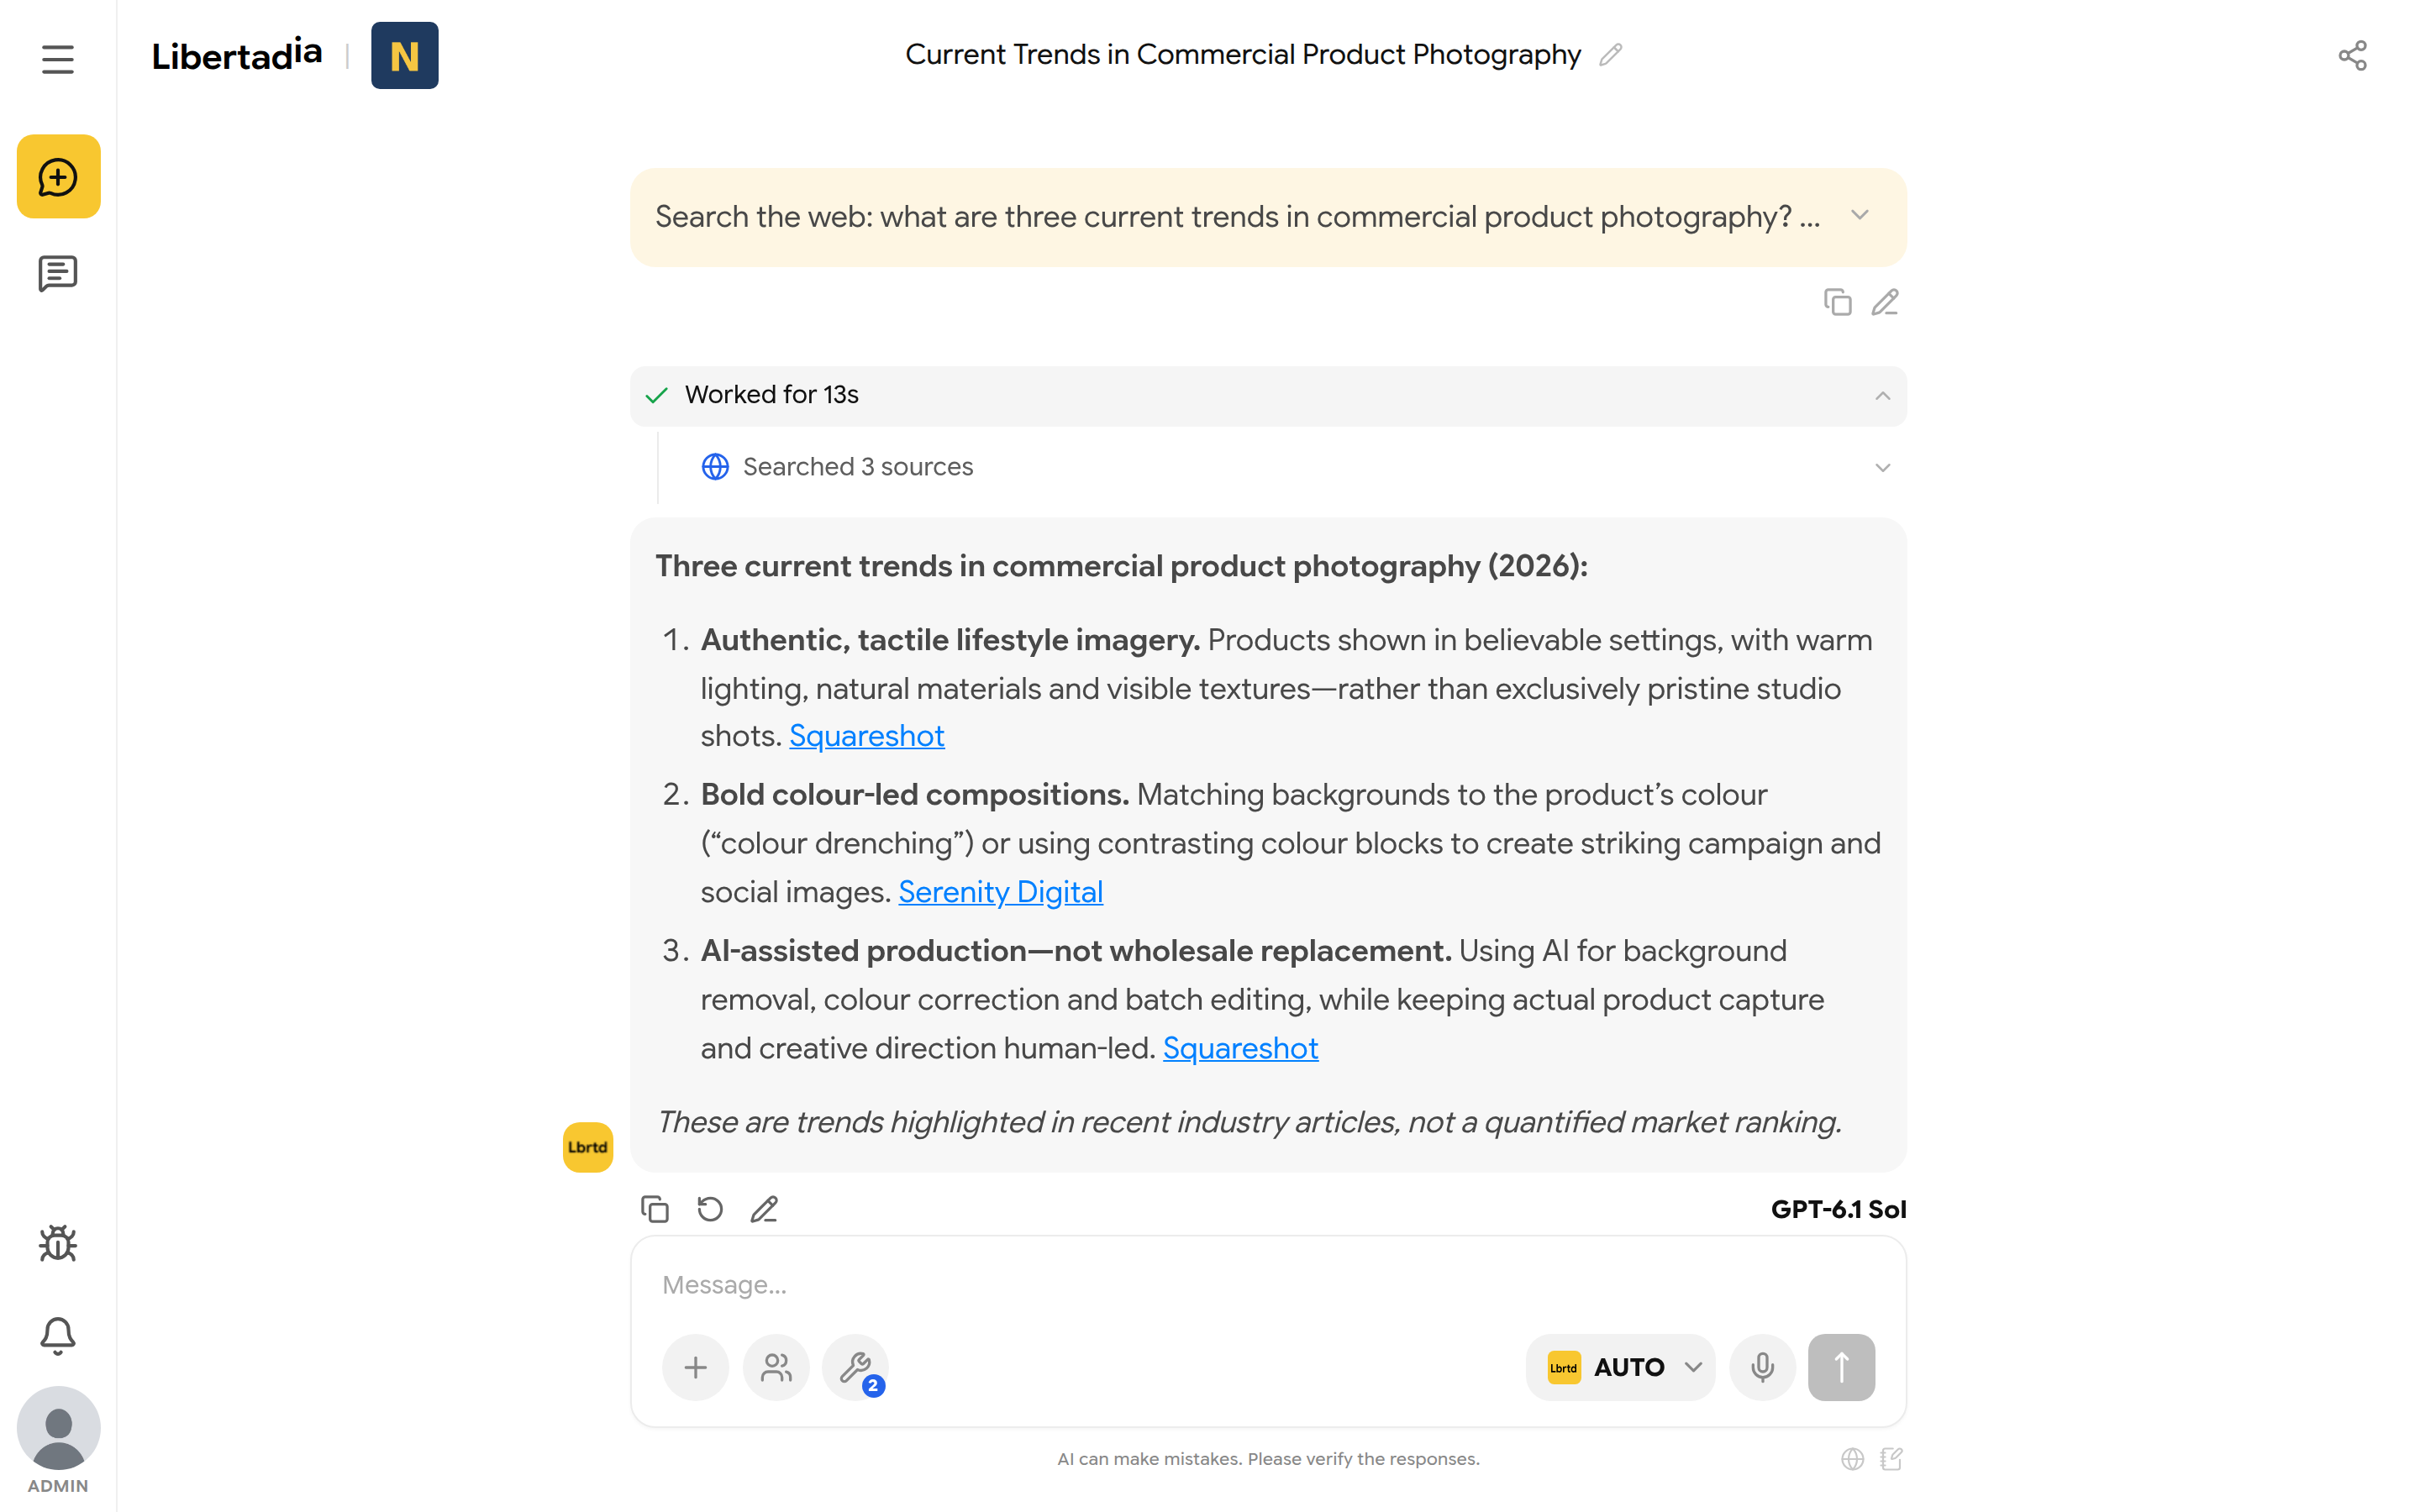
A web search answer with linked sources.
Run deep research
Research plans a multi-step web investigation and returns a cited report. It takes longer and costs more than a single web search.
- Click + and choose Research.
- Set the options in the purple bar: number of topics, depth, and whether the AI may ask questions.
- Describe what to research and send.
- If the AI asks clarifying questions, choose an answer or type your own, then click Next, and finally Continue research.
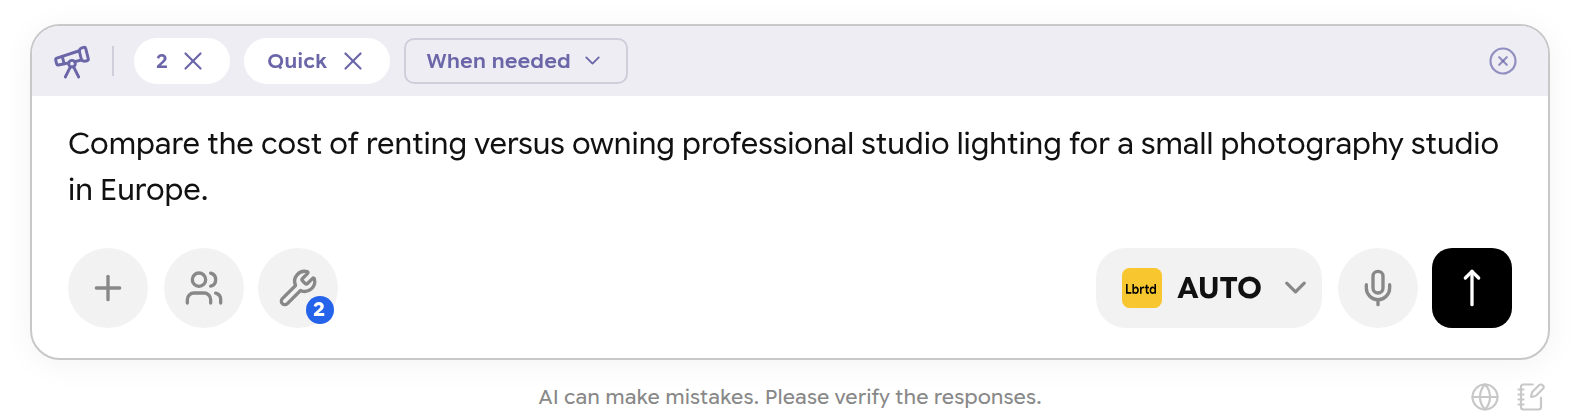
Research mode in the composer.
| Option | Choices | Effect |
|---|---|---|
| Topics | 2–5 | How many parallel topics are covered |
| Depth | Quick, Standard, Deep | How much searching each topic gets. Deeper costs more |
| Questions | When needed, Always ask, Skip | Whether the AI pauses to clarify first |
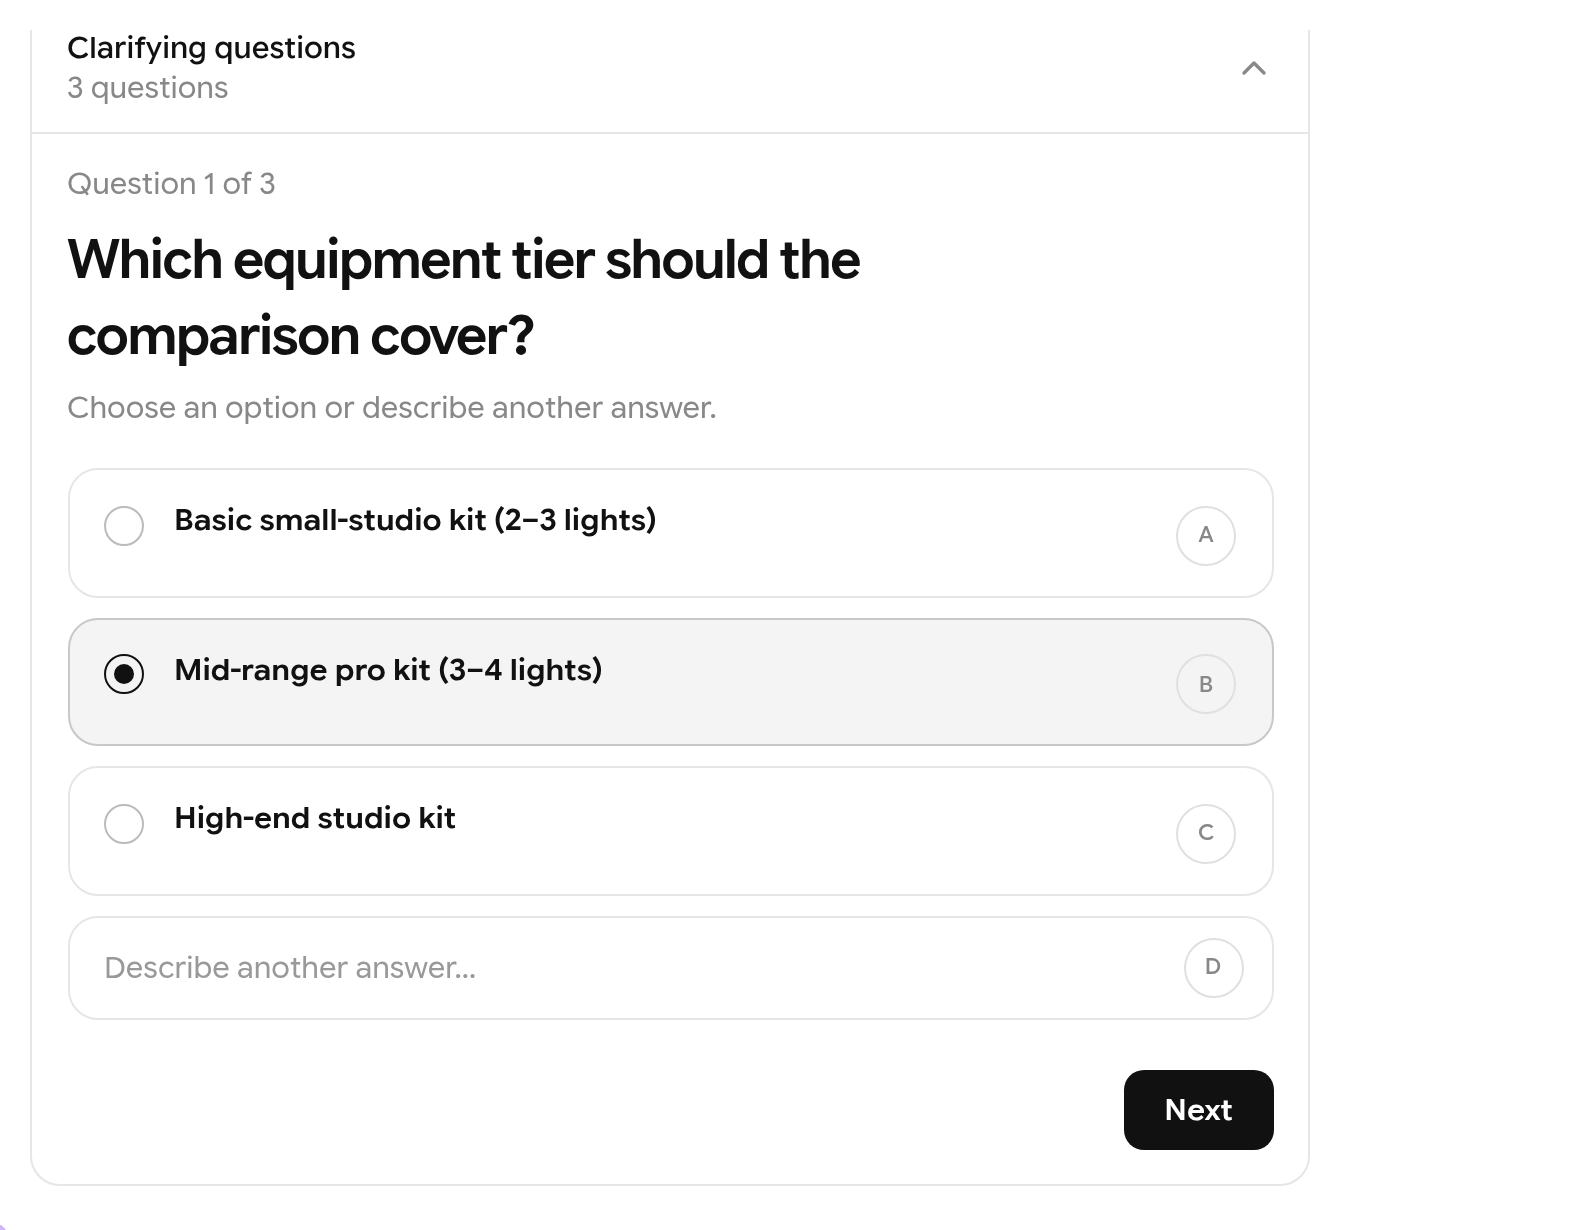
Research can ask clarifying questions before it starts.
When the research finishes, you get a structured report with a summary, sections, sources and a recommendation.
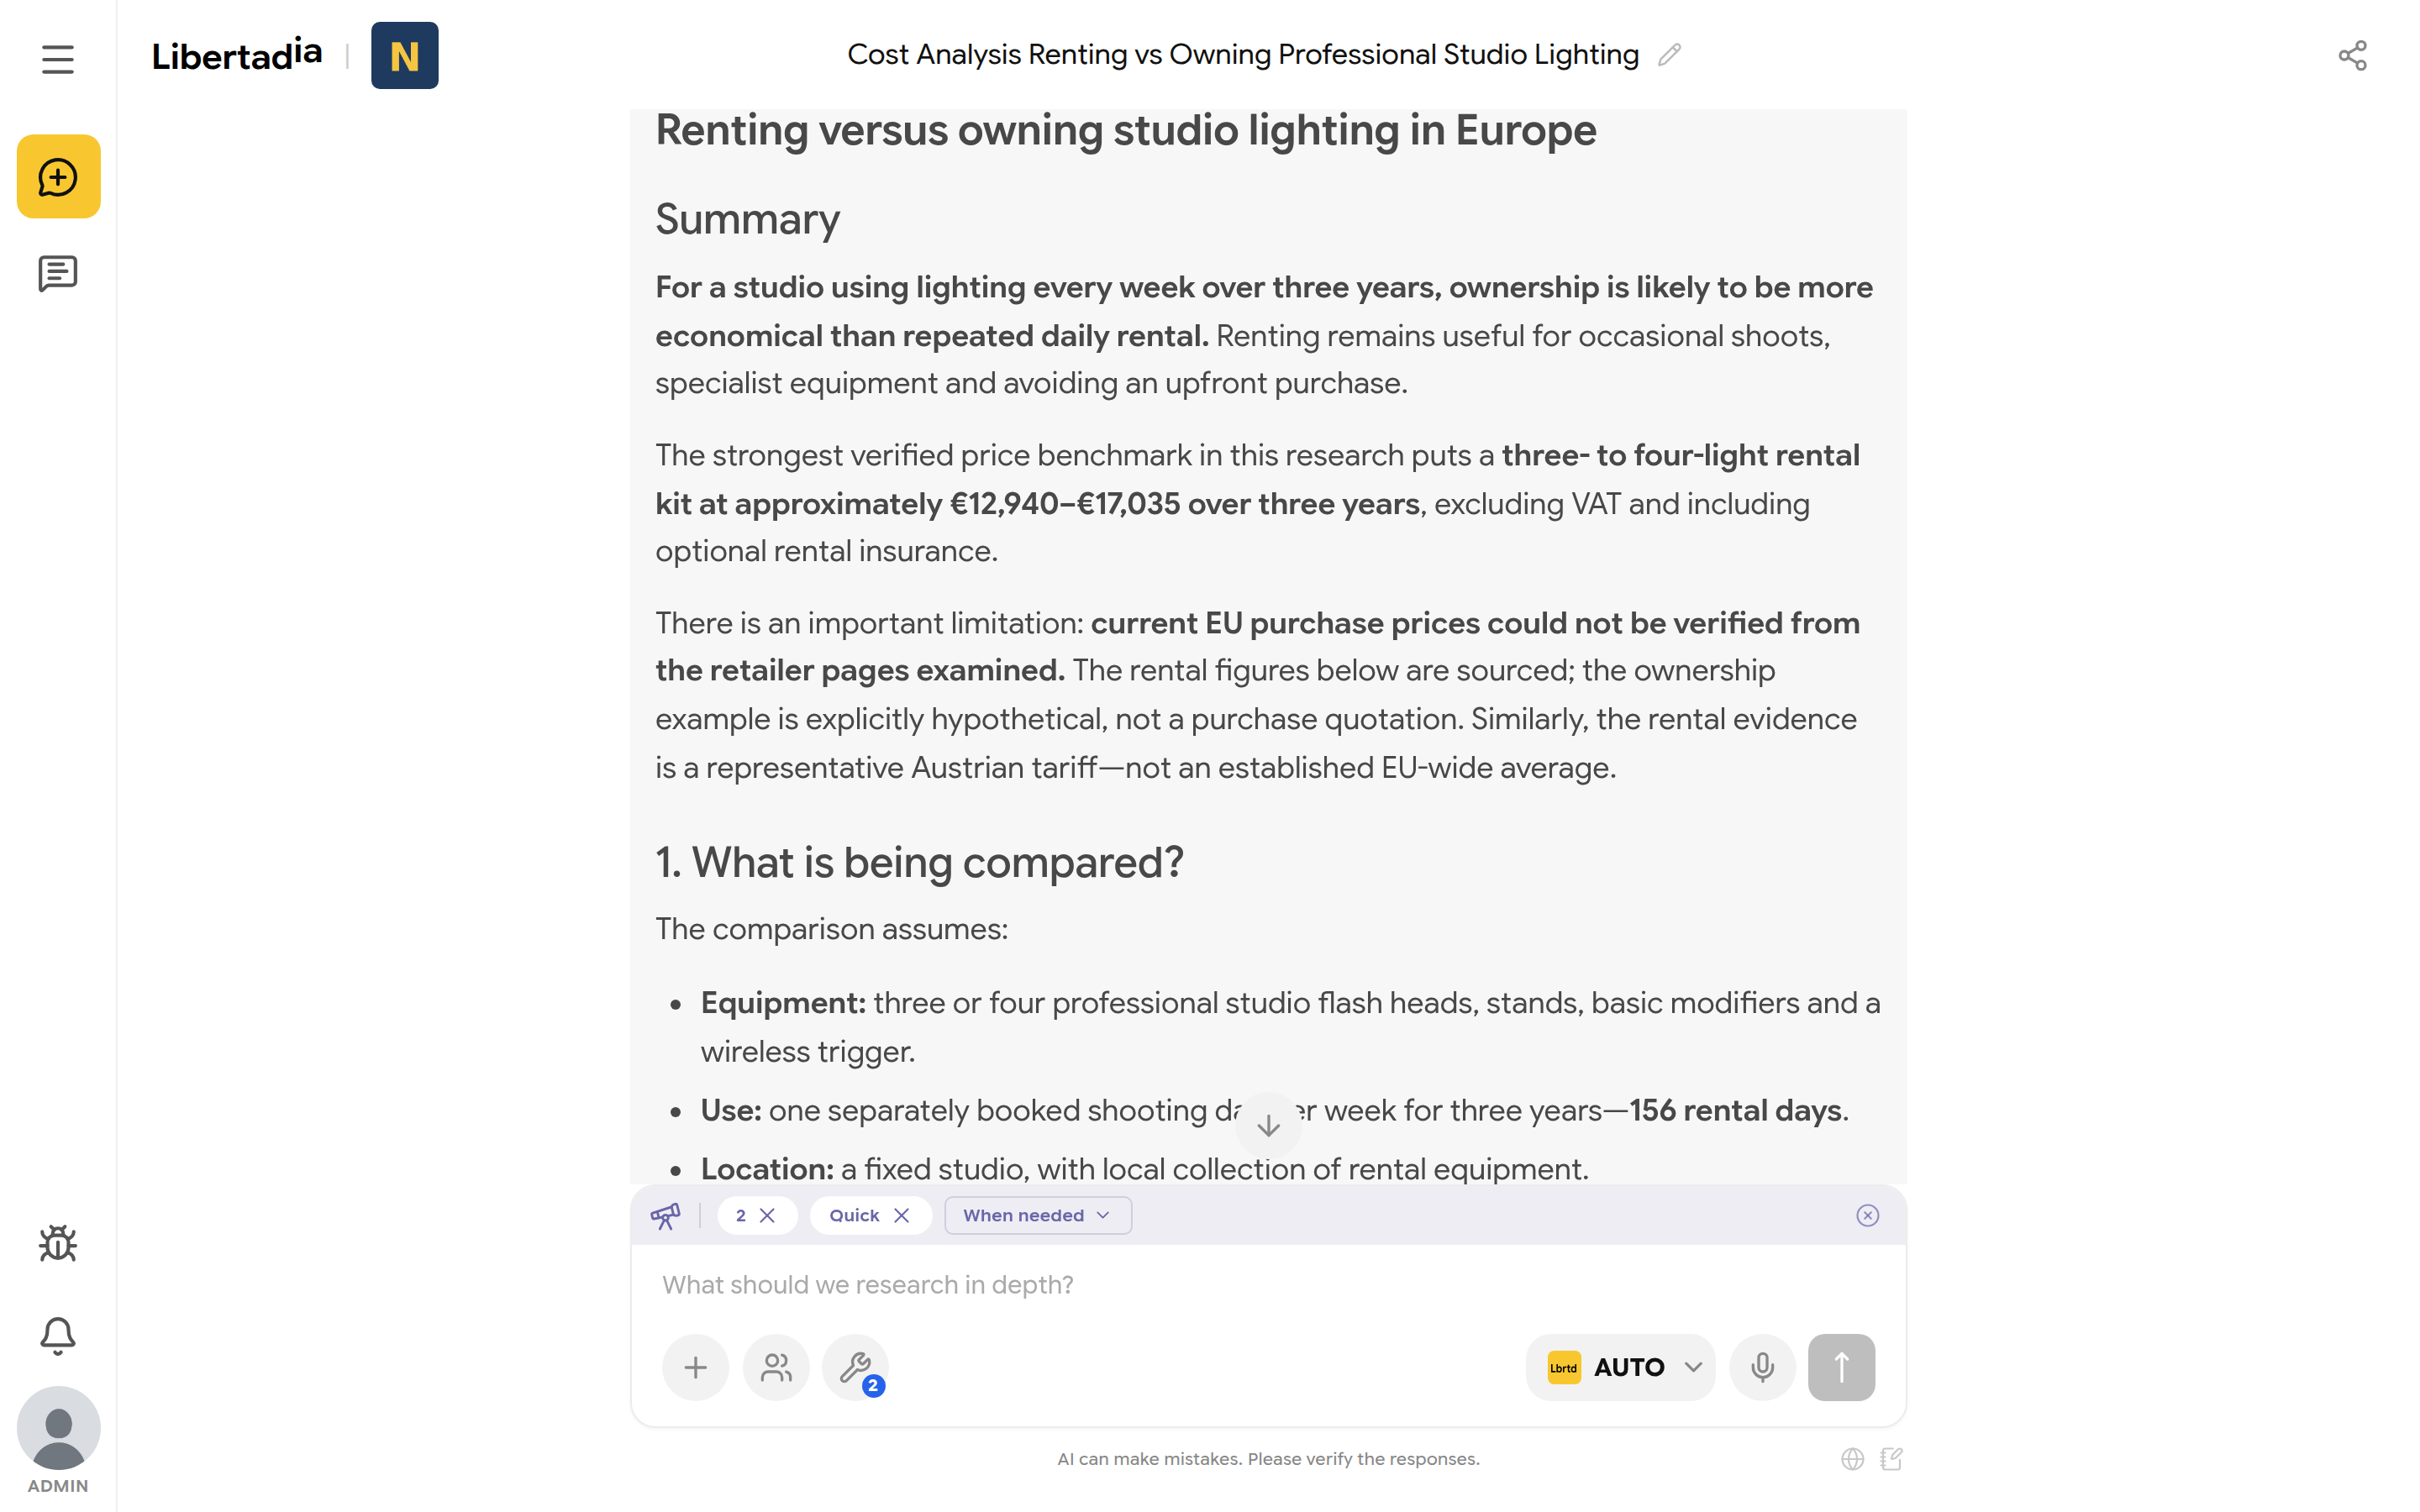
A finished research report.
Leave research mode with Exit research mode (the × on the purple bar).
Attach files
Click + → Upload file, drag files onto the composer, or paste an image. You can send an image without any text.
| Type | Formats | Per message | Max size |
|---|---|---|---|
| Images | JPEG, PNG, WebP, GIF, SVG | 10 | 20 MB each |
| Videos | MP4, WebM, MOV, AVI, MKV | 10 | 50 MB each |
| Documents | PDF, DOCX, ODT, Markdown, JSON, text and code files | 20 | 512 MB each, PDFs up to 2,000 pages |
| Spreadsheets | CSV, TSV, XLSX, XLS, ODS | counted with documents | 50 MB each |
Note: Very large documents are searched rather than read whole. For long files, pick a model that supports tools and has a large context.
Hide sensitive data before sending a document
When you attach documents, Libertadia asks whether you want to review them first. Anything you redact is replaced with [REDACTED] and never reaches the AI model.
- Attach the document. The Redact documents? dialog opens.
- Tick the files you want to review and click Continue. To skip, leave them all unticked.
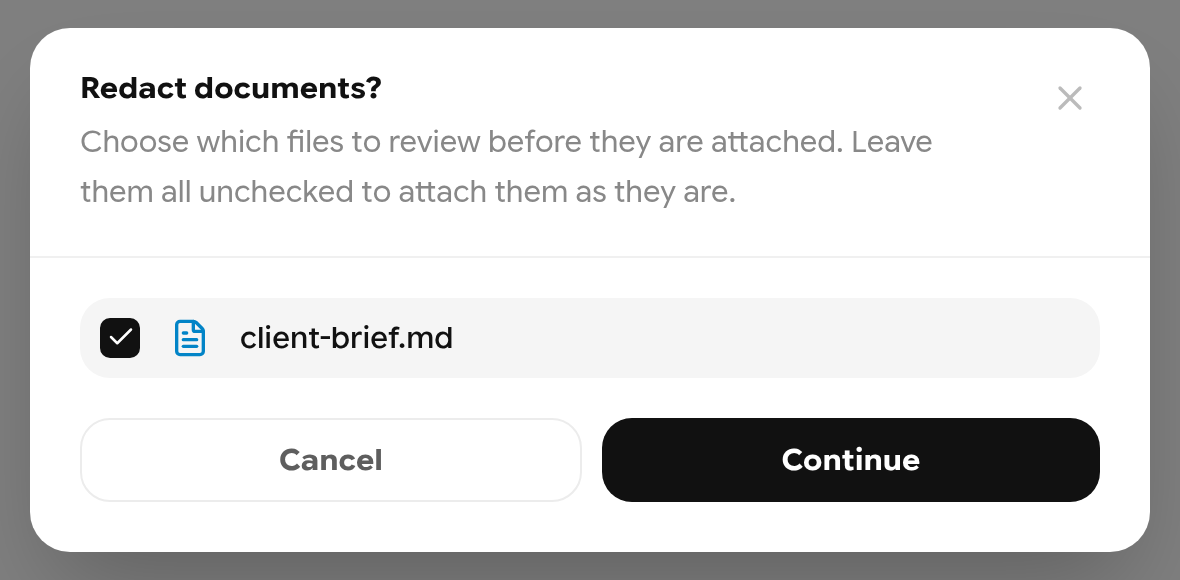
Choose which files to review.
- In the redaction view, select sensitive text and press R (or click Redact). Under Suggested, Libertadia lists likely personal data such as emails, phone numbers and IBANs; click All to redact them at once.
- Use the search box and the filters (Email, Phone, IBAN, ID, Card, Secrets) to find more. Click a black mark to restore it. Ctrl + Z undoes.
- Click Attach with N redactions, or Attach without redacting to send the original.
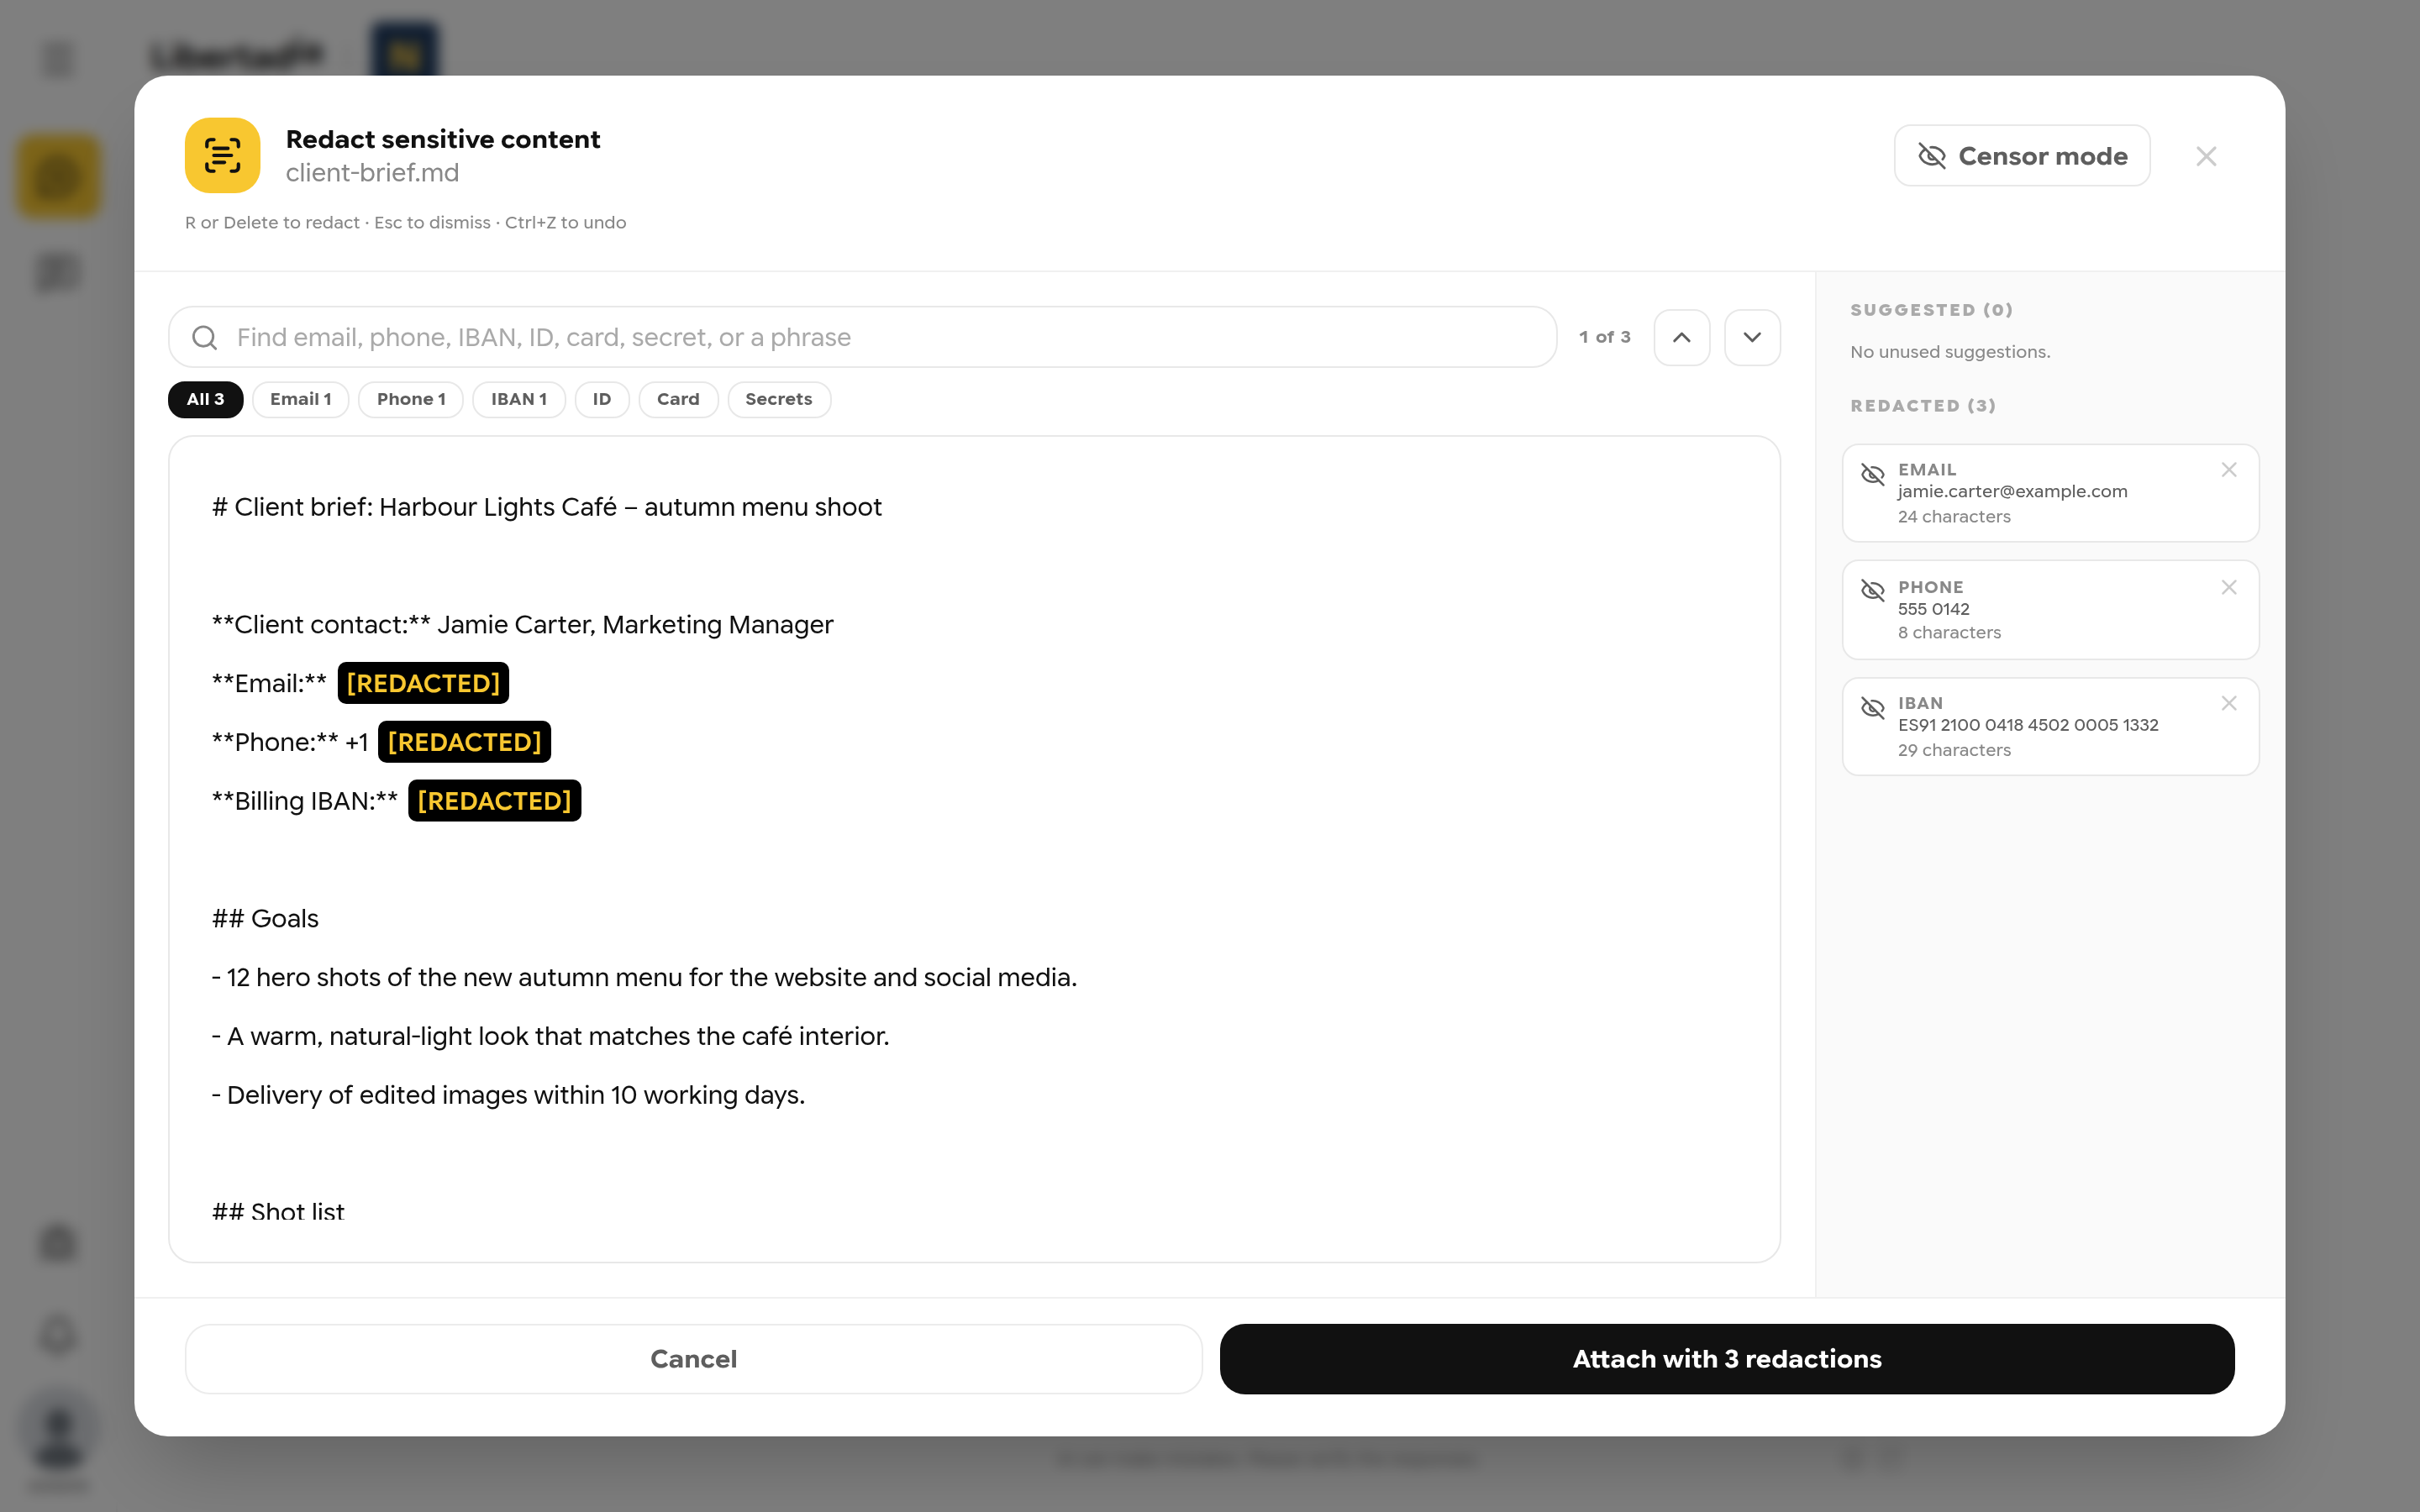
Three items redacted in a client brief.
The attached file then appears as a chip above your message. The crossed-eye icon shows it was redacted.
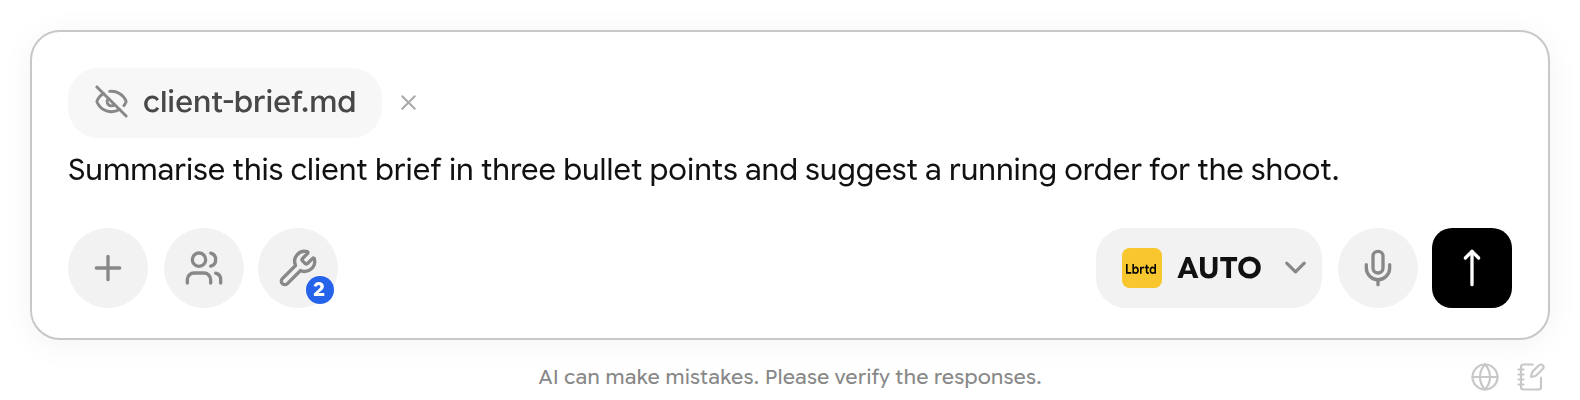
A redacted document ready to send.
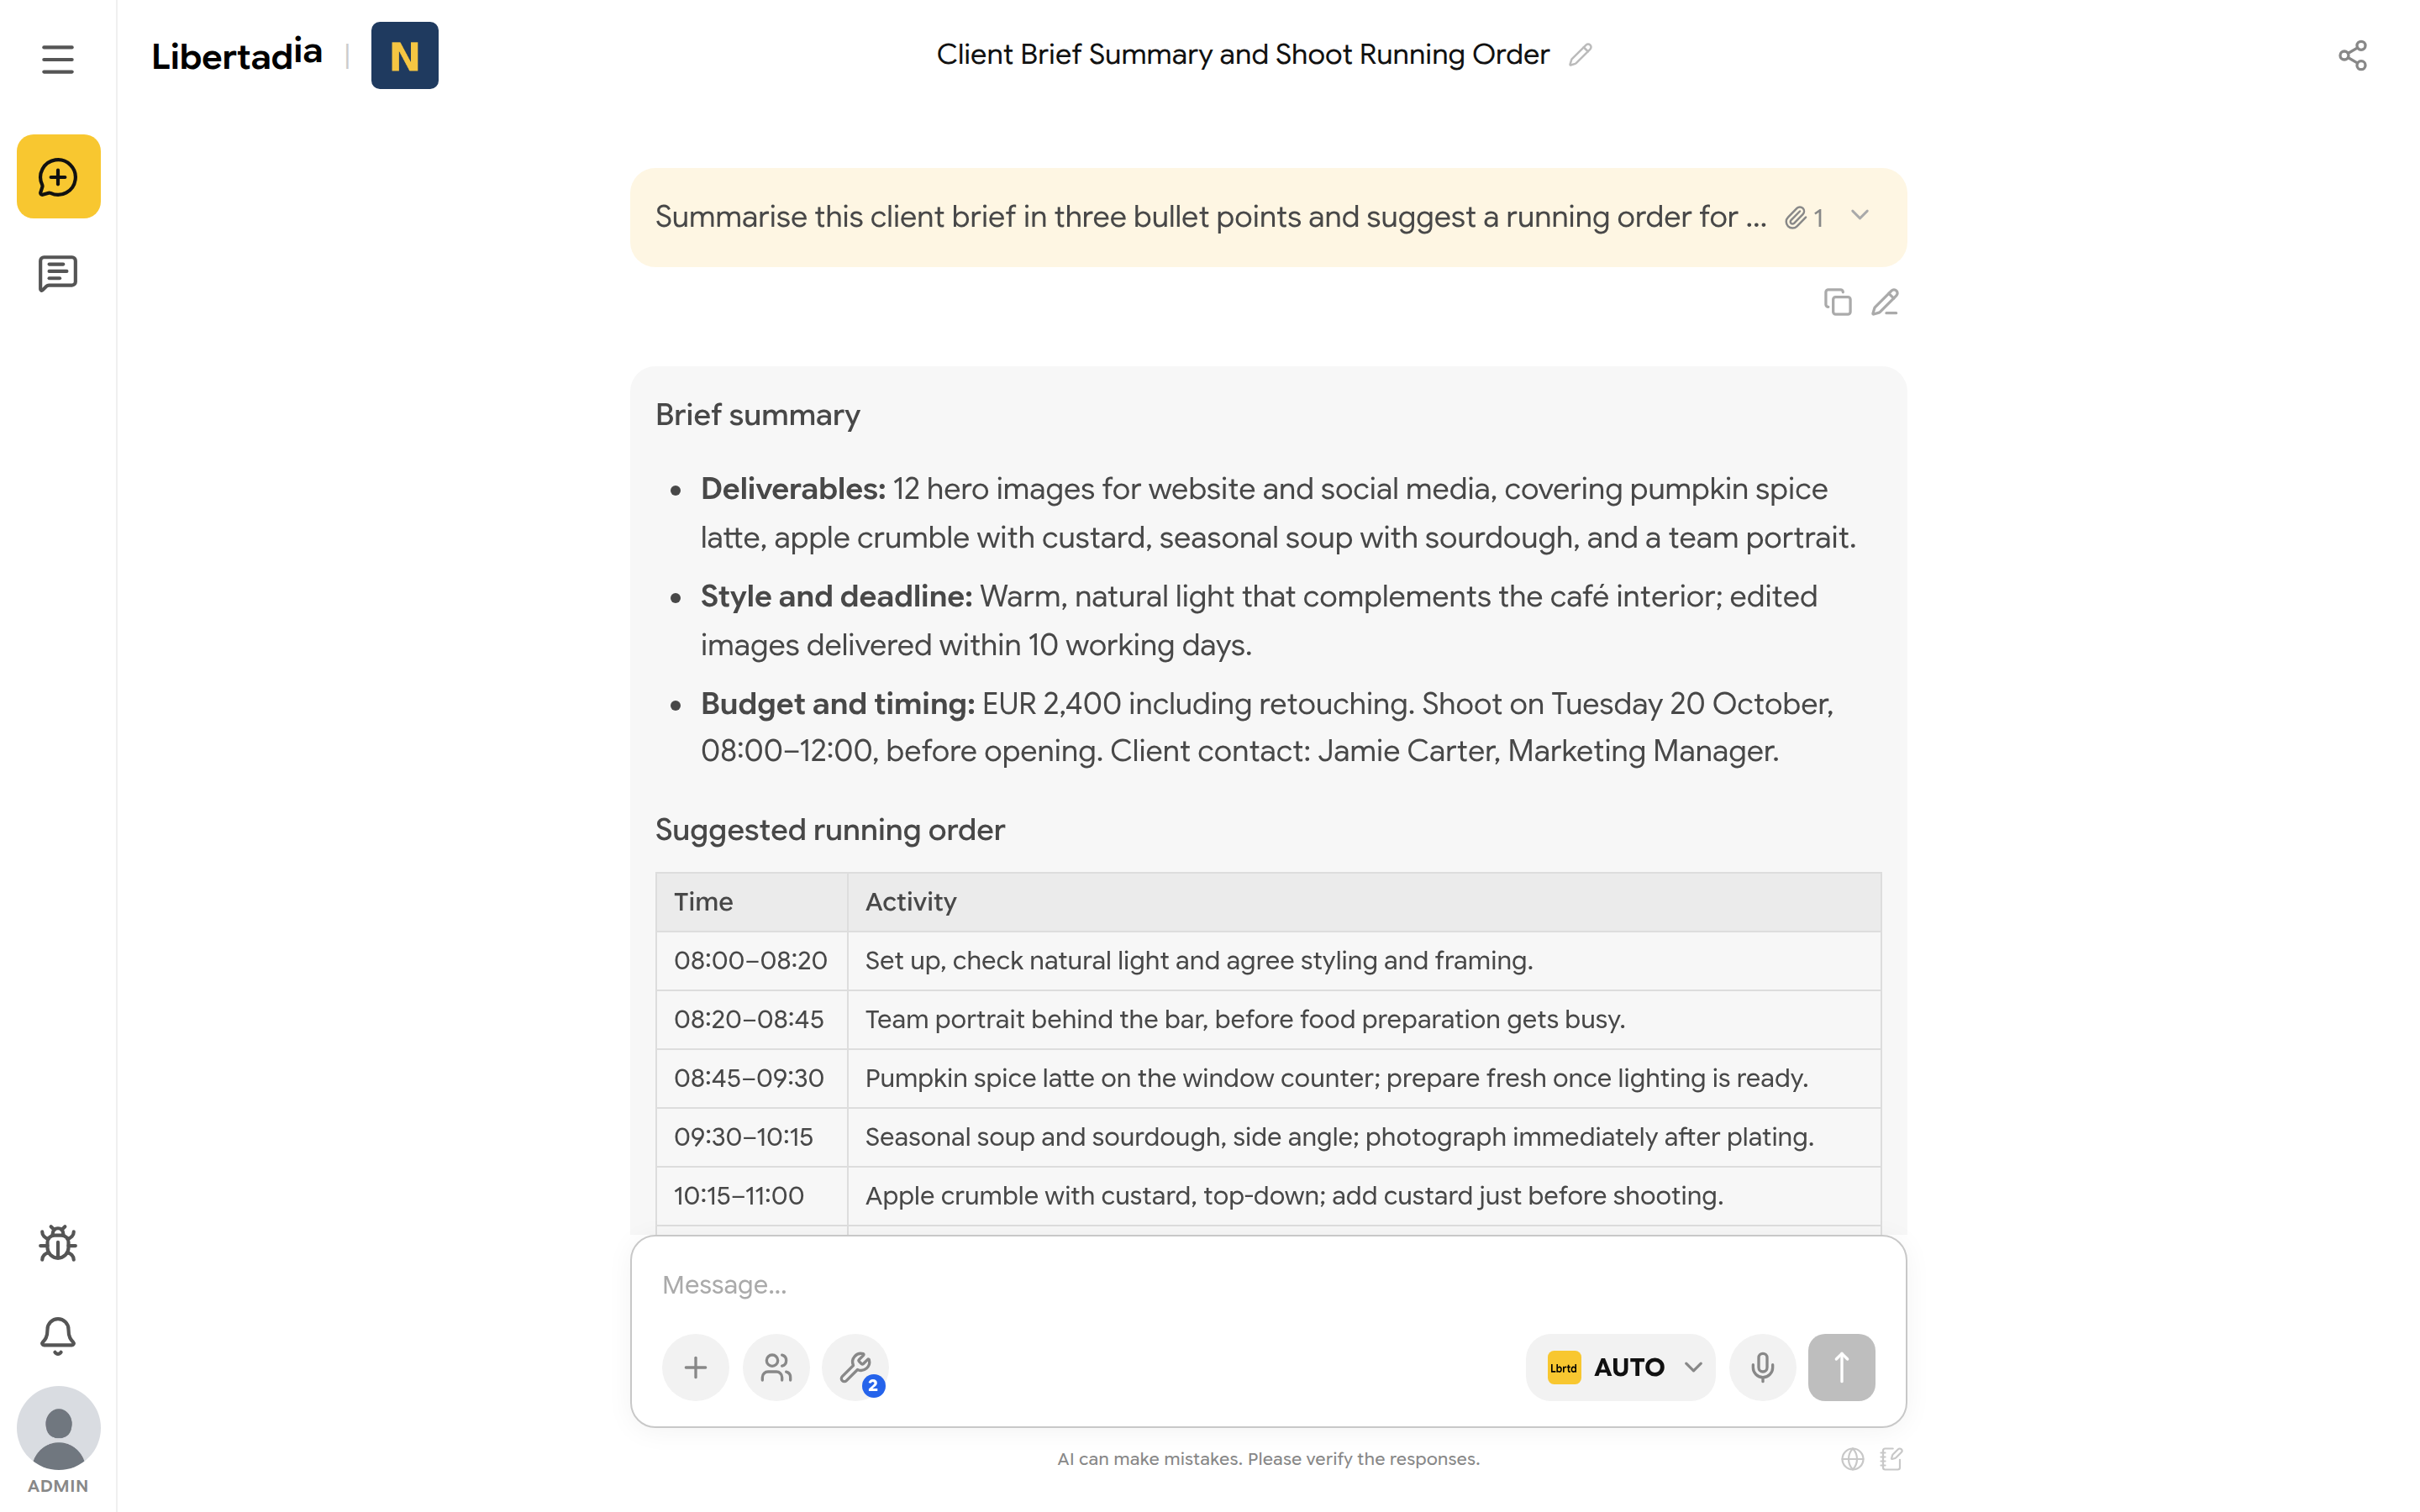
The AI works with the document without seeing the redacted data.
Message actions
Under each reply you can Copy, Regenerate or Edit. Under your own message you can copy it or edit and resend it.
Important: Editing and resending a message removes every message after it and generates a new reply.
While a reply is still being written, you can queue up to 5 more messages with Add to queue. They send in order. Click the red stop button to cancel the current reply.
Organize conversations
In the chat panel, under Chats, you can rename, pin and delete conversations, and group them into folders. Drag a chat onto a folder to move it. Mark all as read clears unread badges.
Share conversation (the share icon at the top right) works in company workspaces. Anyone in the company with the link can view the chat. If they reply, they get their own copy.
Personalize chat
In the chat panel, open Settings:
- Personalization — interface size, font, chat width and bubble colours. Saved on this device.
- Default generation — the default text, image and video model for new conversations.
- Auto LLMs — see 4.3.
Memory
Memory is a set of short notes that Libertadia adds to your free-chat messages, so you do not have to repeat your context. Agents use their own instructions instead.
- Click Tools and make sure Memory is on.
- Click the word Memory, then Manage memory.
- Click New record, give it a name and write the note. Click the pencil to edit a record, or Delete to remove it.
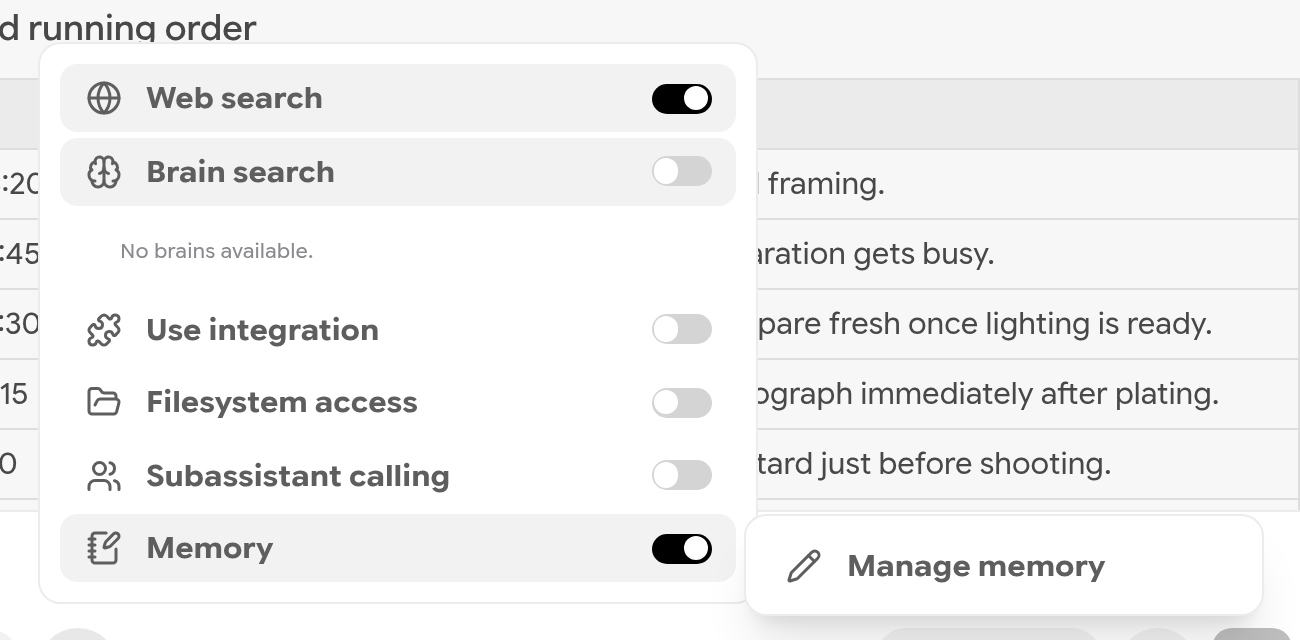
Opening the memory manager.
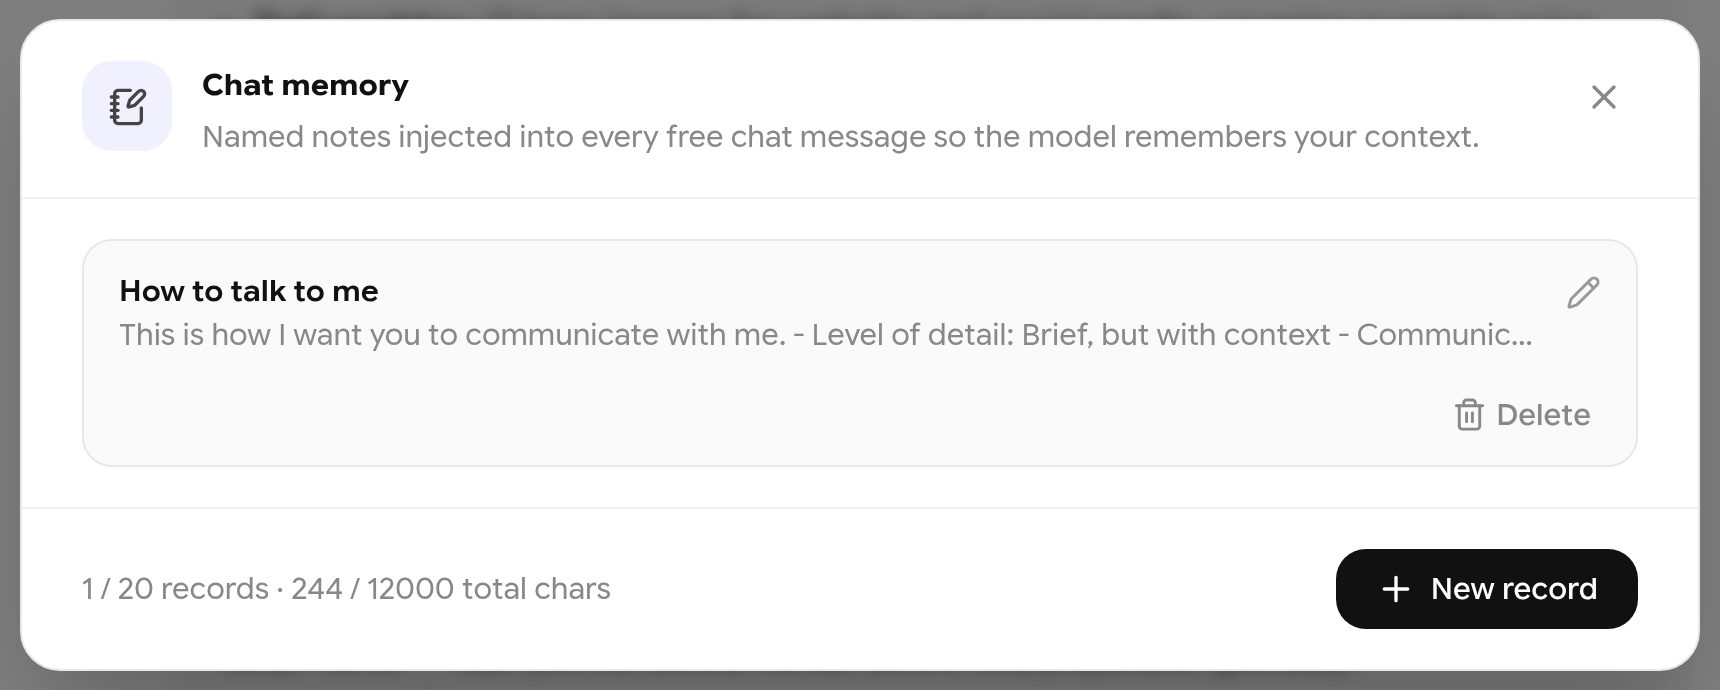
The memory manager. Records from onboarding appear here.
You can also just ask in chat: “Remember that I work in Madrid” or “Forget my old job title”. The chat shows Saved to memory when a record changes.
| Limit | Value |
|---|---|
| Records | 20 |
| Name | 80 characters |
| One record | 4,000 characters |
| All records together | 12,000 characters |
Note: In a company workspace, Company instructions set by administrators are always on, even when your Memory switch is off. You can read them but not change them.