Account & teams
Company workspace
A company workspace lets a team share agents, brains, files and a balance, with administrators controlling who can do what. On the Demo and Team plans you can create one company; Enterprise companies are set up with Libertadia.
Create a team
- Open the workspace switcher and click + Create a team.
- Enter a Name and upload a square logo (JPEG, PNG, WebP or GIF, up to 500 KB). Click Create team.
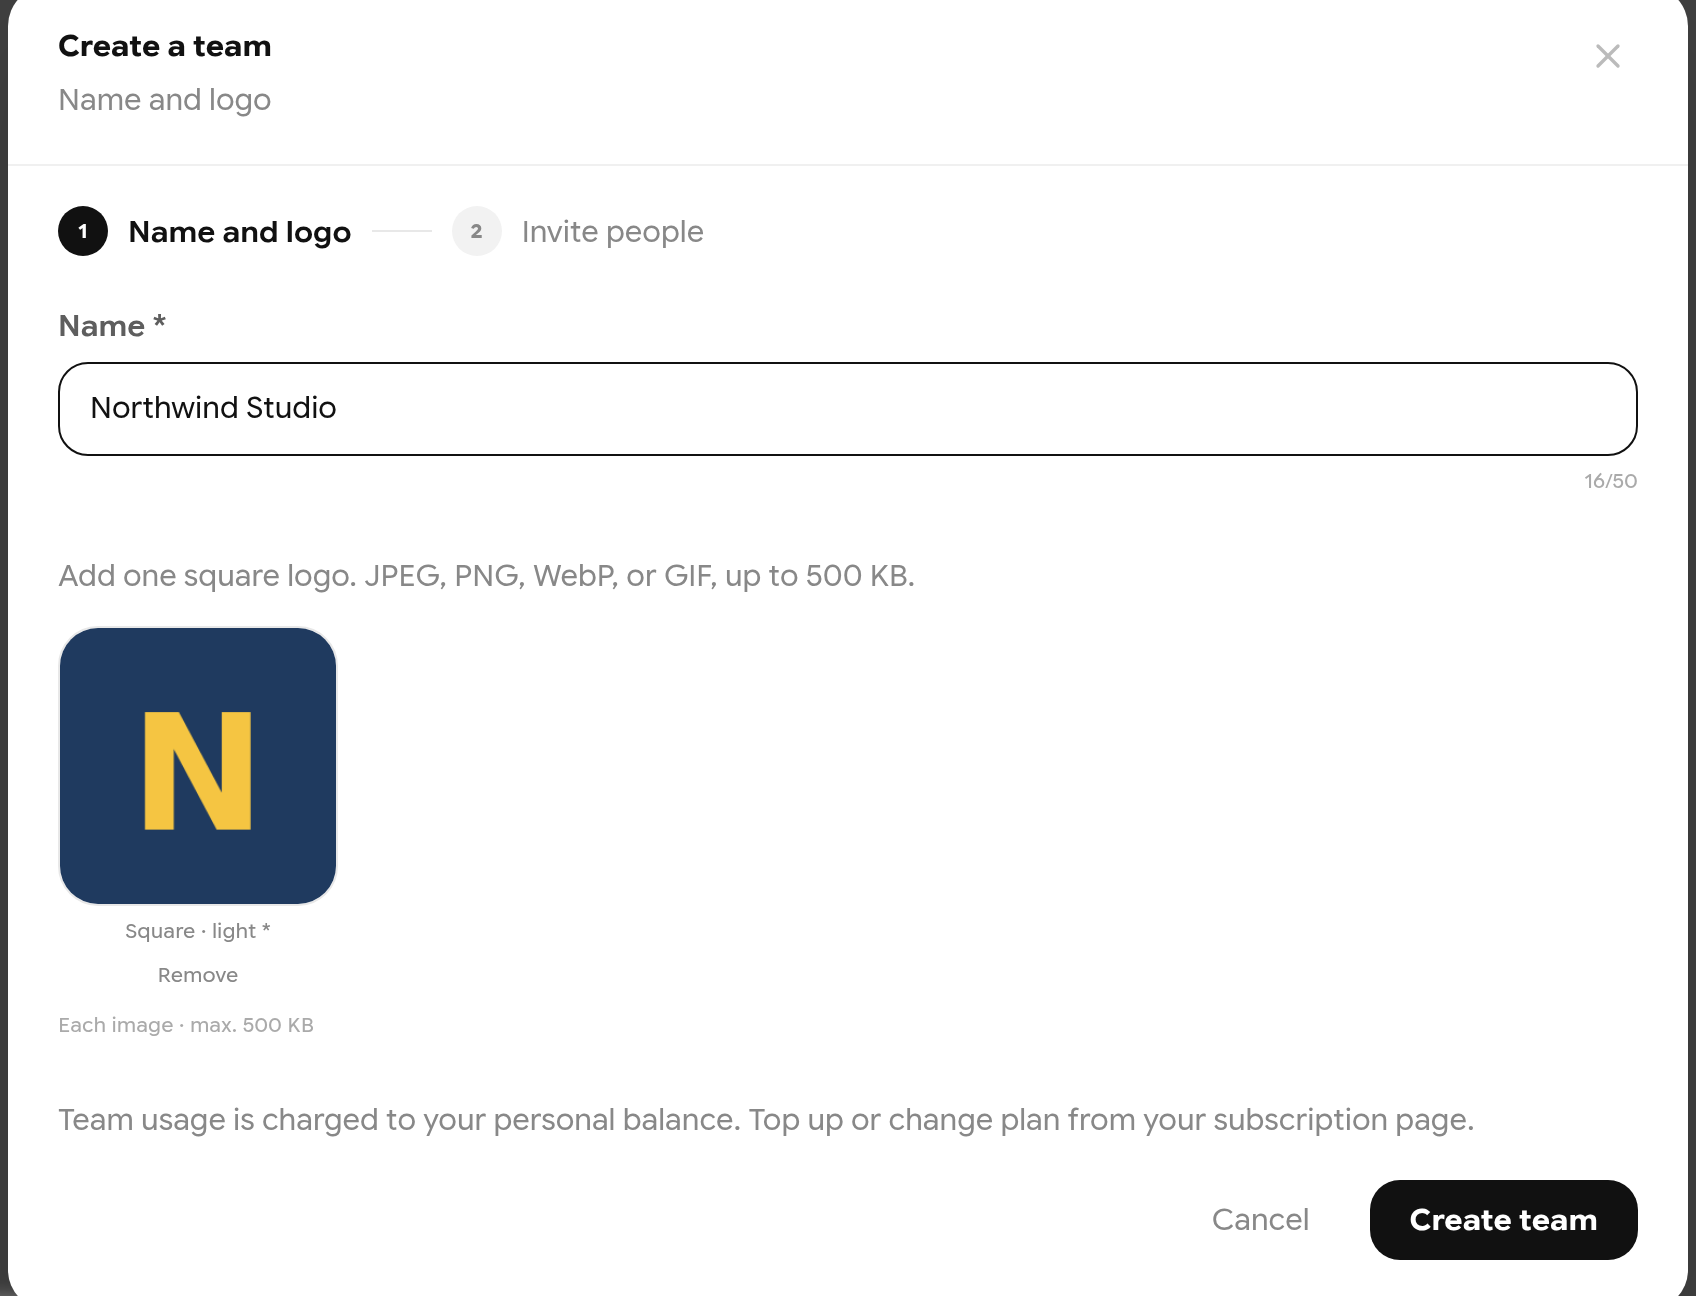
Step 1 — name and logo.
- Optionally invite people: enter their emails, choose a role (Member, Department head or Admin) and click Send invitations. Or click Skip.
- Click Open team.
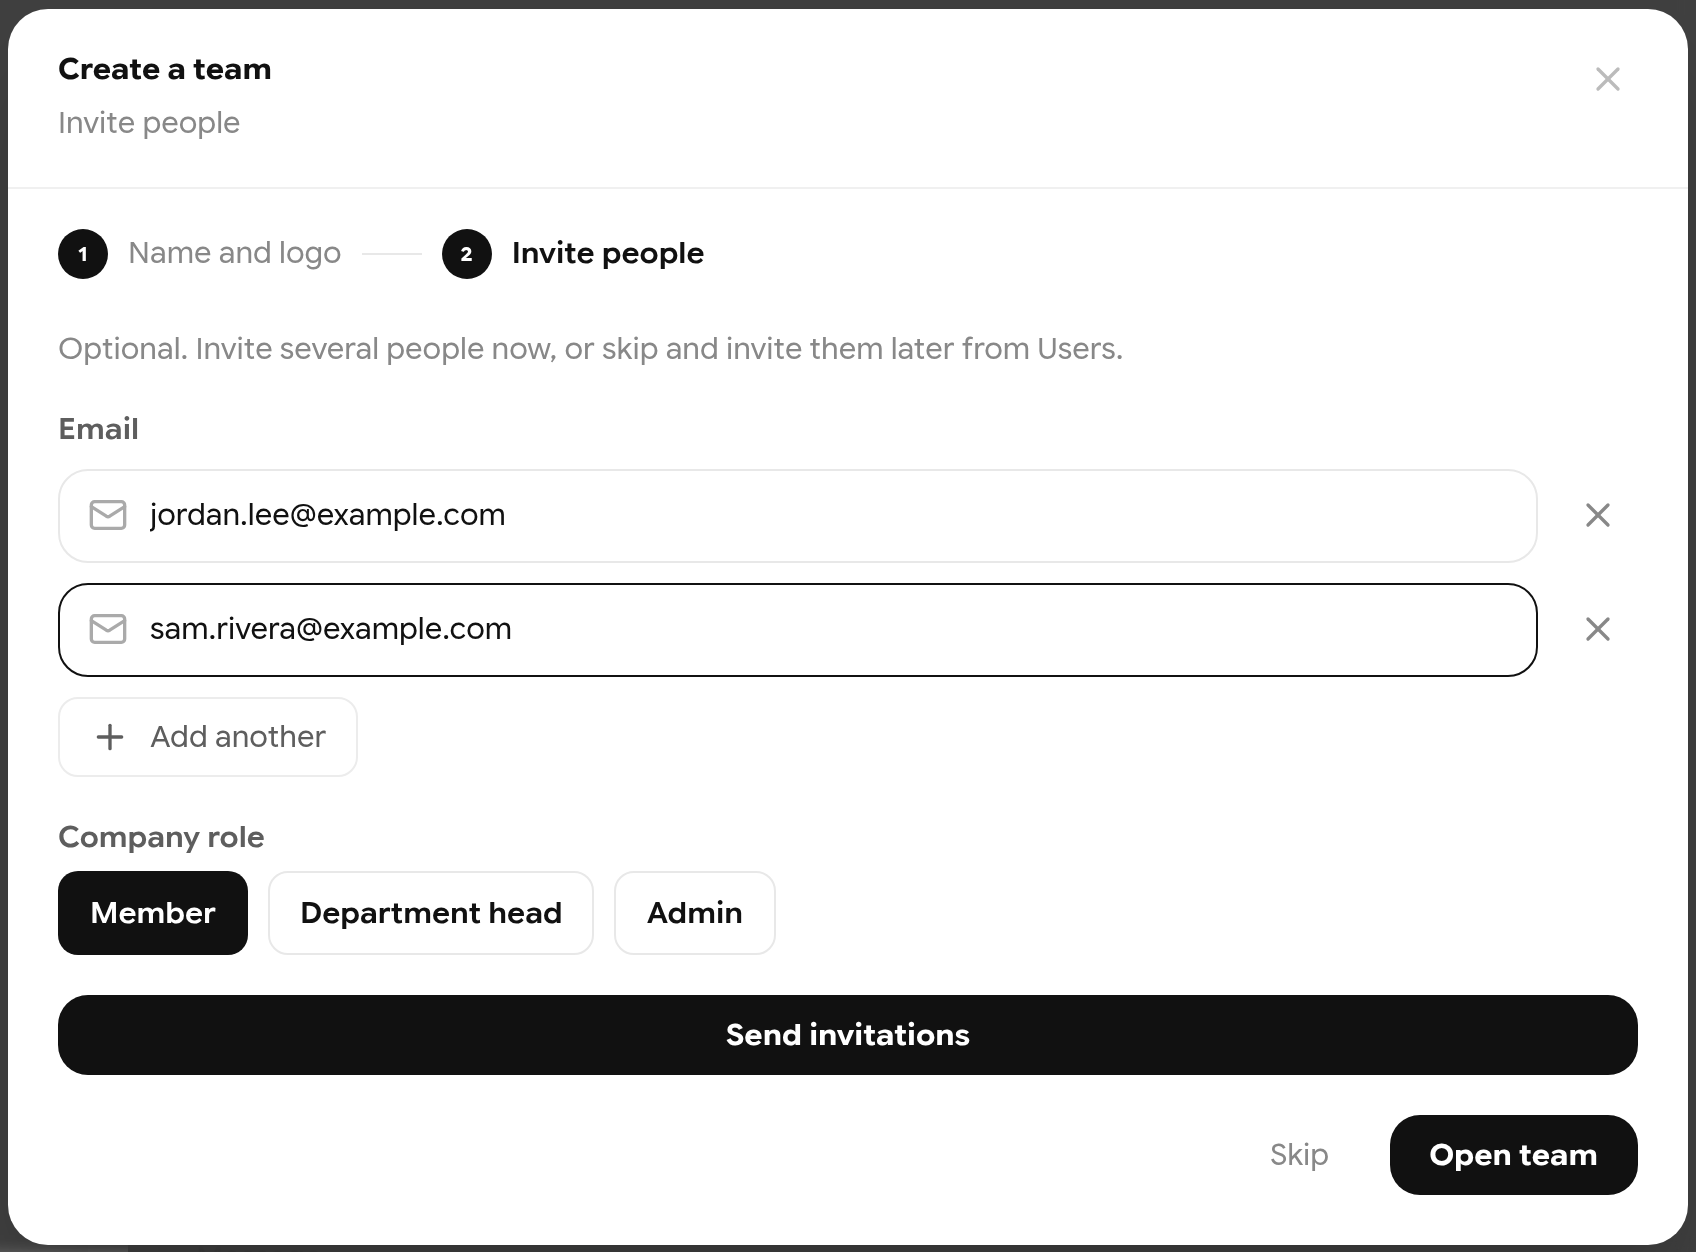
Step 2 — invite people.
Note: A Team company spends the owner's personal balance. It is paused if the owner's Demo ends or the Team plan is no longer paid; nothing is deleted.
Accept an invitation
Invited people get an email and a notification. Open Notifications, select the invitation and click Accept. Invitations expire after 7 days.
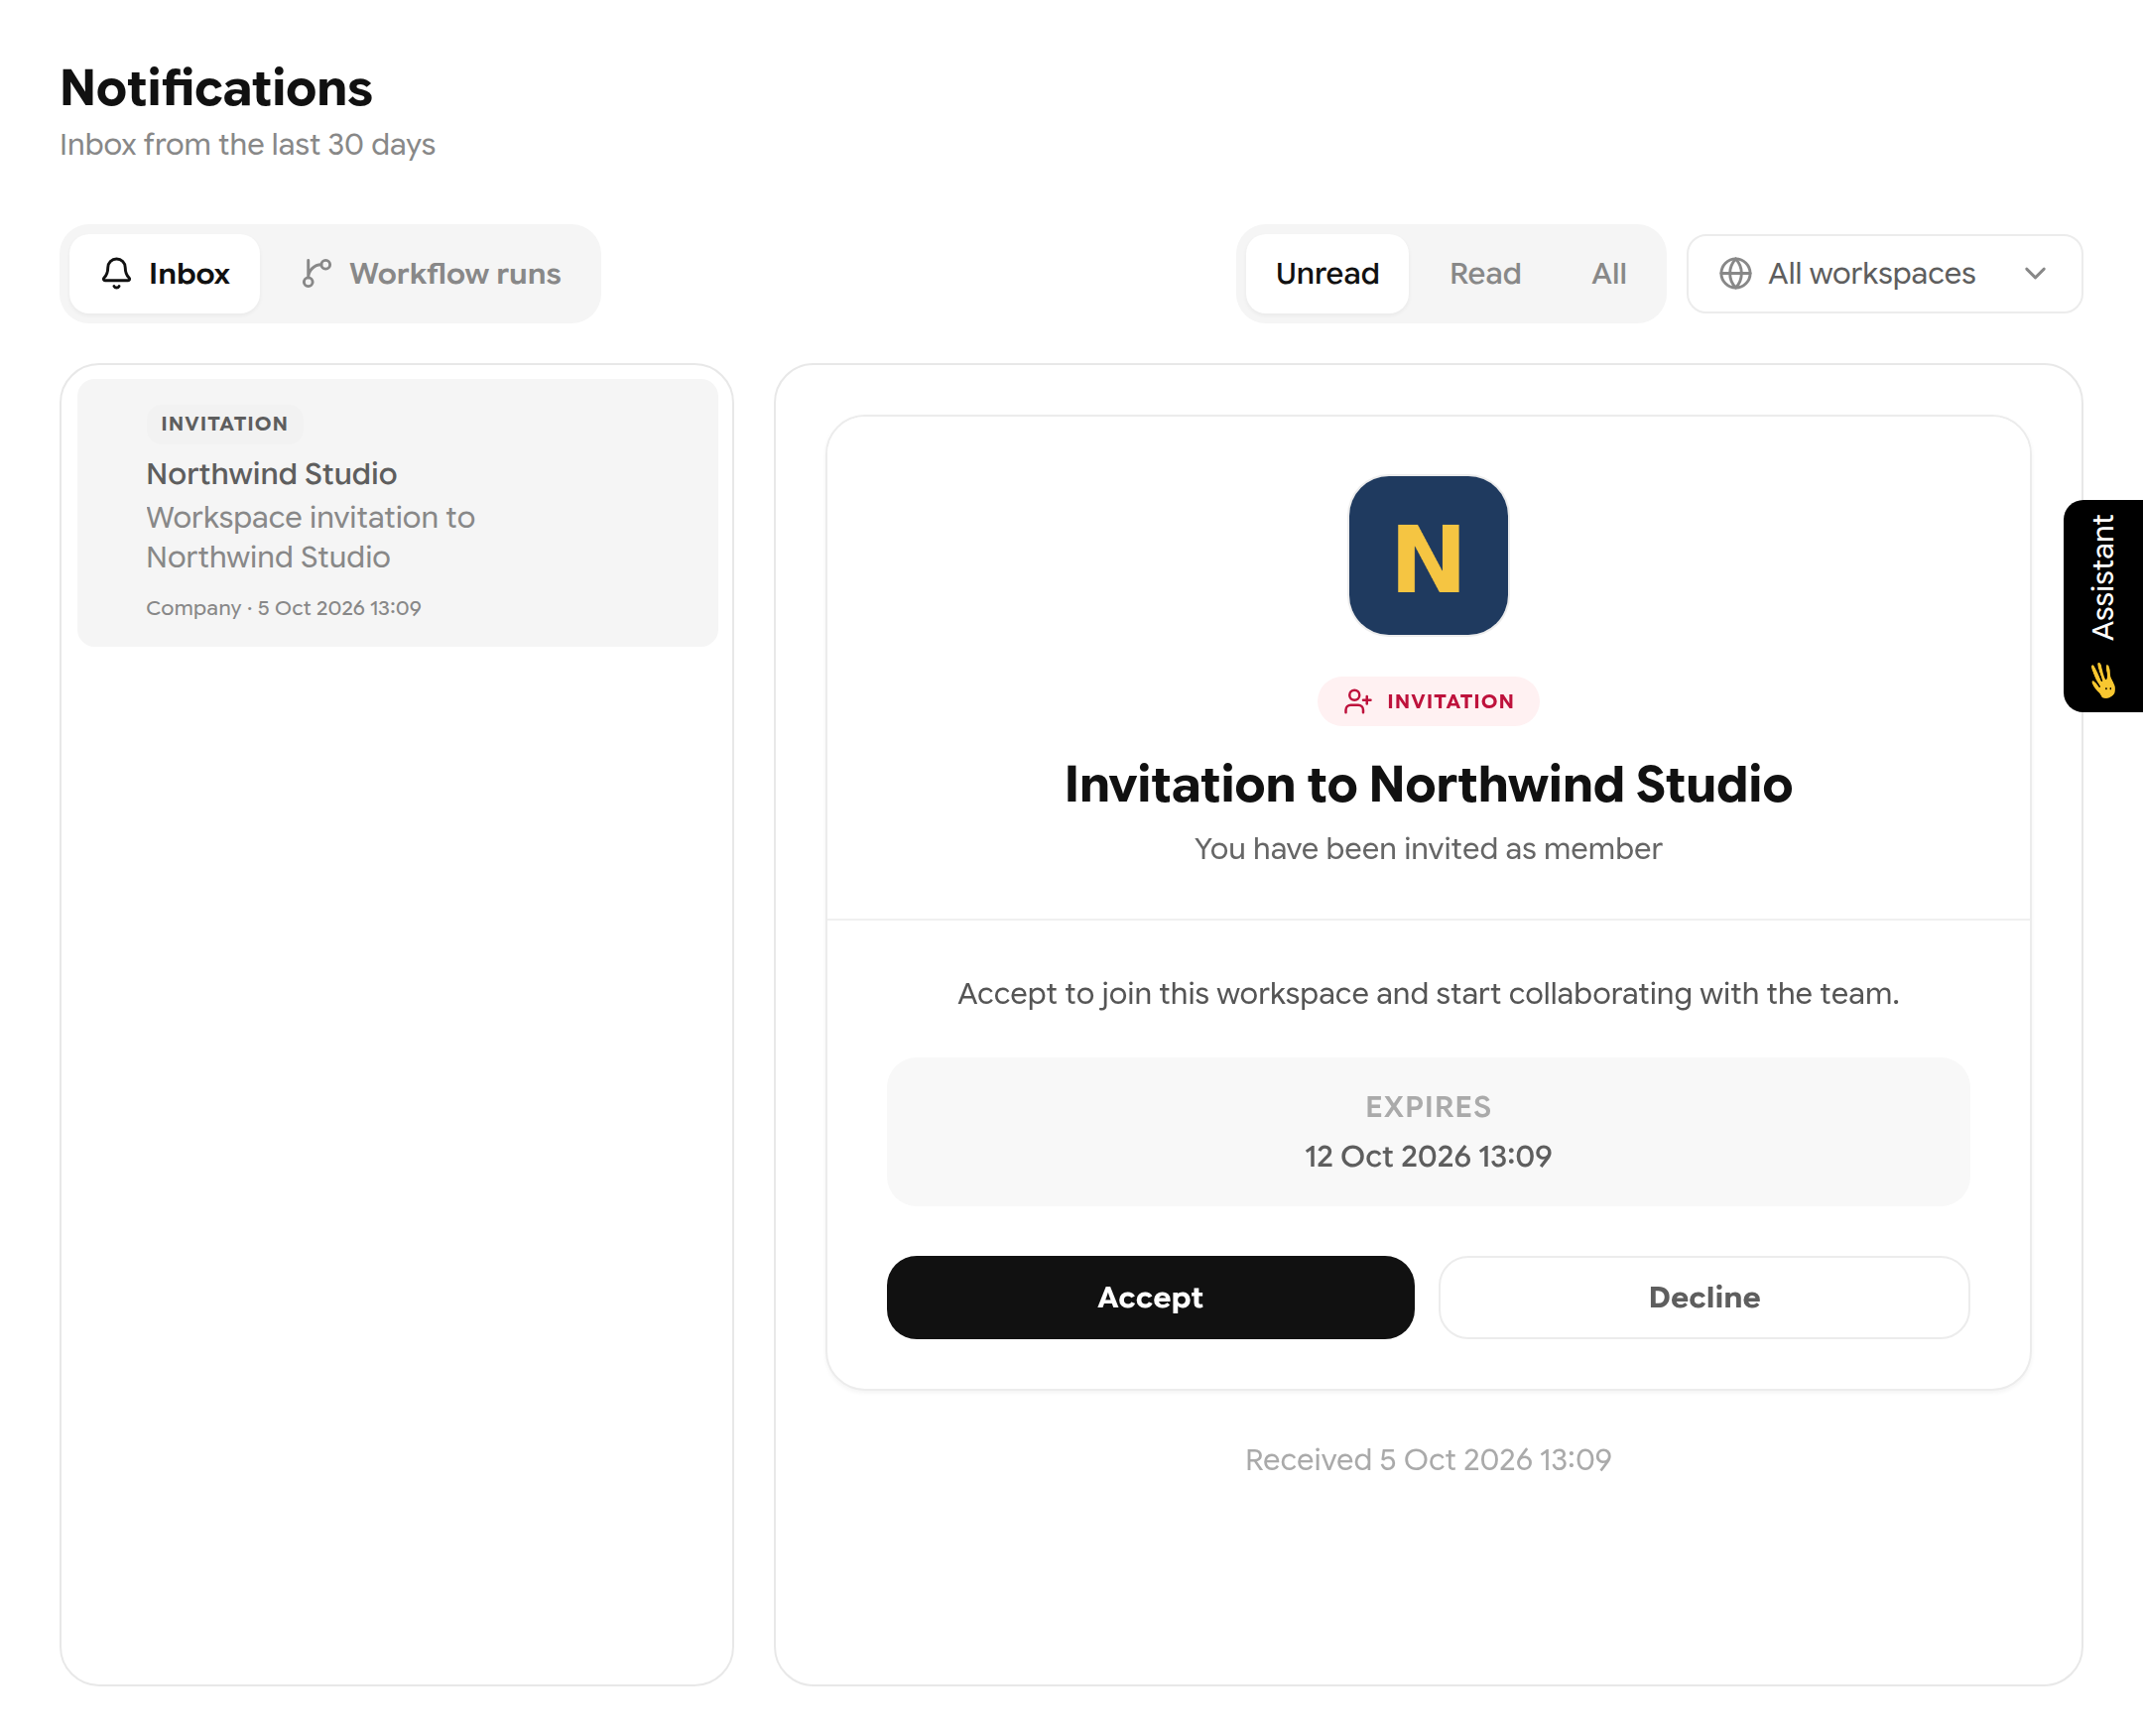
Accepting a company invitation.
What members see
Members see the company's agents, brains, integrations, automations and files, plus Company agents. They do not see the Team section. Company announcements appear as a blue Company notice banner and in Notifications.
| Personal workspace on Demo | Company workspace, member view |
|---|---|
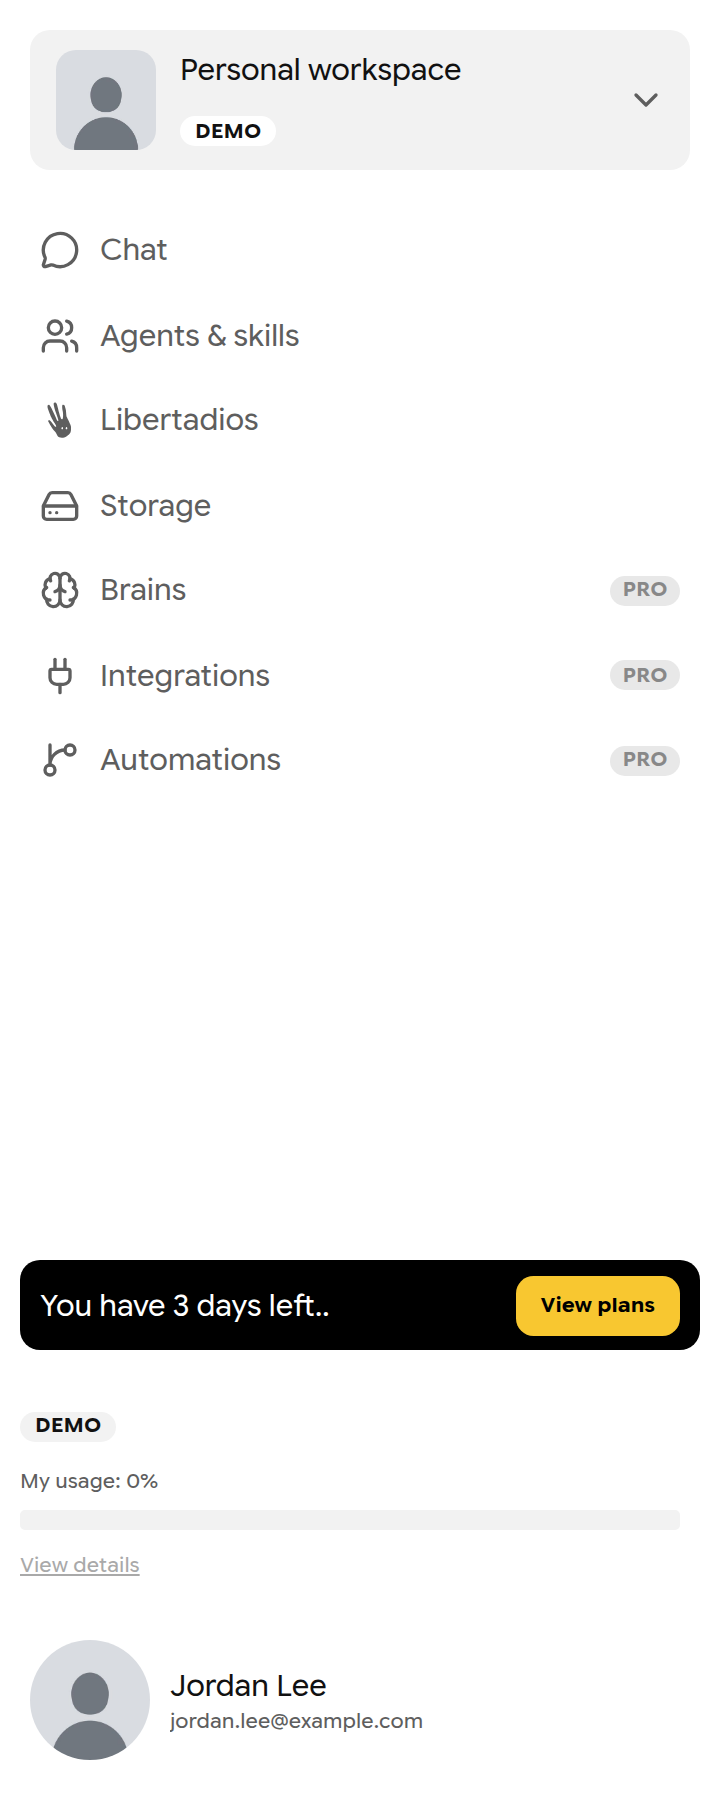 | 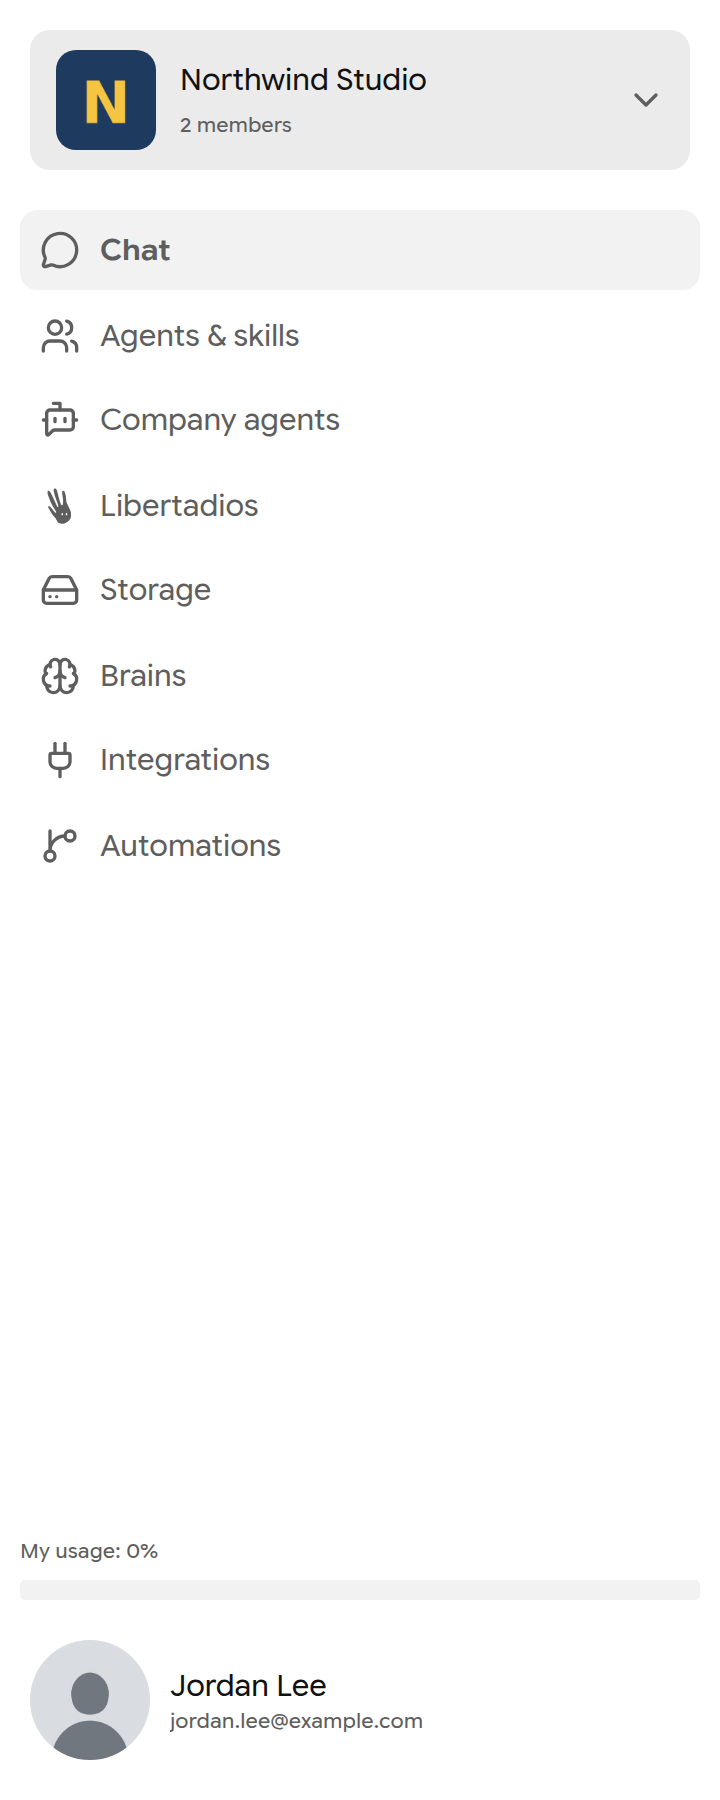 |
The same person's menu in their personal workspace and in the company.
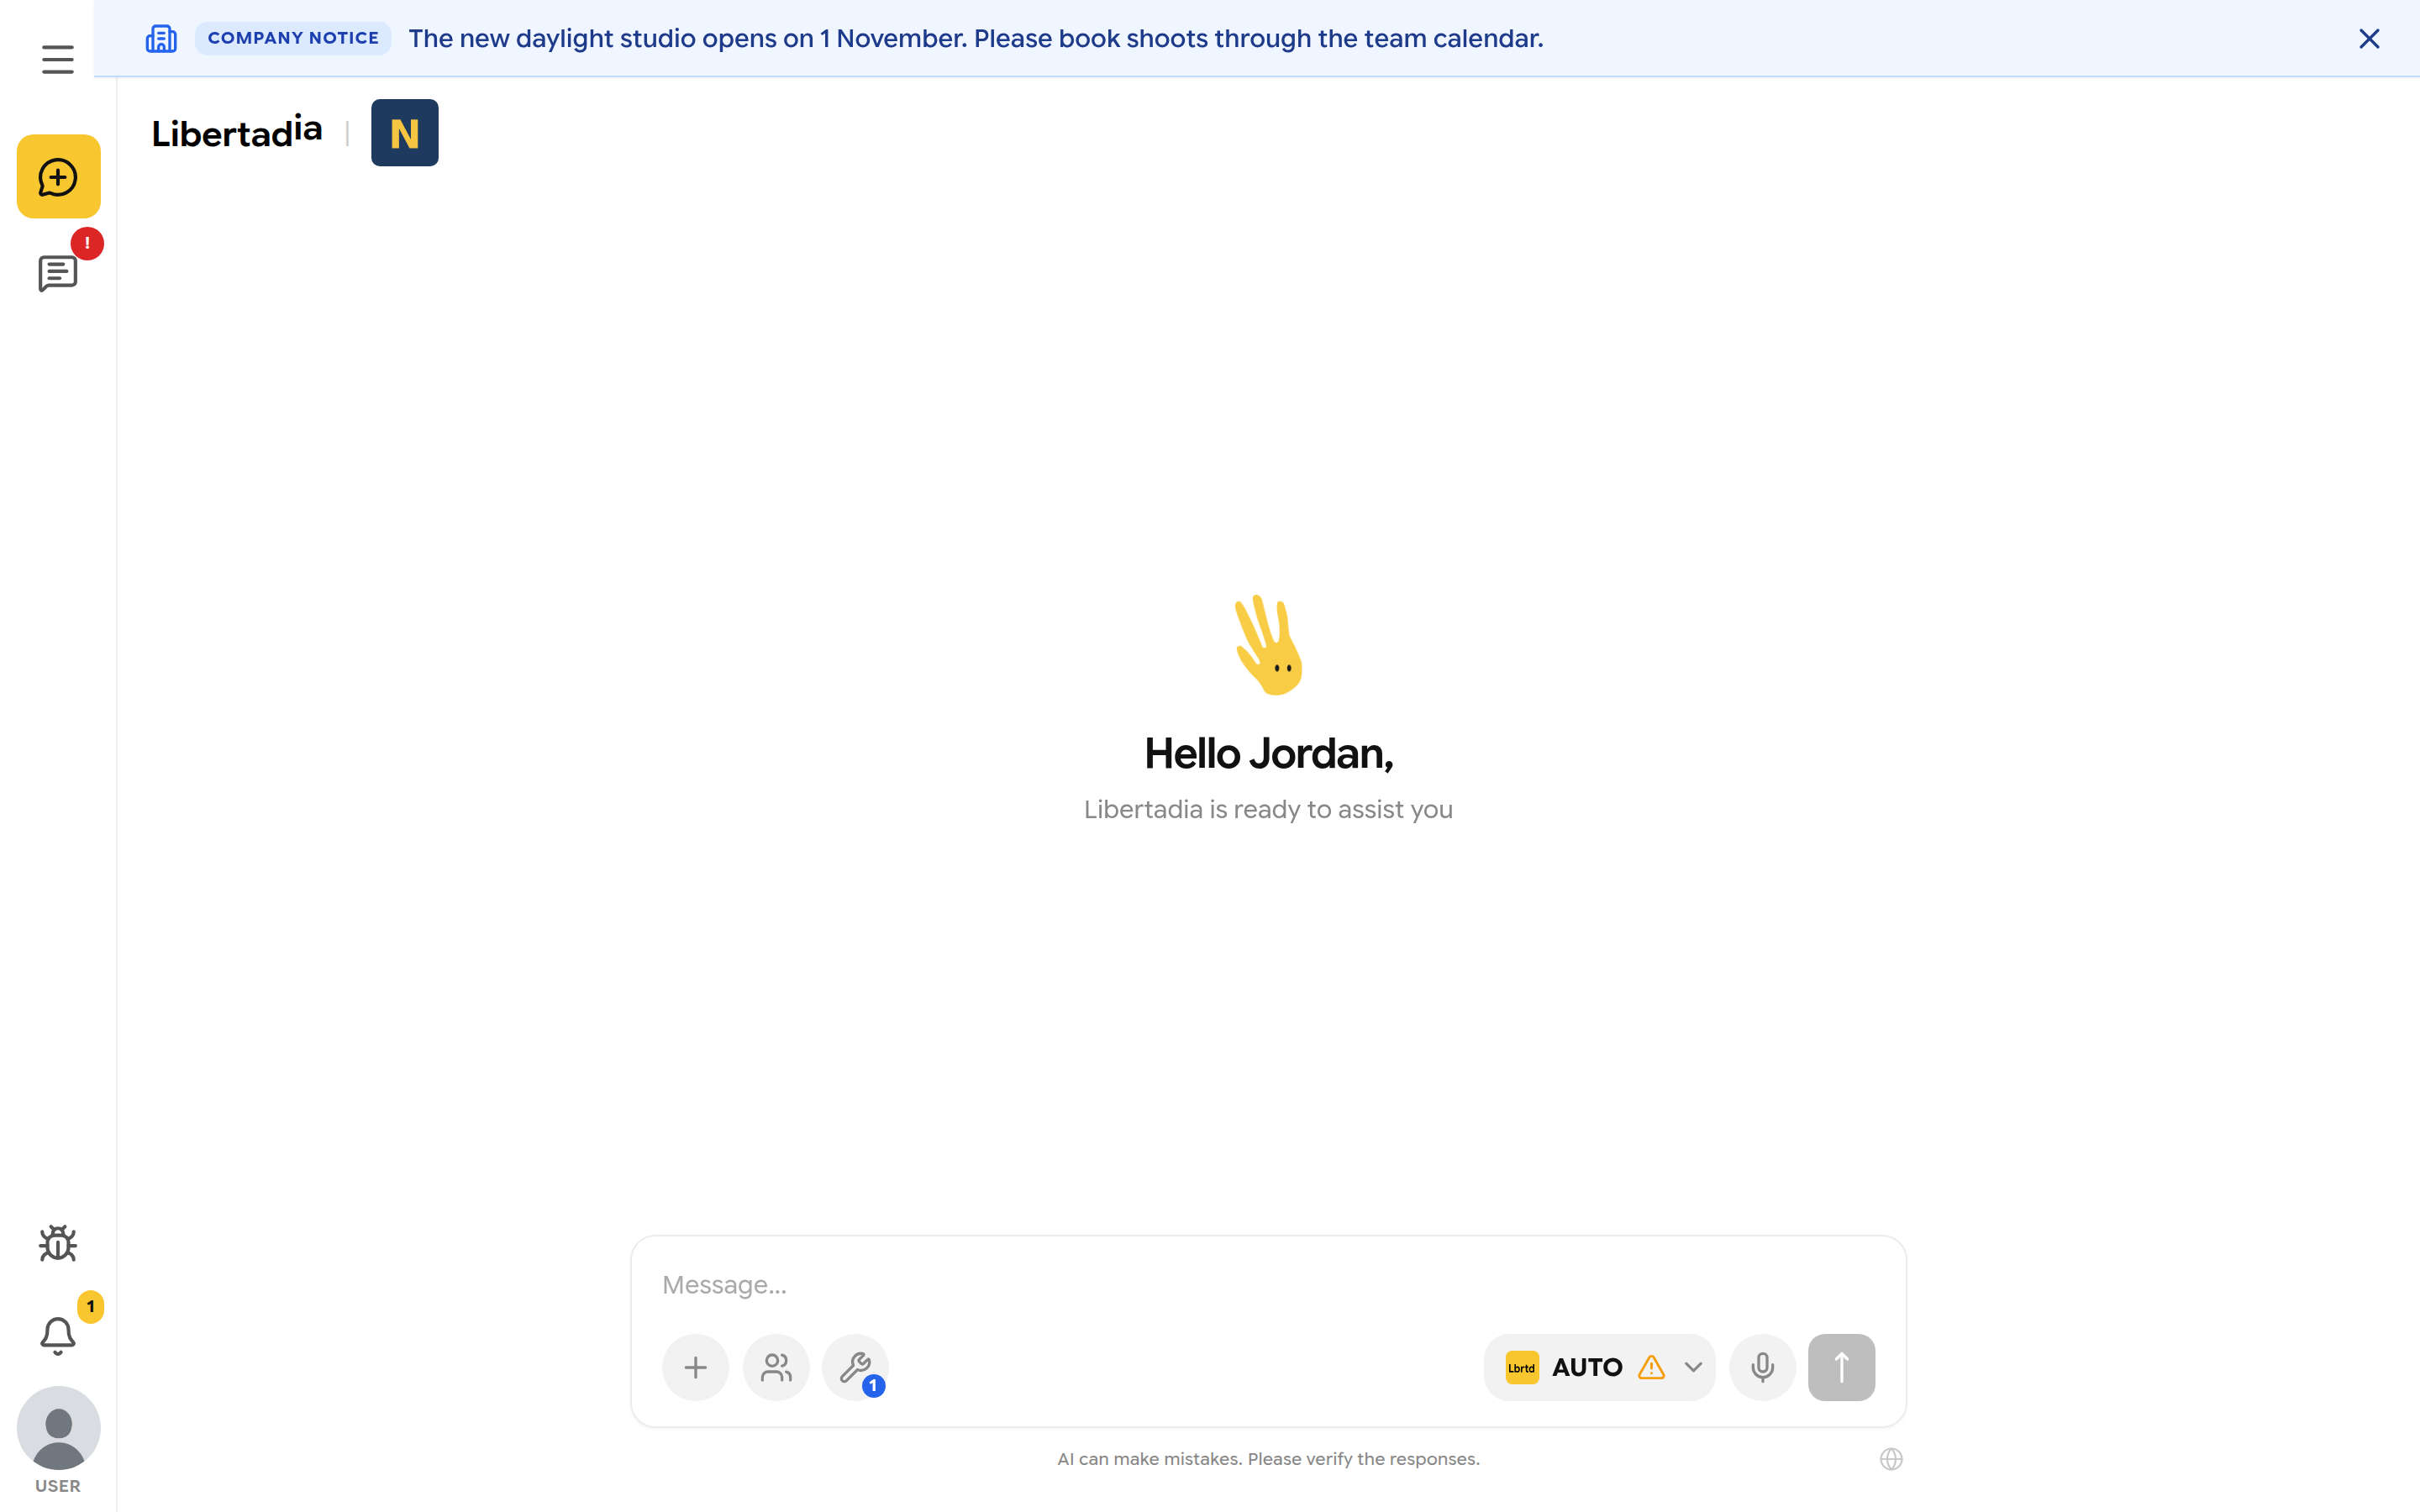
A company notice shown to a member.
Roles
| Role | Typical access |
|---|---|
| Member | Uses the workspace. No admin screens |
| Department head | Sees and manages their department's scope |
| Admin | Company settings, users, departments, roles, models, announcements |
| Owner | Everything an admin can do, plus billing and deleting the company |
Administrators can also create named Roles with their own permissions. Settings are applied in this order: company default → department → role → user.
For administrators: the Company page
Company gathers company details, management shortcuts (Subscription, Departments, Permissions, Roles, Users, Models, Usage & Logs), announcements and Delete company.
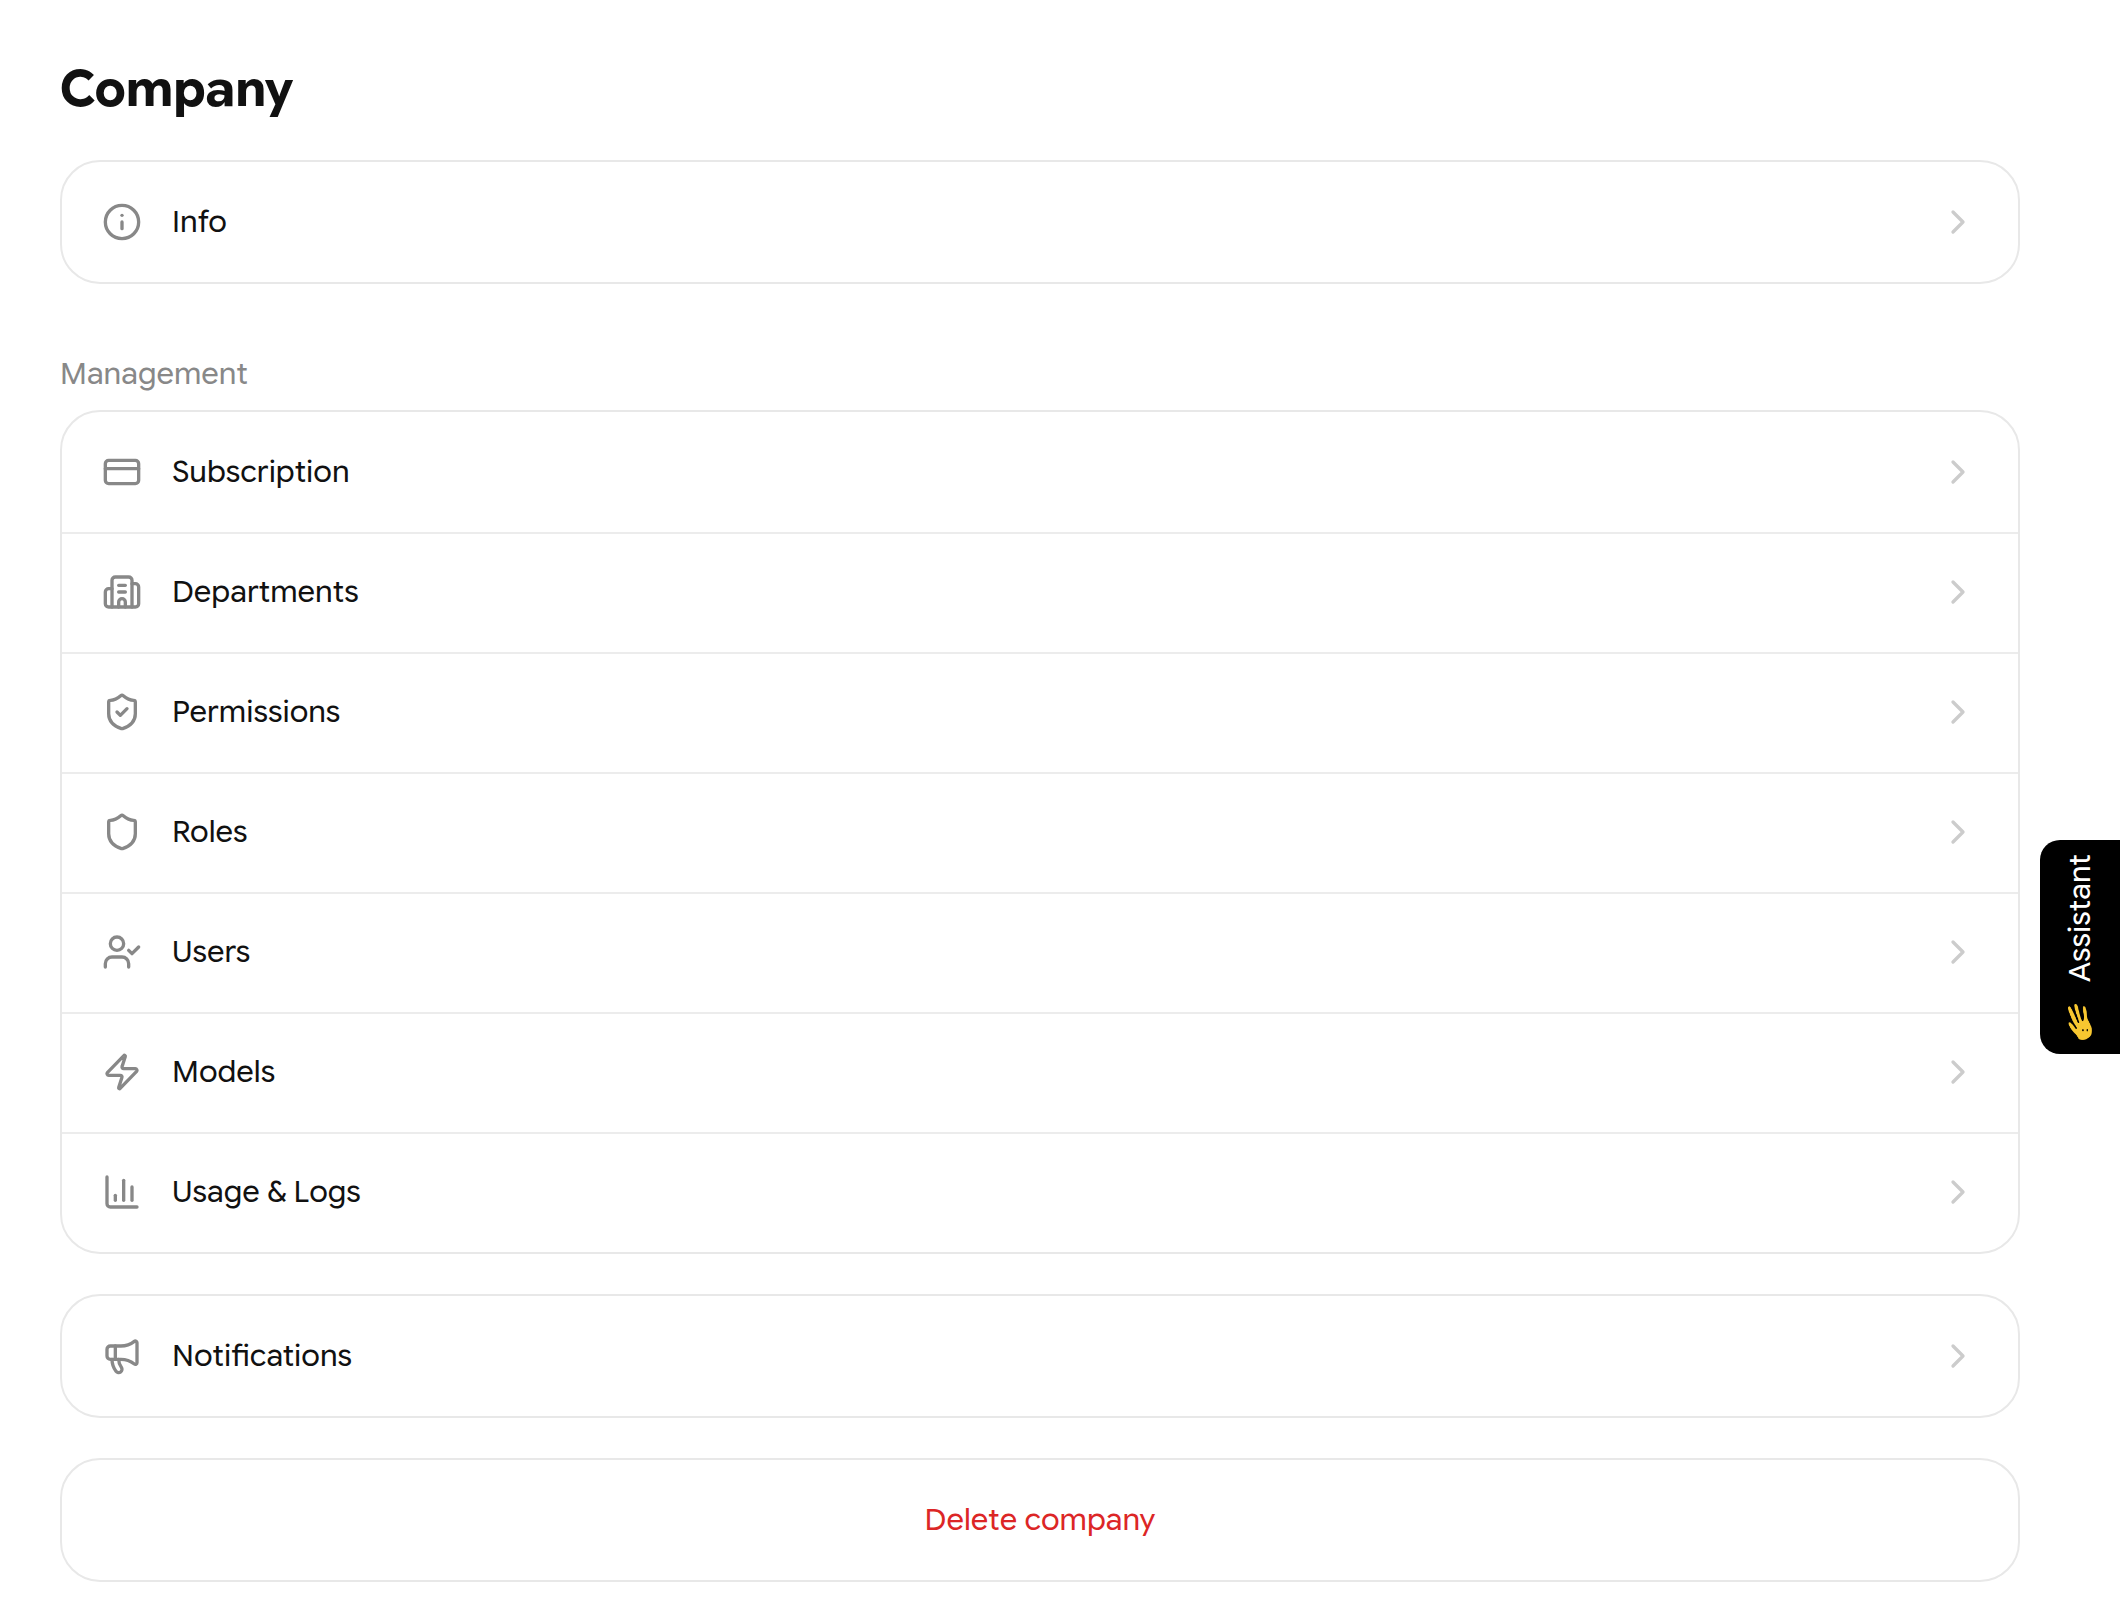
The Company page.
Post an announcement: open Notifications on the Company page, click New notification, write the message (up to 512 characters, 3 lines), set a Duration from 5 minutes to 1 week (for example 1w), and click Publish.
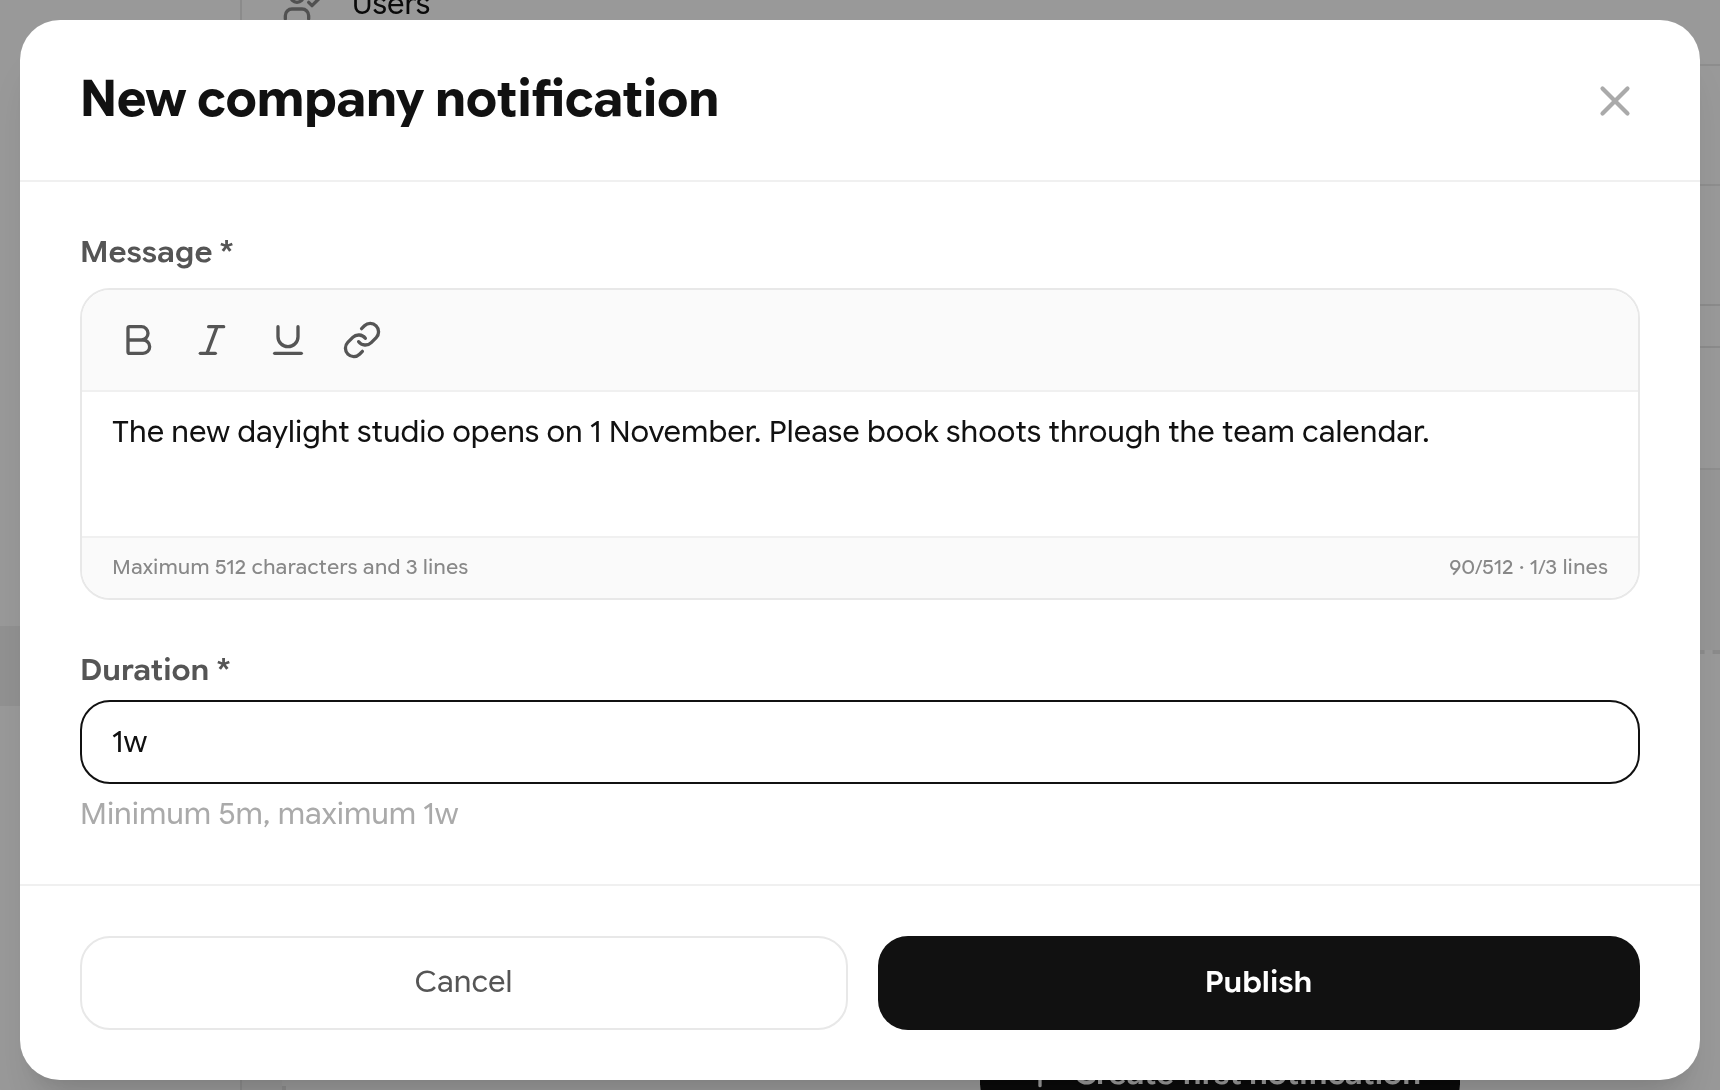
Writing an announcement.
For administrators: users and limits
Open Users to see seats, pending invitations and members. Click a member to set a spending limit (USD), a storage quota, a department, model access and extra roles.
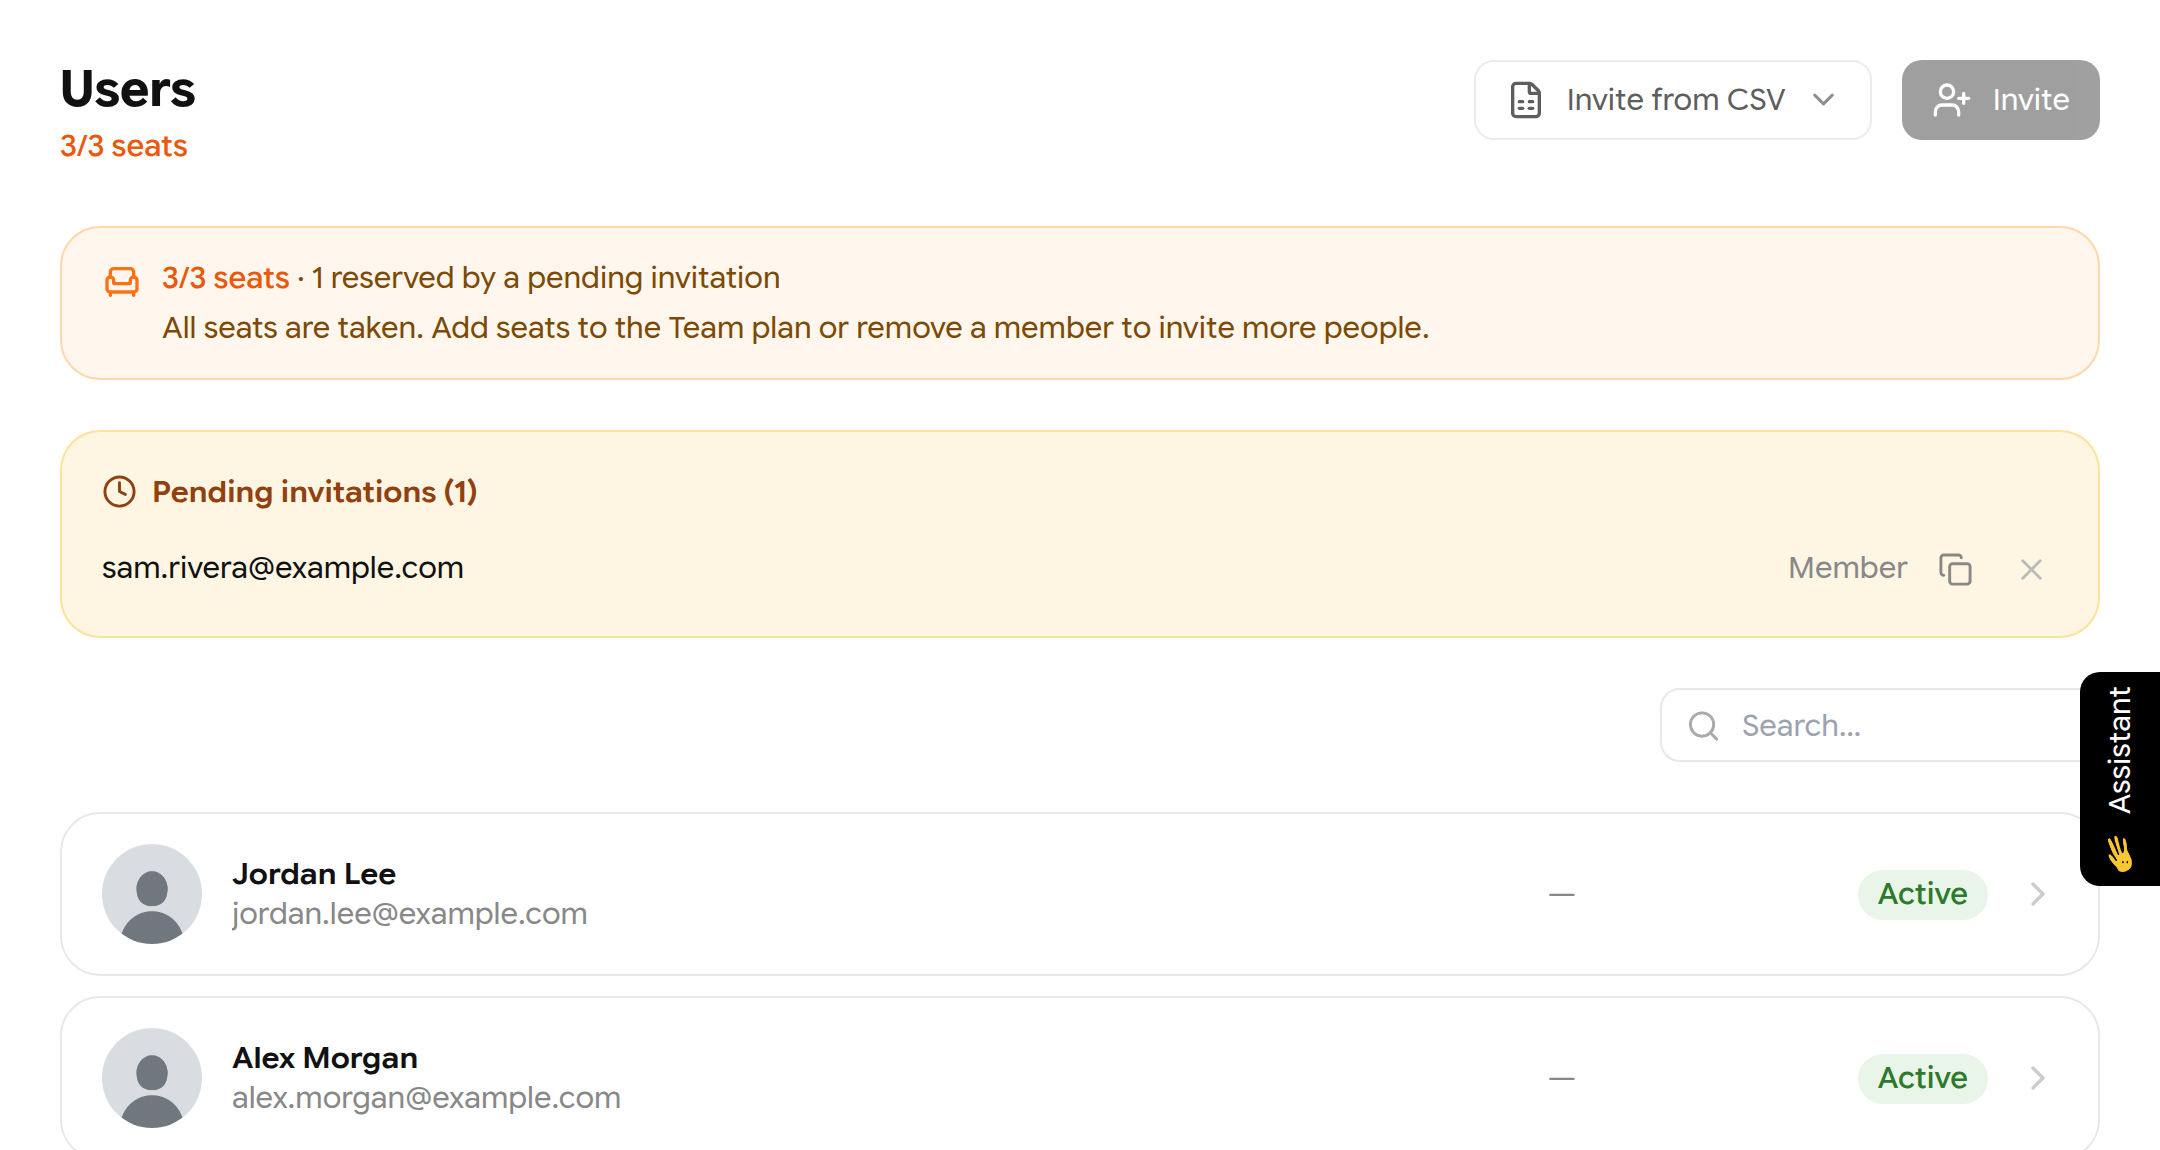
The Users page. Pending invitations reserve a seat.
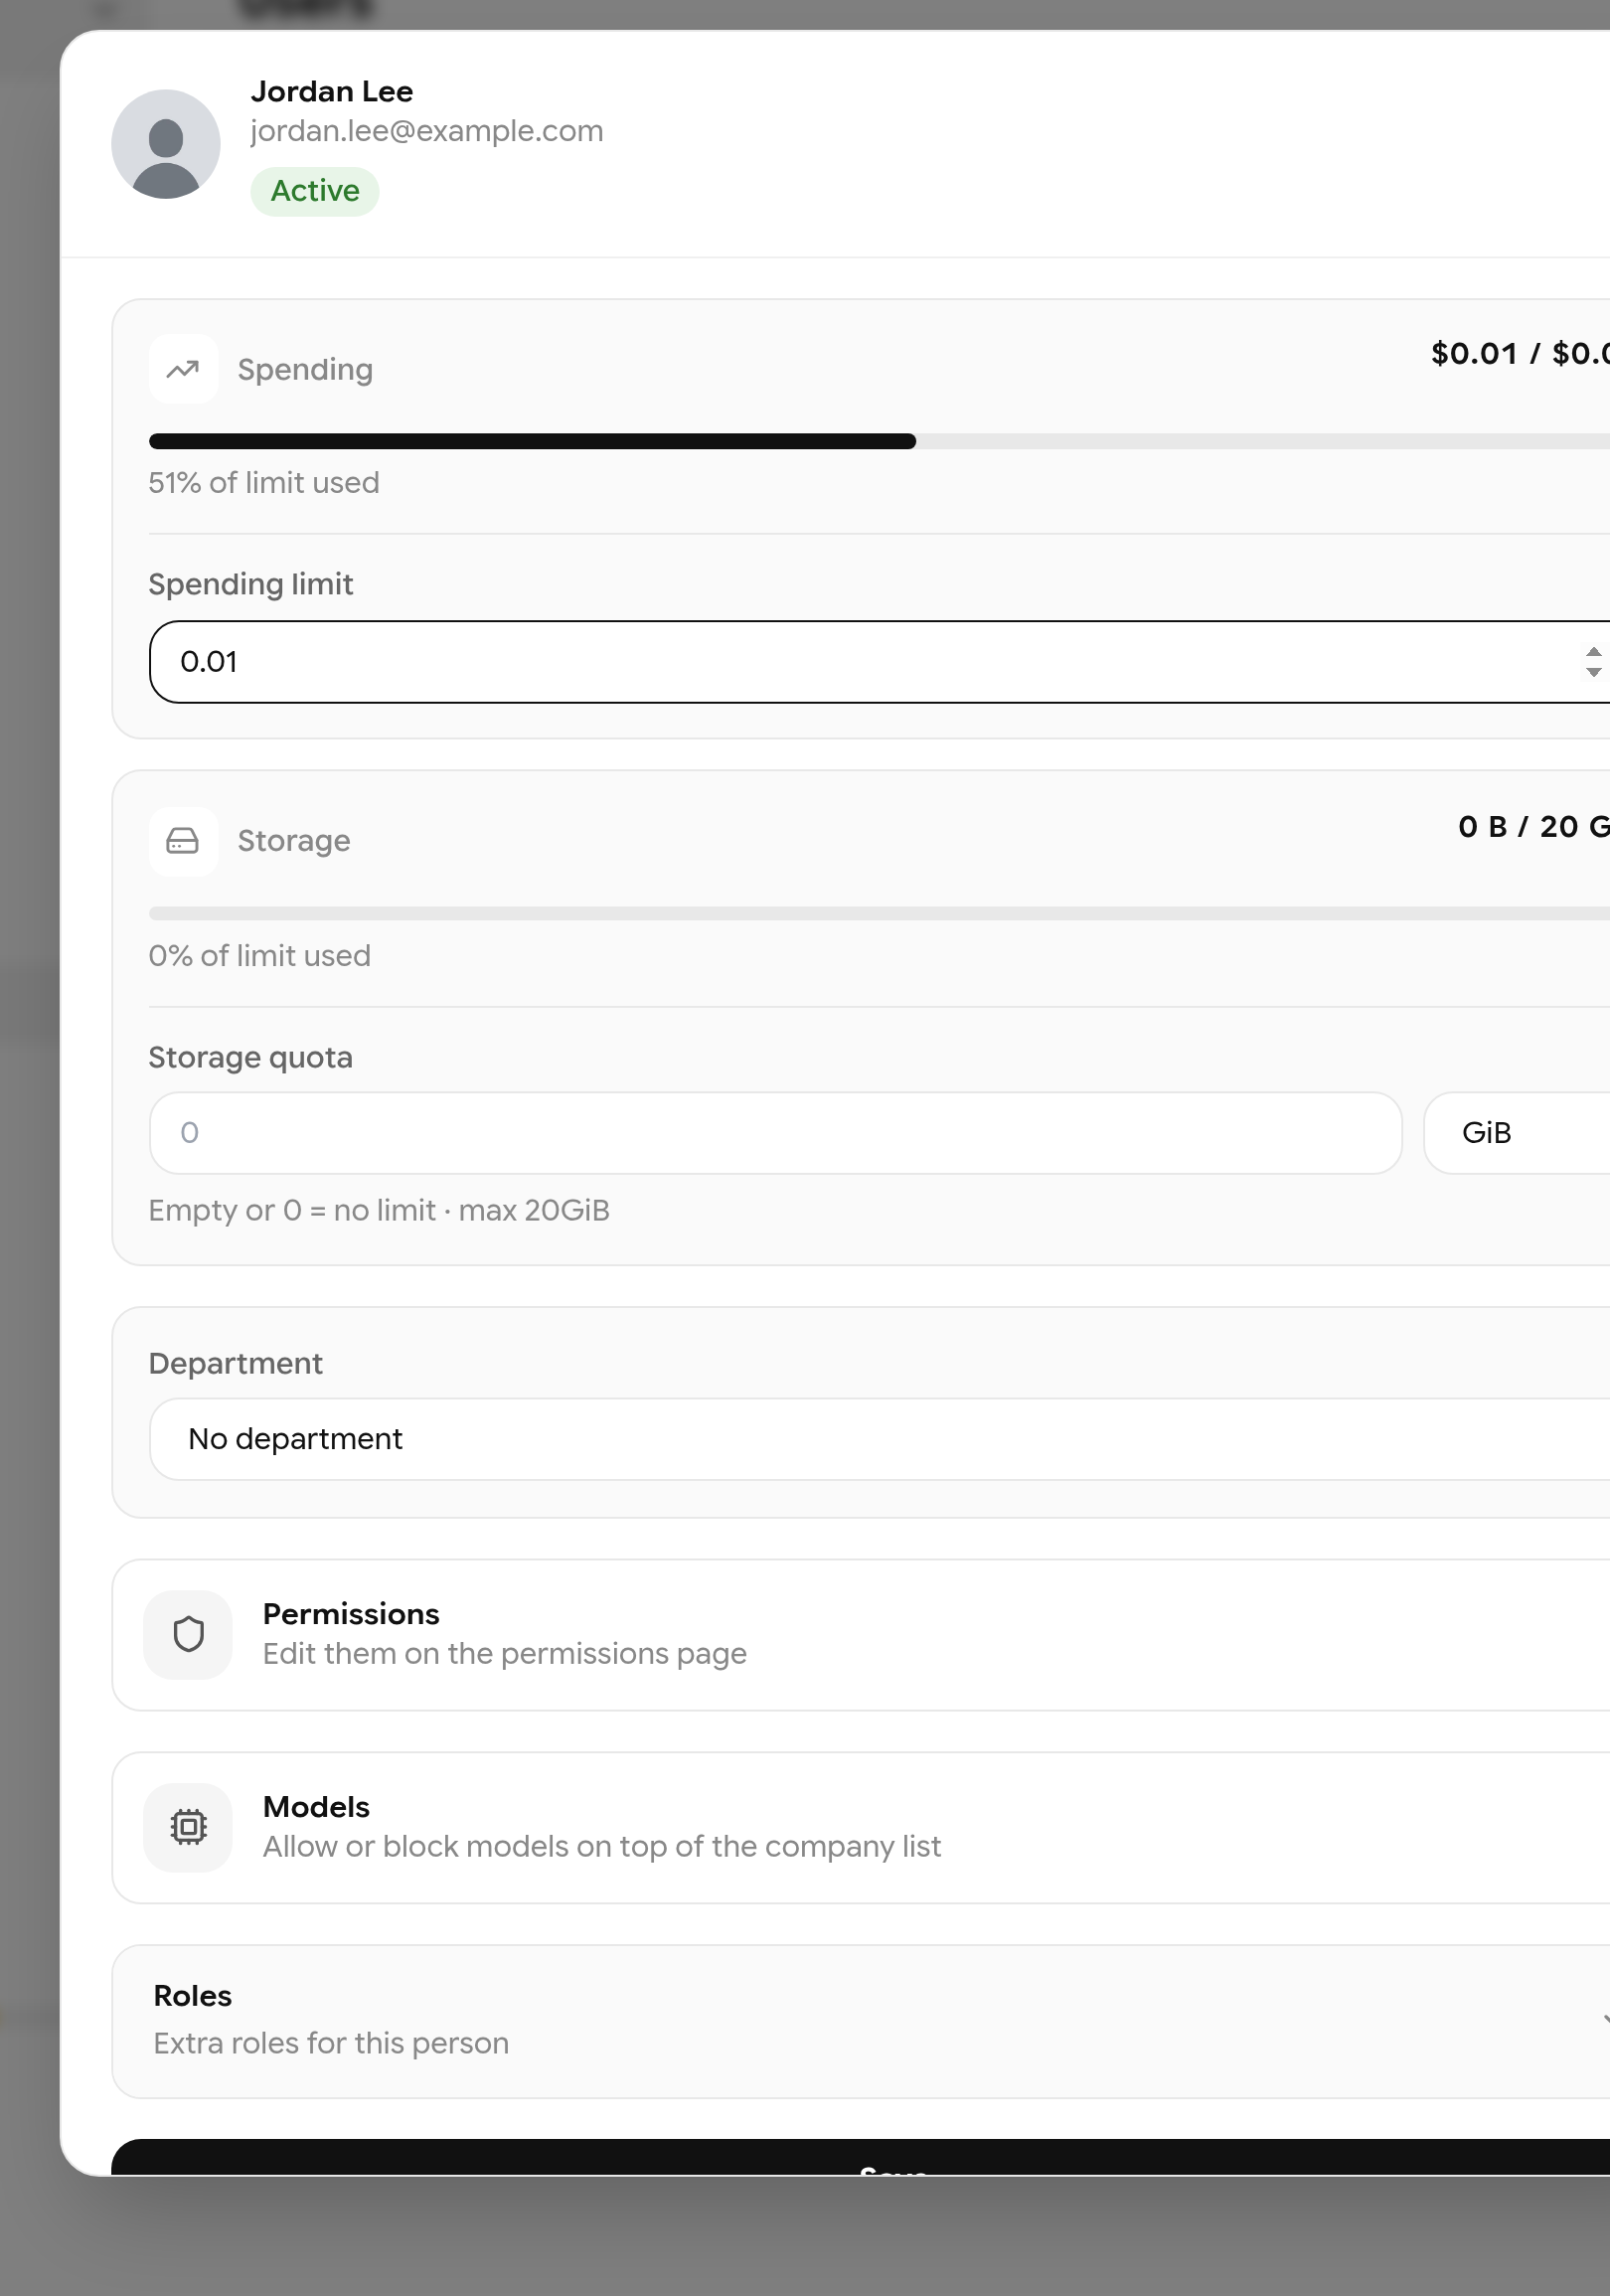
Setting a member's spending limit.
Invite from CSV lets you invite many people at once with the columns email, role, max_spending_usd and max_storage. If the file needs more seats than are free, no invitations are sent.